15.2 Basic Concepts of Administering Medications
Open Resources for Nursing (Open RN)
The scope of practice regarding a nurse’s ability to legally dispense and administer medication is based on each state’s Nurse Practice Act. Registered Nurses (RNs) and Licensed Practical Nurses (LPNs/LVNs) may legally administer medications that are prescribed by a health care provider, such as a physician, nurse practitioner, or physician’s assistant. Prescriptions are “orders, interventions, remedies, or treatments ordered or directed by an authorized primary health care provider.”[1]
Types of Orders
Prescriptions are often referred to as orders in clinical practice. There are several types of orders, such as routine orders, PRN orders, standing orders, one-time orders, STAT orders, and titration orders.
- A routine order is a prescription that is followed until another order cancels it. An example of a routine order is “Lisinopril 10 mg PO daily.”
- A PRN (or as-needed) order is a prescription for medication to be administered when it is requested by, or as needed by, the patient. PRN orders are typically administered based on patient symptoms, such as pain, nausea, or itching. An example of a PRN order for pain medication is “Acetaminophen 500 mg PO every 4-6 hours as needed for pain.”
- A standing order is also referred to in practice as an “order set” or a “protocol.” Standing orders are standardized prescriptions for nurses to implement to any patient in clearly defined circumstances without the need to initially notify a provider. An example of a standing order set/protocol for patients visiting an urgent care clinic reporting chest pain is to immediately administer four chewable aspirin, establish intravenous (IV) access, and obtain an electrocardiogram (ECG).
- A one-time order is a prescription for a medication to be administered only once. An example of a one-time order is a prescription for an IV dose of antibiotics to be administered immediately prior to surgery.
- A STAT order is a one-time order that is administered without delay due to the urgency of the circumstances. An example of a STAT order is “Benadryl 50 mg PO stat” for a patient having an allergic reaction.
- A titration order is an order in which the medication dose is either progressively increased or decreased by the nurse in response to the patient’s status. Titration orders are typically used for patients in critical care as defined by agency policy. The Joint Commission requires titration orders to include the medication name, medication route, initial rate of infusion (dose/unit of time), incremental units to which the rate or dose can be increased or decreased, how often the rate or dose can be changed, the maximum rate or dose of infusion, and the objective clinical measure to be used to guide changes. An example of a titration order is “Norepinephrine 2-12 micrograms/min, start at 2 mcg/min and titrate upward by 1 mcg/min every 5 minutes with continual blood pressure monitoring until systolic blood pressure >90 mm Hg.”
Components of a Medication Order
According to the Centers for Medicare & Medicaid Services, all orders for the administration of drugs and biologicals must contain the following information:[2]
- Name of the patient
- Age or date of birth
- Date and time of the order
- Drug name
- Dose, frequency, and route
- Name/Signature of the prescriber
- Weight of the patient to facilitate dose calculation when applicable. (Note that dose calculations are based on metric weight: kilograms for children/adults or grams for newborns)
- Dose calculation requirements, when applicable
- Exact strength or concentration, when applicable
- Quantity and/or duration of the prescription, when applicable
- Specific instructions for use, when applicable
When reviewing a medication order, the nurse must ensure these components are included in the prescription before administering the medication. If a pertinent piece of information is not included, the nurse must contact the prescribing provider to clarify and correct the order.
Drug Name
The name of the drug may be ordered by the generic name or brand name. The generic name is considered the safest method to use and allows for substitution of various brand medications by the pharmacist.
Dose
The dosage of a drug is prescribed using either the metric or the household system. The metric system is the most commonly accepted system internationally. Examples of standard dosage are 5 mL (milliliters) or 1 teaspoon. Standard abbreviations of metric measurement are frequently used regarding the dosage, such as mg (milligram), kg (kilogram), mL (milliliter), mcg (microgram), or L (liter). However, it is considered safe practice to avoid other abbreviations and include the full words in prescriptions to avoid errors. In fact, several abbreviations have been deemed unsafe by the Joint Commission and have been put on a “do not use” list. See the hyperlinks below to view the Joint Commission “Do Not Use List” and the Institute of Safe Medication Practices (ISMP) list of abbreviations to avoid. If a dosage is unclear or written in a confusing manner in a prescription, it is always best to clarify the order with the prescribing provider before administering the medication.
View the ISMP List of Error-Prone Abbreviations to Avoid.
Frequency
Frequency in prescriptions is indicated by how many times a day the medication is to be administered or how often it is to be administered in hours or minutes. Examples of frequency include verbiage such as once daily, twice daily, three times daily, four times daily, every 30 minutes, every hour, every four hours, or every eight hours. Medication times are typically indicated using military time (i.e., using a 24-hour clock). For example, 11 p.m. is indicated as “2300.” Read more about military time in the “Math Calculations” chapter.
Some types of medications may be ordered “around the clock (ATC).” An around-the-clock frequency order indicates they should be administered at regular time intervals, such as every six hours, to maintain consistent levels of the drug in the patient’s bloodstream. For example, pain medications administered at end of life are often prescribed ATC instead of PRN (as needed) to maintain optimal pain relief.
Route of Administration
Common routes of administration and standard abbreviations include the following:
- Oral (PO) – the patient swallows a tablet or capsule
- Sublingual (SL) – applied under the tongue
- Enteral (NG or PEG) – administered via a tube directly into the GI tract
- Rectal (PR) – administered via rectal suppository
- Inhalation (INH) – the patient breathes in medication from an inhaler
- Intramuscular (IM) – administered via an injection into a muscle
- Subcutaneous – administered via injection into the fat tissue beneath the skin (Note that “subcutaneous” is on ISMP’s recommended list of abbreviations to avoid due to common errors.)
- Transdermal (TD) – administered by applying a patch on the skin
Provider Name/Signature
Signature of the prescribing provider is required on the order and can be electronic or handwritten. Verbal orders from a prescriber are not recommended, but may be permitted in some agencies for urgent situations. Verbal orders require the nurse to “repeat back” the order to the prescriber for confirmation.
Rights of Medication Administration
Each year in the United States, 7,000 to 9,000 people die as a result of a medication error. Hundreds of thousands of other patients experience adverse reactions or other complications related to a medication. The total cost of caring for patients with medication-associated errors exceeds $40 billion each year. In addition to the monetary cost, patients experience psychological and physical pain and suffering as a result of medication errors.[3] Nurses play a vital role in reducing the number of medication errors that occur by verifying several rights of medication.
The Centers for Medicare & Medicaid Services requires nurses to verify specific information prior to the administration of medication to avoid errors, referred to as verifying the rights of medication administration.[4] These rights of medication administration are the vital last safety check by nurses to prevent errors in the chain of medication administration that includes the prescribing provider, the pharmacist, the nurse, and the patient.
It is important to remember that if a medication error occurs resulting in harm to a patient, a nurse can be held liable even if “just following orders.” It is absolutely vital for nurses to use critical thinking and clinical judgment to ensure each medication is safe for each specific patient before administering it. The consequences of liability resulting from a medication error can range from being charged with negligence in a court of law, to losing one’s job, to losing one’s nursing license.
The six rights of medication administration must be verified by the nurse at least three times before administering a medication to a patient. These six rights include the following:
- Right Patient
- Right Drug
- Right Dose
- Right Time
- Right Route[5]
- Right Documentation
Recent literature indicates that up to ten rights should be completed as part of a safe medication administration process. These additional rights include Right History and Assessment, Right Drug Interactions, Right to Refuse, and Right Education and Information. Information for each of these rights is further described below.[6], [7]
Right Patient
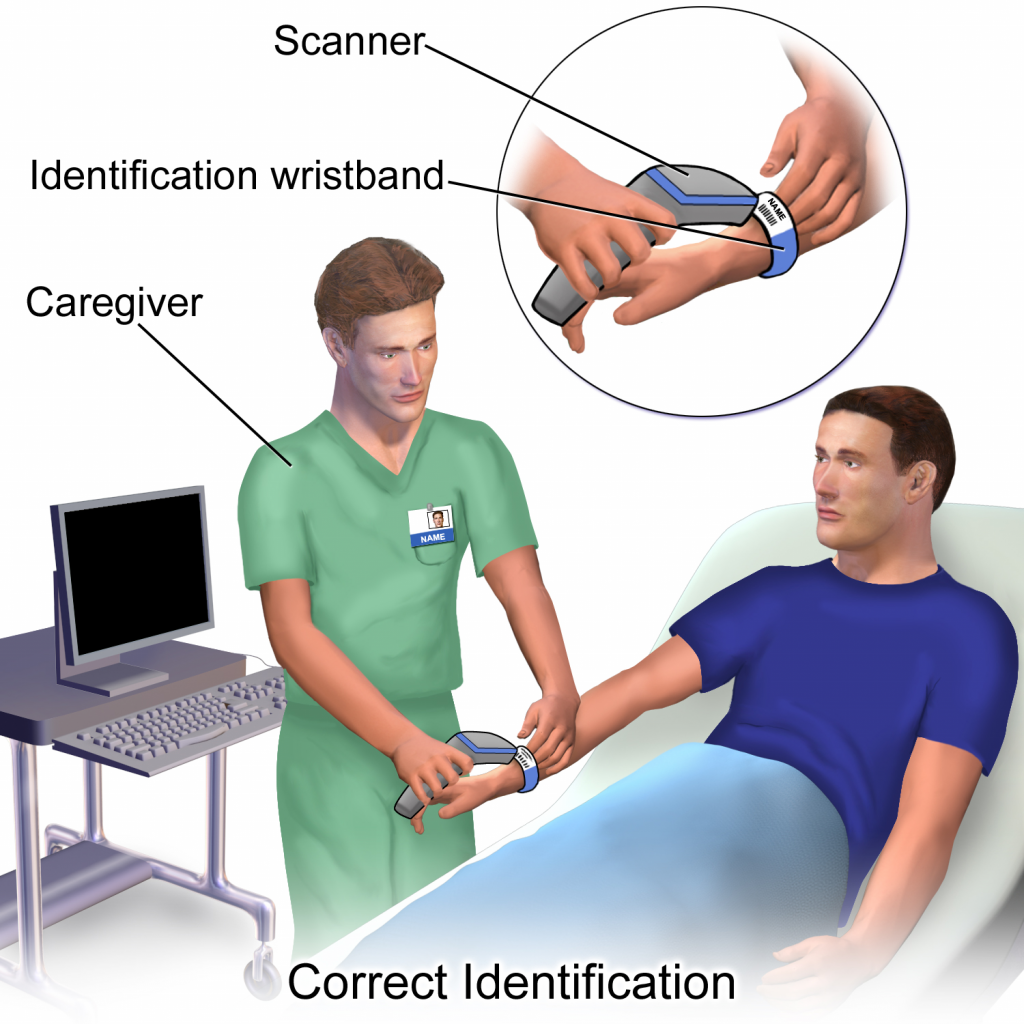
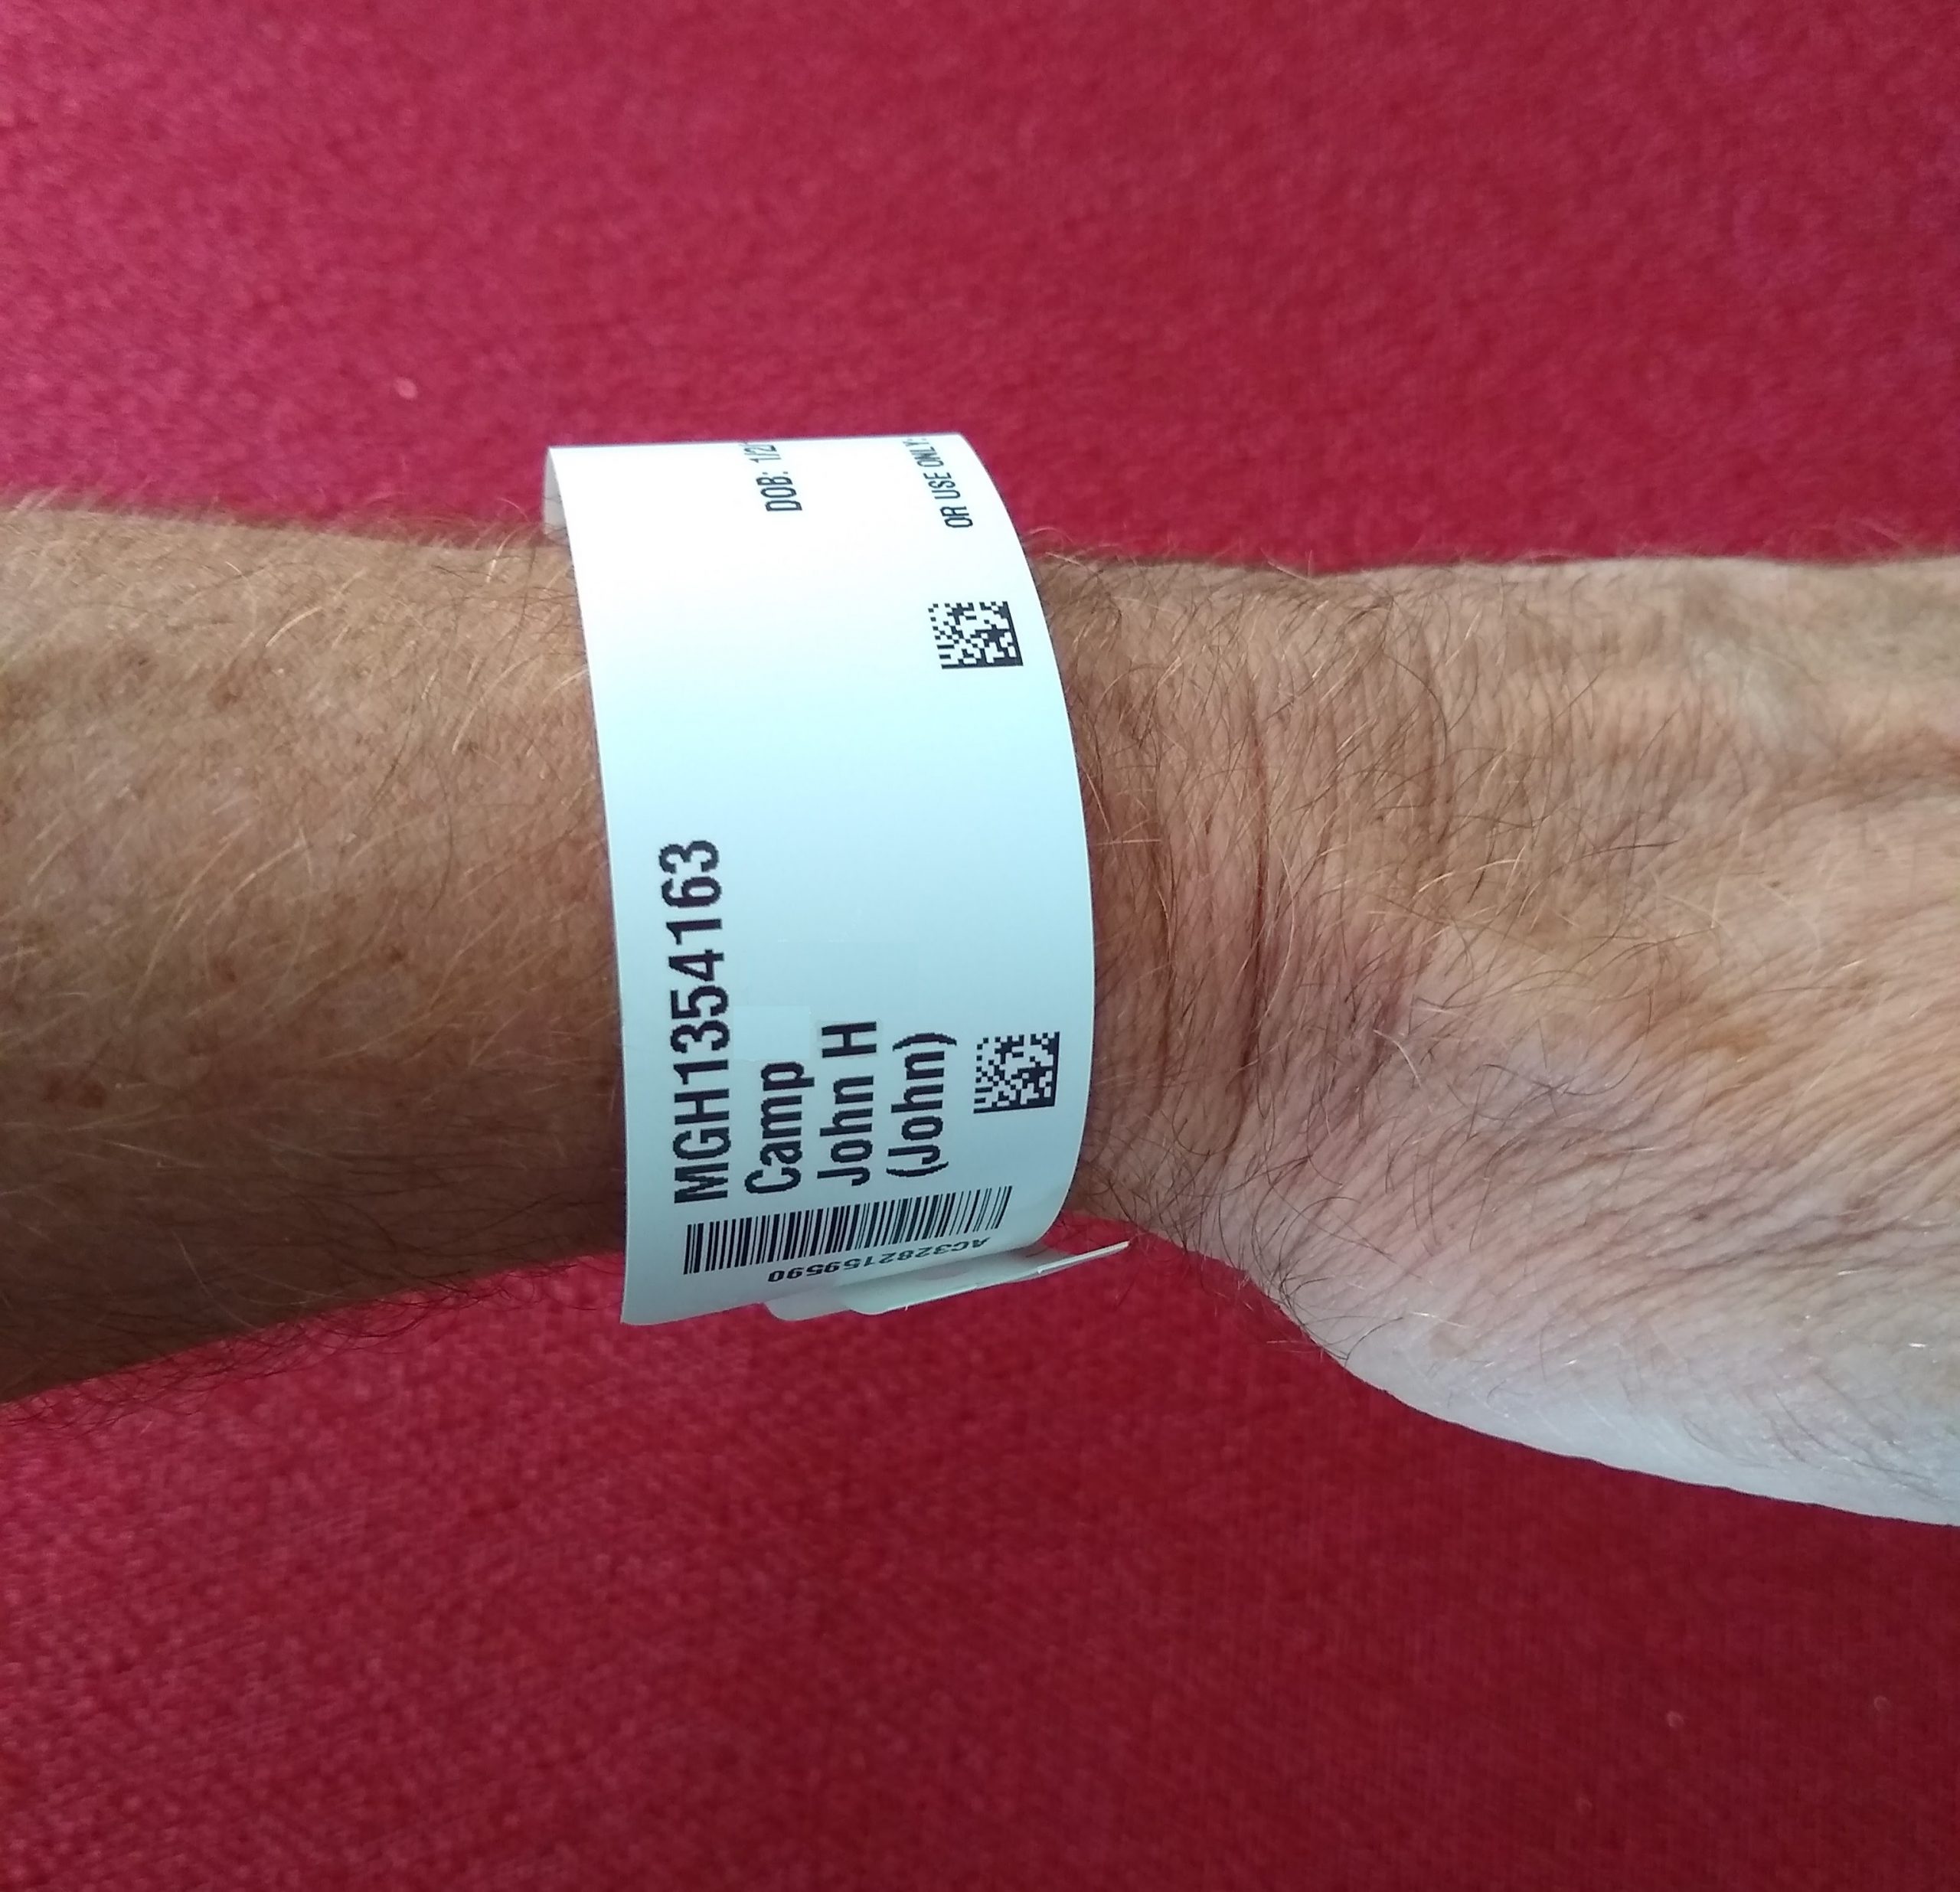
Acceptable patient identifiers include, but are not limited to, the patient’s full name, an identification number assigned by the hospital, or date of birth. A patient’s room number must never be used as an identifier because a patient may change rooms. Identifiers must be confirmed by the patient wristband, patient identification card, patient statement (when possible), or other means outlined in the agency policy such as a patient picture included on the MAR. The nurse must confirm the patient’s identification matches the medication administration record (MAR) and medication label prior to administration to ensure that the medication is being given to the correct patient.[8] See Figure 15.1[9] for an illustration of the nurse verifying the patient’s identify by scanning their identification band and asking for their date of birth. See Figure 15.2[10] for a close-up image of a patient identification wristband.
If barcode scanning is used in an agency, this scanning is not intended to take the place of confirming two patient identifiers, but is intended to add another layer of safety to the medication administration process. The National Patient Safety Goals established by the Joint Commission state that whenever administering patient medications, at least two patient identifiers should be used.[11]
Right Drug
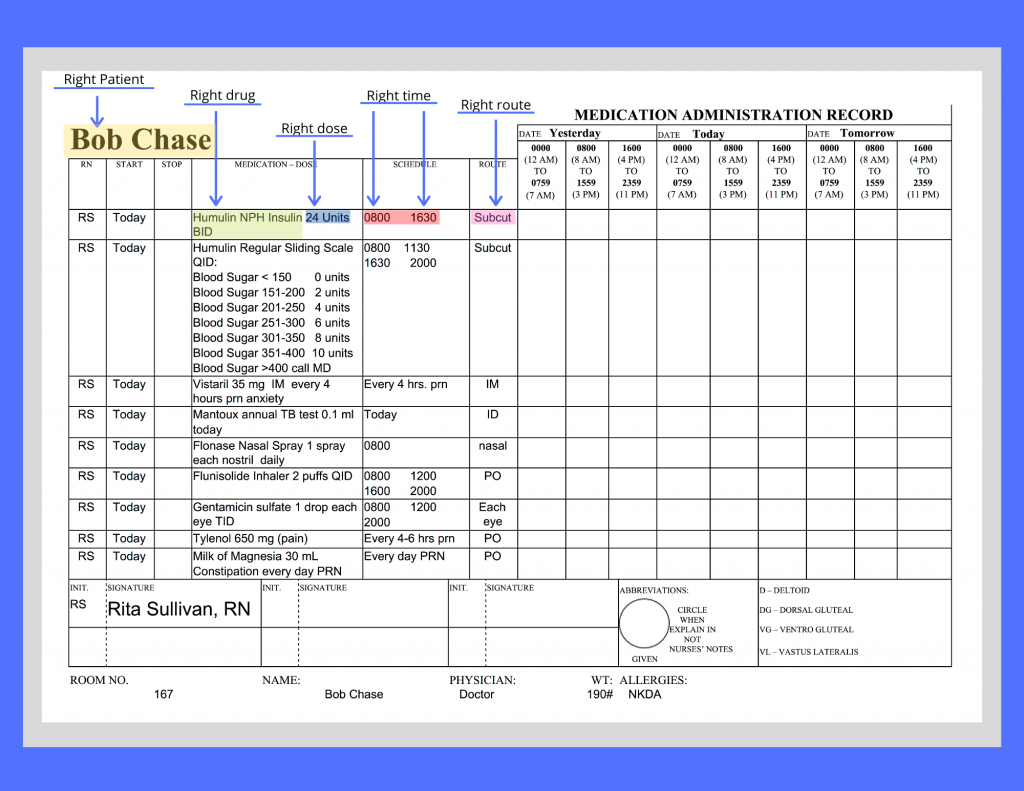
During this step, the nurse ensures the medication to be administered to the patient matches the order or Medication Administration Record (MAR) and that the patient does not have a documented allergy to it.[12] The Medication Administration Record (MAR), or eMAR, an electronic medical record, is a specific type of documentation found in a patient’s chart. See Figure 15.3[13] for an image of a MAR and its components. Beware of look-alike and sound-alike medication names, as well as high-alert medications that bear a heightened risk of causing significant patient harm if they are used in error. The nurse should also be aware of what medication can be crushed and those that cannot be crushed. Read more information about these concerns using the hyperlinks below.
Right Dose
During this step, the nurse ensures the dosage of the medication matches the prescribed dose, verifies the correct dosage range for the age and medical status of the patient, and also confirms that the prescription itself does not reflect an unsafe dosage level (i.e., a dose that is too high or too low).[14] For example, medication errors commonly occur in children, who typically receive a lower dose of medication than an adult. Medication errors also commonly occur in older patients who have existing kidney or liver disease and are unable to metabolize or excrete typical doses of medications.
Right Time and Frequency
During this step, the nurse verifies adherence to the prescribed frequency and scheduled time of administration of the medication.[15] This step is especially important when PRN medications are administered because it is up to the nurse to verify the time of the previous dose and compare it to the ordered frequency.
Medications should be administered on time whenever possible. However, when multiple patients are scheduled to receive multiple medications at the same time, this goal of timeliness can be challenging. Most facilities have a policy that medications can be given within a range of 30 minutes before or 30 minutes after the medication is scheduled. For example, a medication ordered for 0800 could be administered anytime between 0730 and 0830. However, some medications must be given at their specific ordered time due to pharmacokinetics of the drug. For example, if an antibiotic is scheduled every eight hours, this time frame must be upheld to maintain effective bioavailability of the drug, but a medication scheduled daily has more flexibility with time of actual administration.
Right Route
During this step, the nurse ensures the route of administration is appropriate for the specific medication and also for the patient.[16] Many medications can potentially be administered via multiple routes, whereas other medications can only be given safely via one route. Nurses must administer medications via the route indicated in the order. If a nurse discovers an error in the order or believes the route is unsafe for a particular patient, the route must be clarified with the prescribing provider before administration. For example, a patient may have a PEG tube in place, but the nurse notices the medication order indicates the route of administration as PO. If the nurse believes this medication should be administered via the PEG tube and the route indicated in the order is an error, the prescribing provider must be notified and the order must be revised indicating via PEG tube before the medication is administered.
Right Documentation
After administering medication, it is important to immediately document the administration to avoid potential errors from an unintended repeat dose.
In addition to checking the basic rights of medication administration and documenting the administration, it is also important for nurses to verify the following information to prevent medication errors.
Right History and Assessment
The nurse should be aware of the patient’s allergies, as well as any history of any drug interactions. Additionally, nurses collect appropriate assessment data regarding the patient’s history, current status, and recent lab results to identify any contraindications for the patients to receive the prescribed medication.[17]
Right Drug Interactions
The patient’s history should be reviewed for any potential interactions with medications previously given or with the patient’s diet. It is also important to verify the medication’s expiration date before administration.
Right Education and Information
Information should be provided to the patient about the medication, including the expected therapeutic effects, as well as the potential adverse effects. The patient should be encouraged to report suspected side effects to the nurse and/or prescribing provider. If the patient is a minor, the parent may also have a right to know about the medication in many states, depending upon the circumstances.
Right of Refusal
After providing education about the medication, the patient has the right to refuse to take medication in accordance with the Nurses Code of Ethics and respect for individual patient autonomy. If a patient refuses to take the medication after proper education has been performed, the event should be documented in the patient chart and the prescribing provider notified.
Medication Dispensing
Medications are dispensed for patients in a variety of methods. During inpatient care, unit dose packaging is a common method for dispensing medications. See Figure 15.4[18] for an image of unit dose packaging.

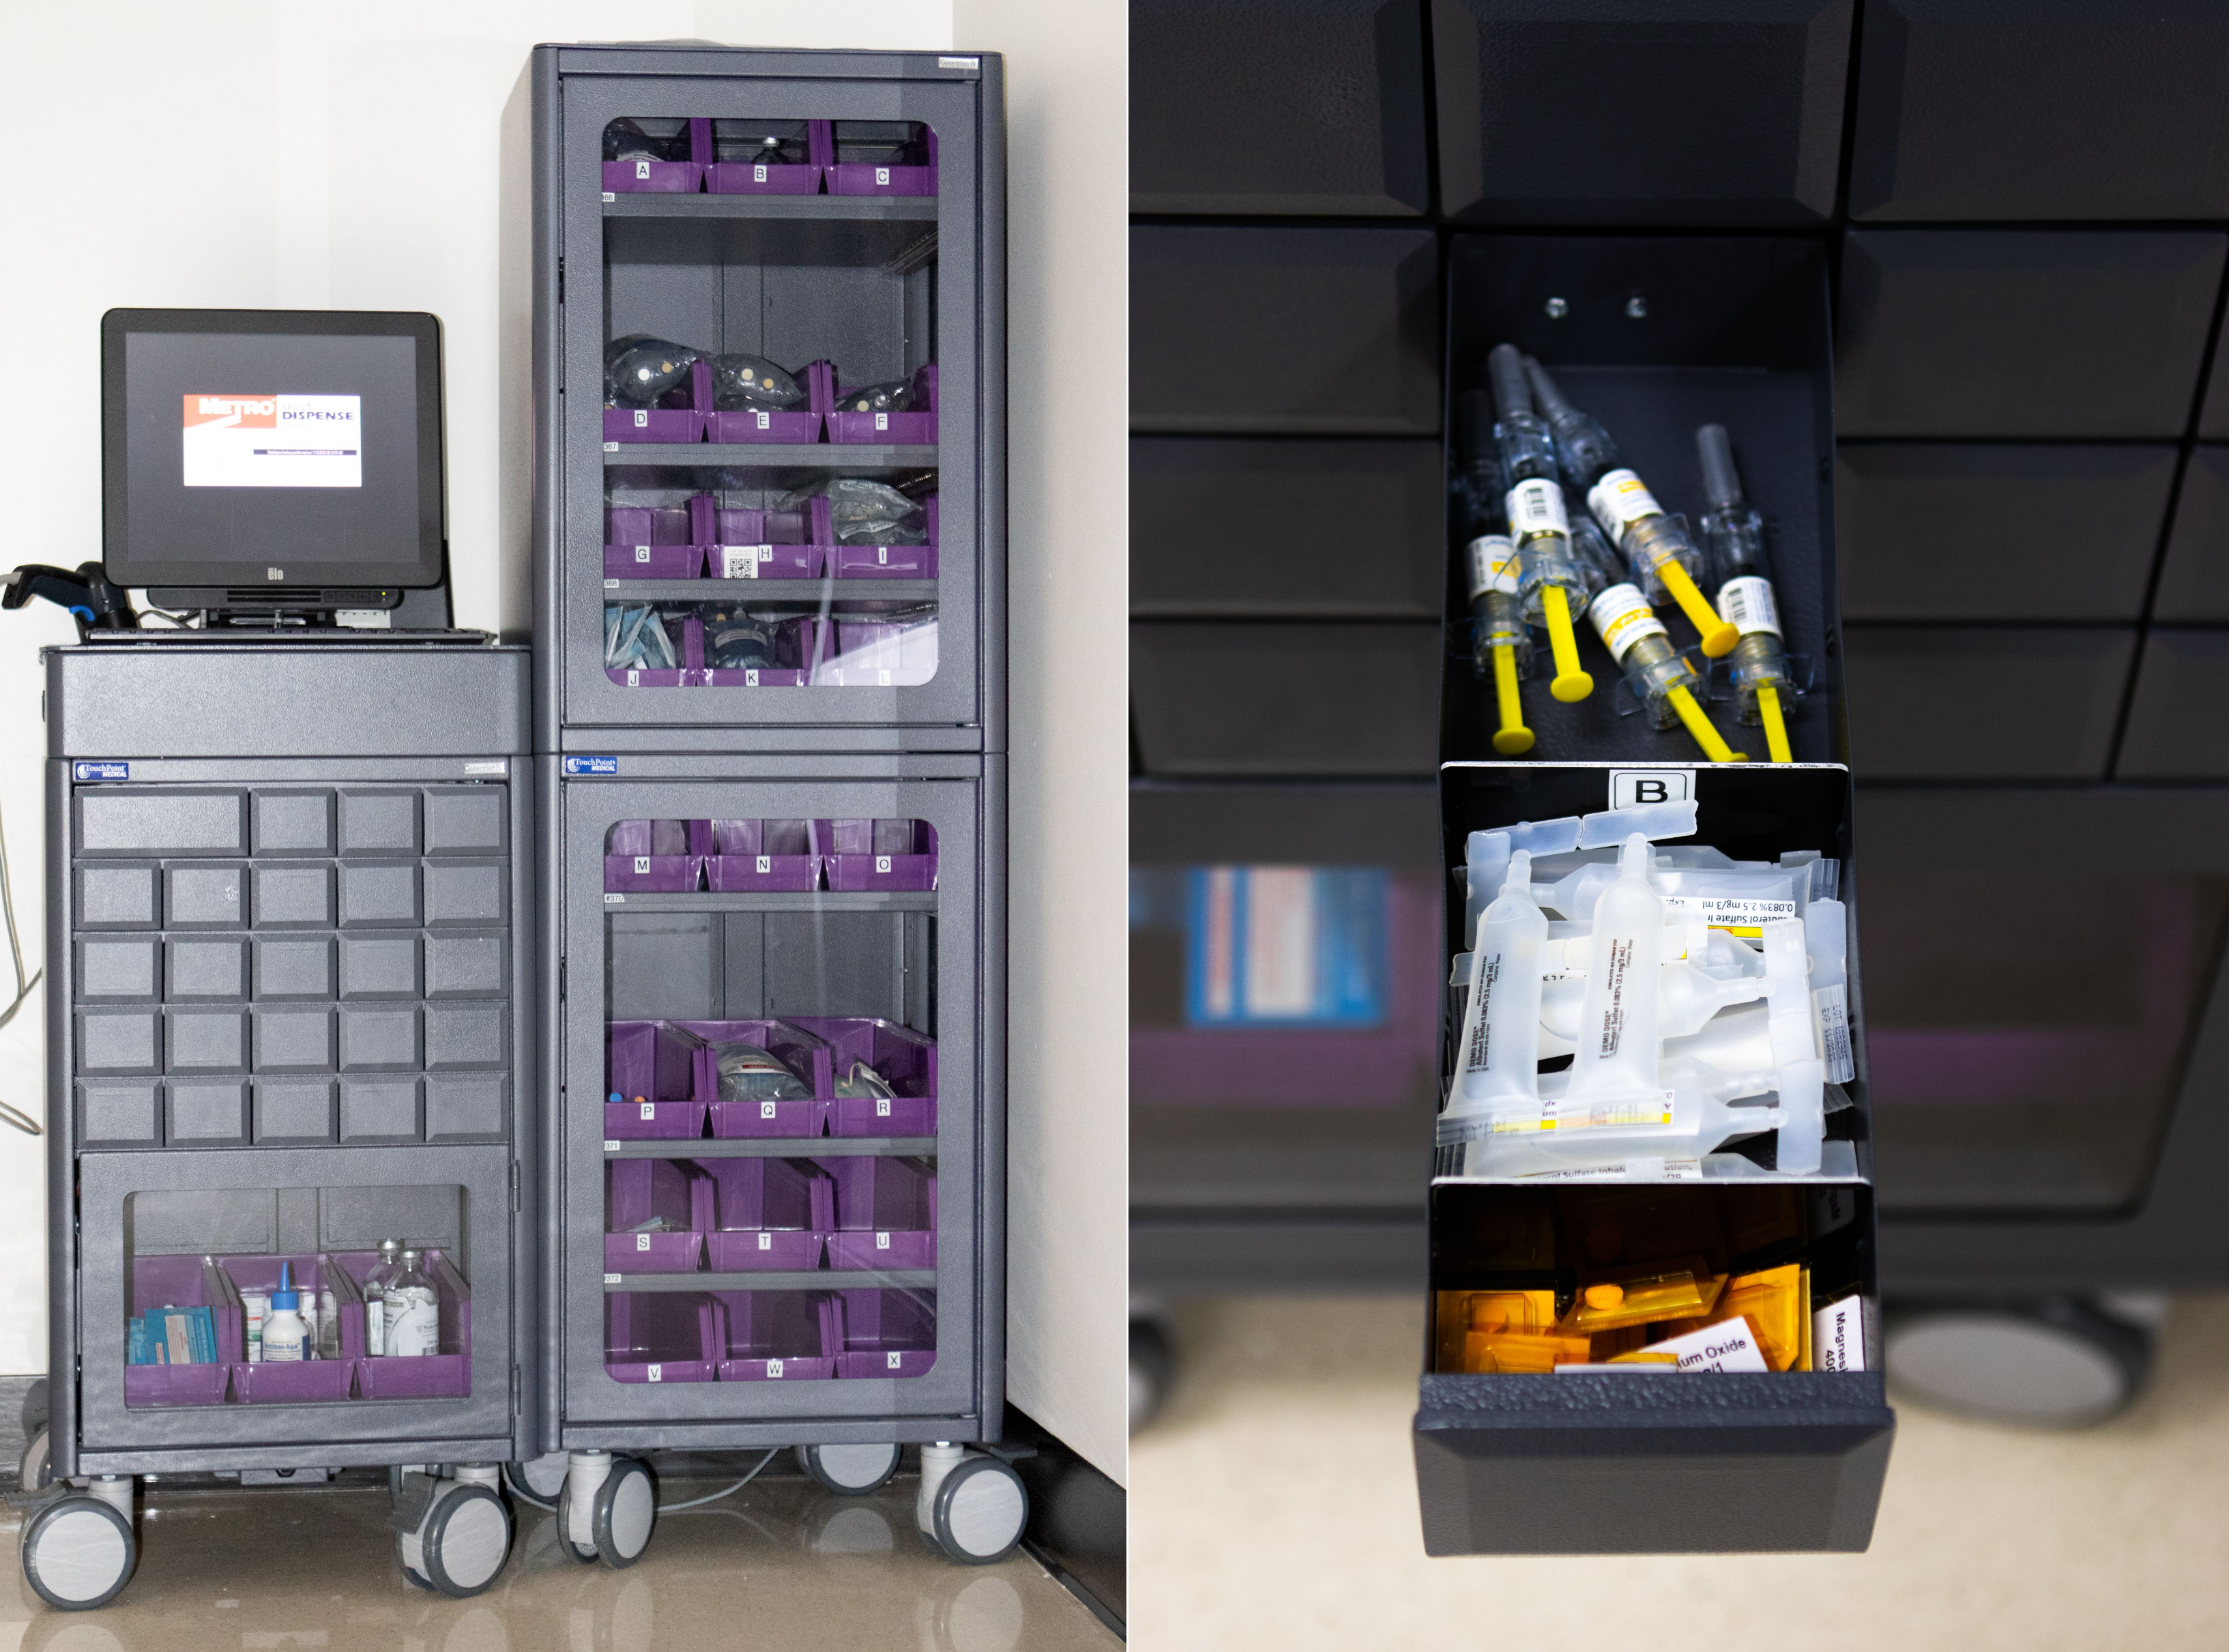
Unit dose dispensing is typically used in association with a medication dispensing system, sometimes referred to in practice with brand names such as “Pyxis” or “Omnicell.” Medication dispensing systems help keep medications secure by requiring a user sign-in and password. They also reduce medication errors by only allowing medications prescribed for a specific patient to be removed unless additional actions are taken. However, it is important to remember that medication errors can still occur when using a medication dispensing system if the incorrect medication is erroneously stocked in a compartment. See Figure 15.5[19] for an image of a medication dispensing system.
Bar codes are often incorporated with unit dose medication dispensing as an additional layer of safety to prevent medication errors. Each patient and medication is identified with a unique bar code. The nurse scans the patient’s identification wristband with a bedside portable device and then scans each medication to be administered. The portable device will display error messages if an incorrect medication is scanned or if medication is scanned at an incorrect time. It is vital for nurses to stop and investigate the medication administration process when an error is received. The scanning device is typically linked to an electronic MAR and the medication administered is documented immediately in the patient’s chart.
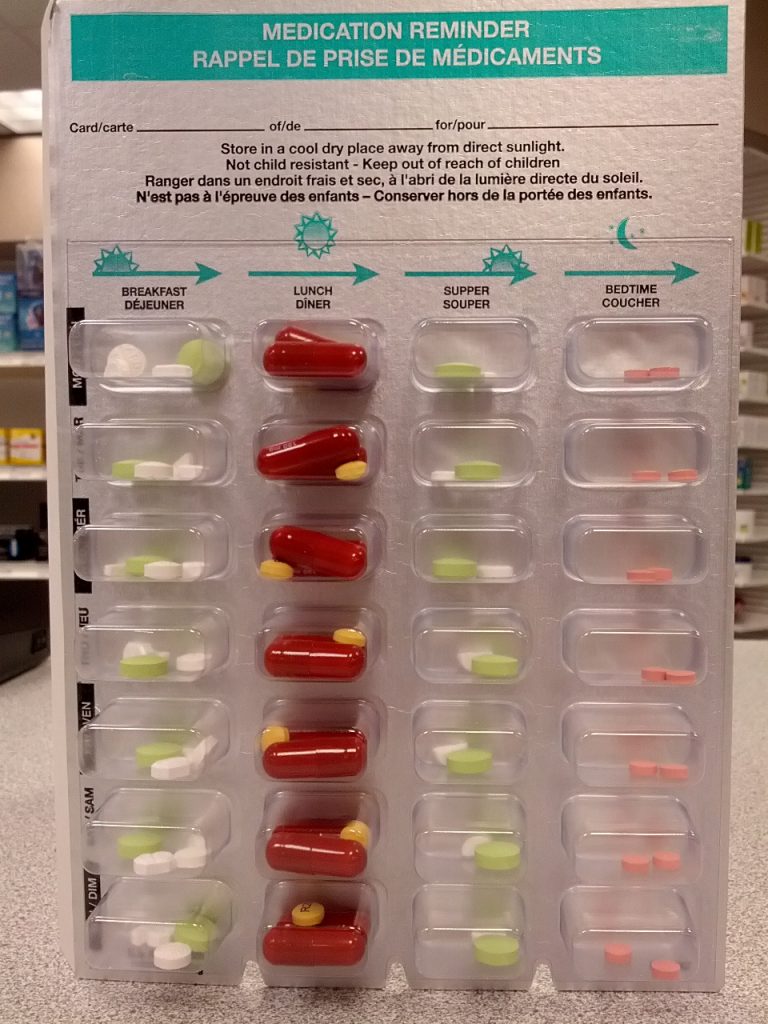
In long-term care agencies, weekly blister cards may be used that contain a specific patient’s medications for each day of the week. See Figure 15.6[20] for an image of a blister pack.
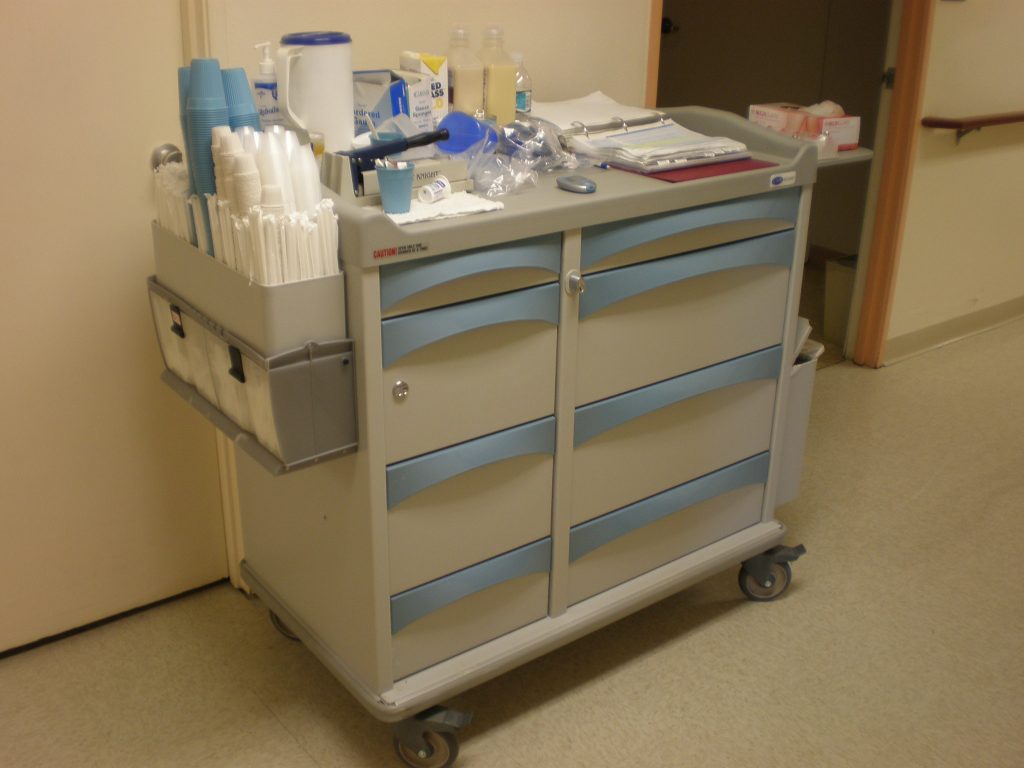
Agencies using blister cards or pill bags typically store medications in a locked medication cart to keep them secure. Supplies used to administer medications are also stored on the cart. The MAR is available in printed format or electronically with a laptop computer. See Figure 15.7[21] for an image of a medication cart.
Process of Medication Administration
No matter what method of medication storage and dispensing is used in a facility, the nurse must continue to verify the rights of medication administration to perform an accurate and safe medication pass. Using a medication dispensing system or bar coding does not substitute for verifying the rights, but are used to add an additional layer of safety to medication administration. Nurses can also avoid medication errors by creating a habitual process of performing medication checks when administering medication. The rights of medication administration should be done in the following order:
- Perform the first check as the unit dose package, blister pack, or pill bag is removed from the dispensing machine or medication cart. Also, check the expiration date of the medication.
- A second check should be performed after the medication is removed from the dispensing machine or medication cart. This step should be performed prior to pouring or removing from a multidose container. Note: Some high-alert medications, such as insulin, require a second nurse to perform a medication check at this step due to potentially life-threatening adverse effects that can occur if an error is made.
- The third check should be performed immediately before administering the medication to the patient at the bedside or when replacing the multidose container back into the drawer.
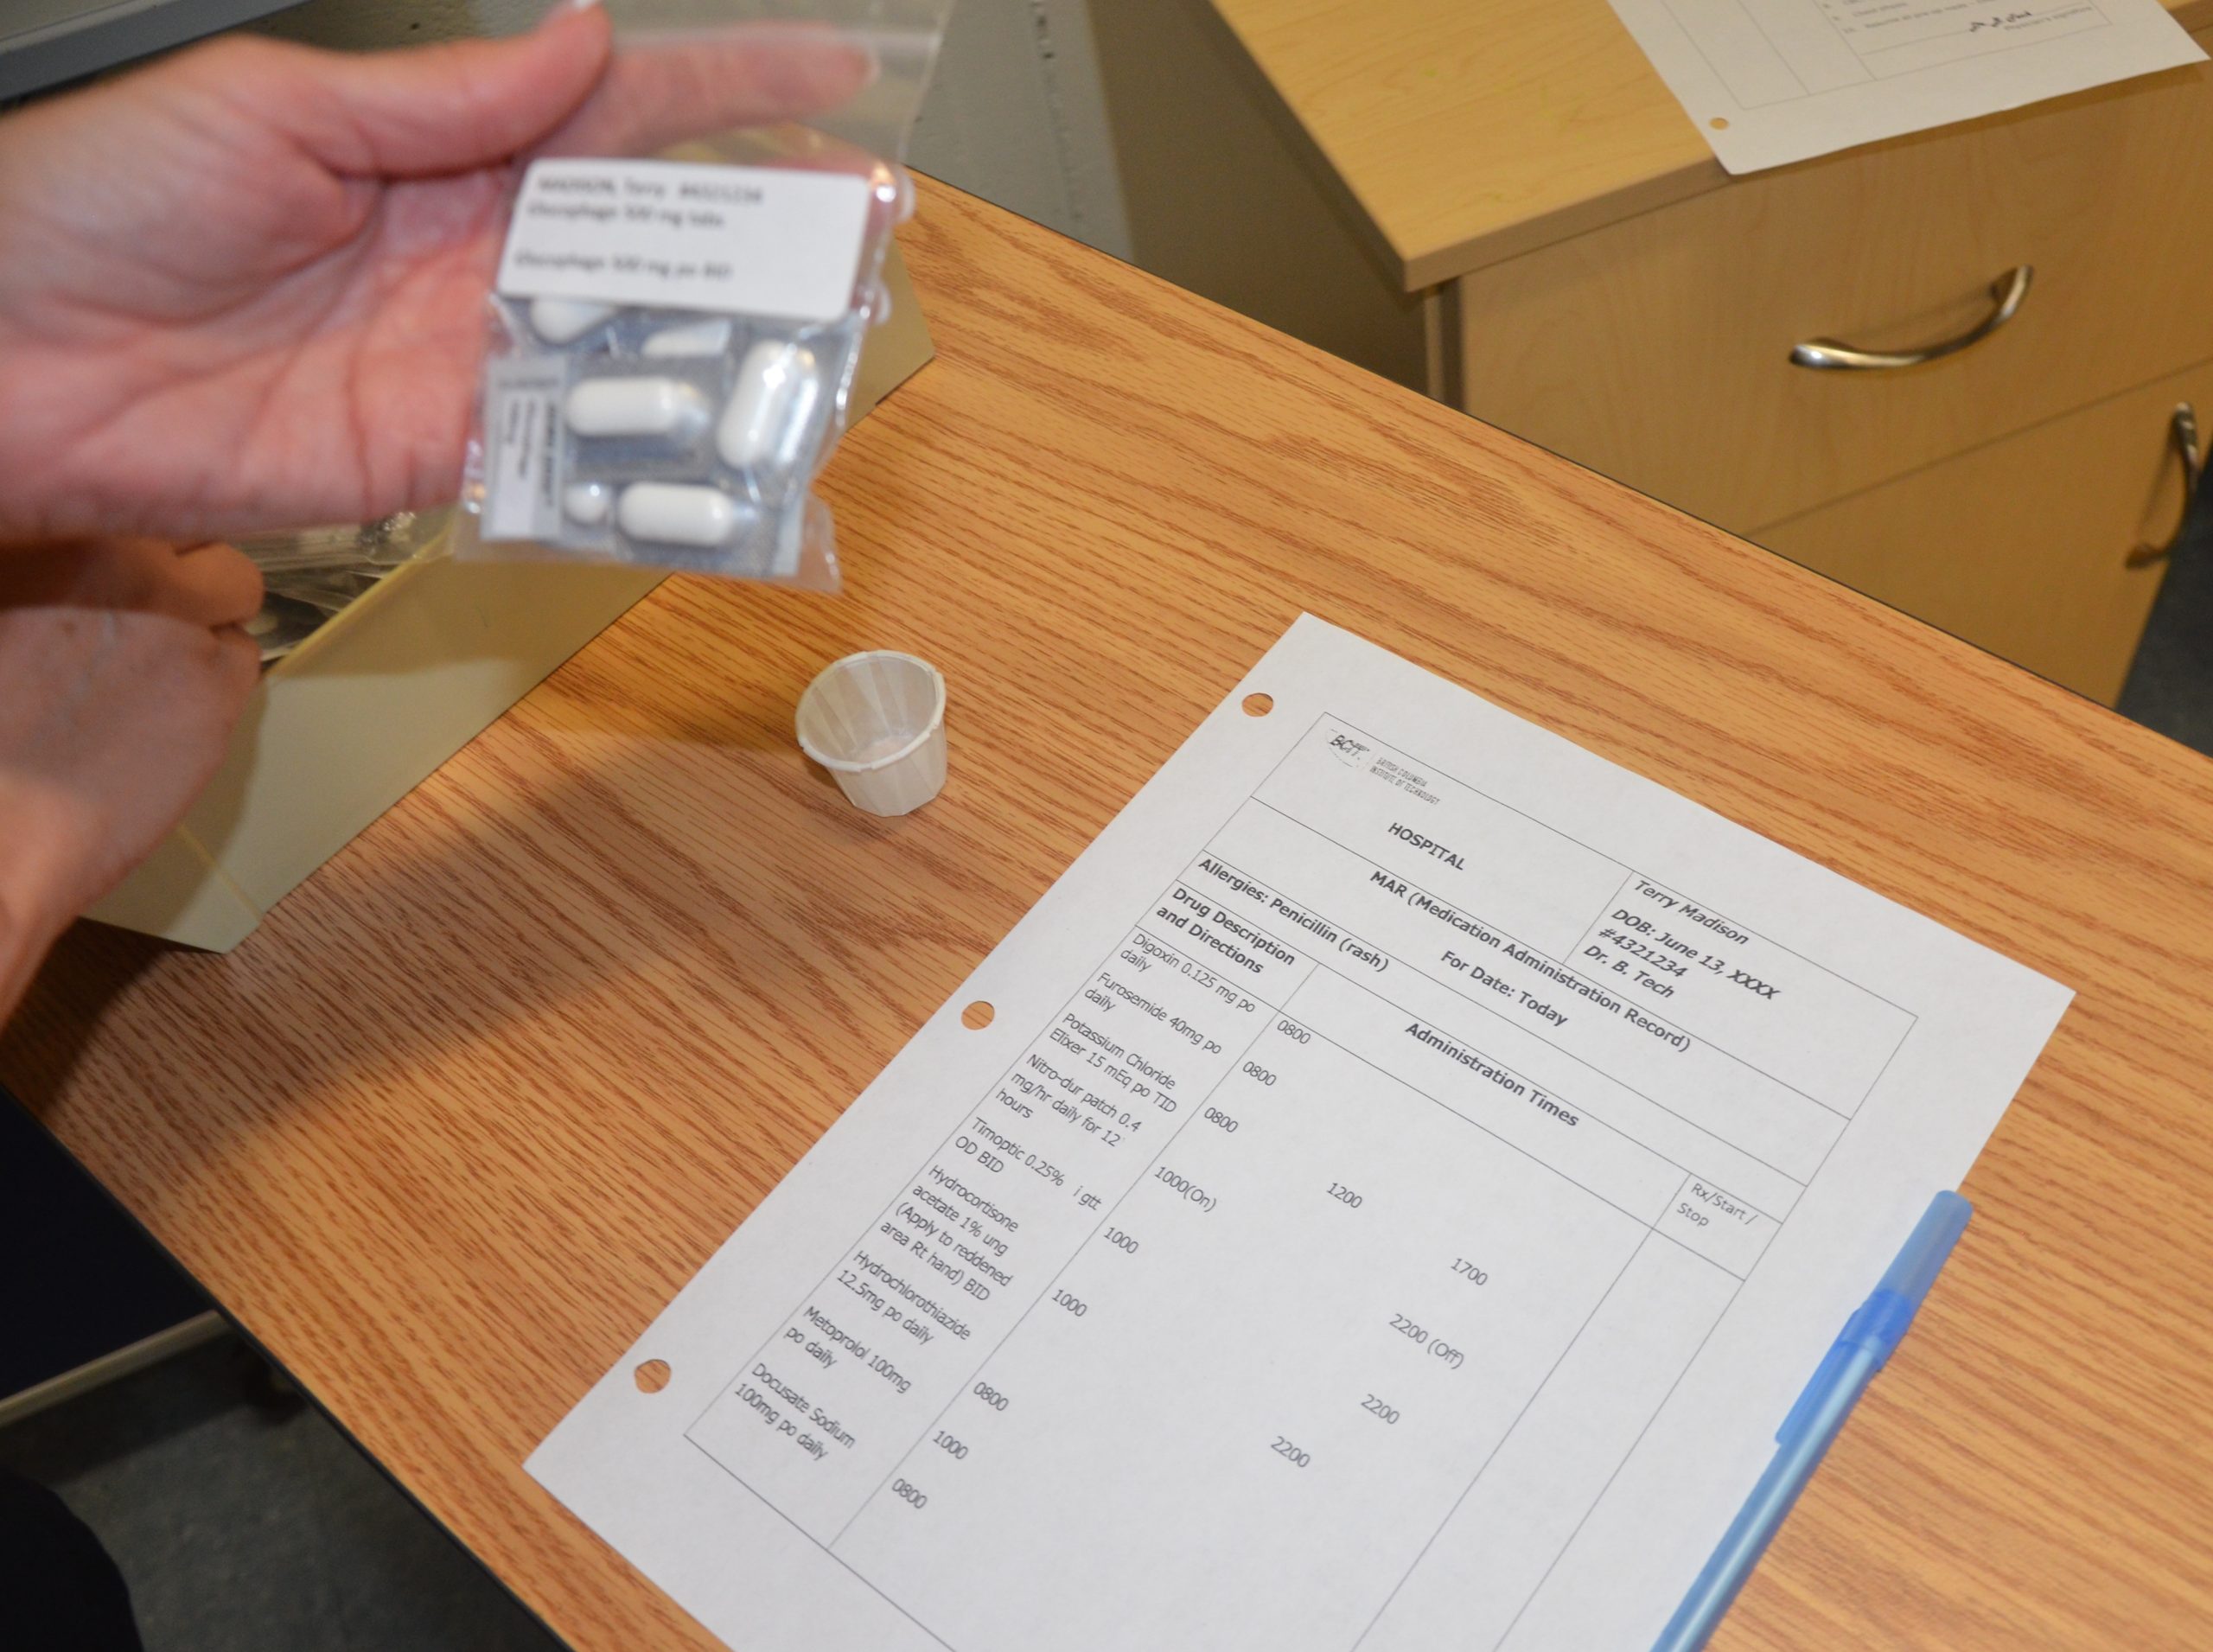
See Figure 15.8[22] for an image of a nurse comparing medication information on the medication packet to information on the patient’s MAR.
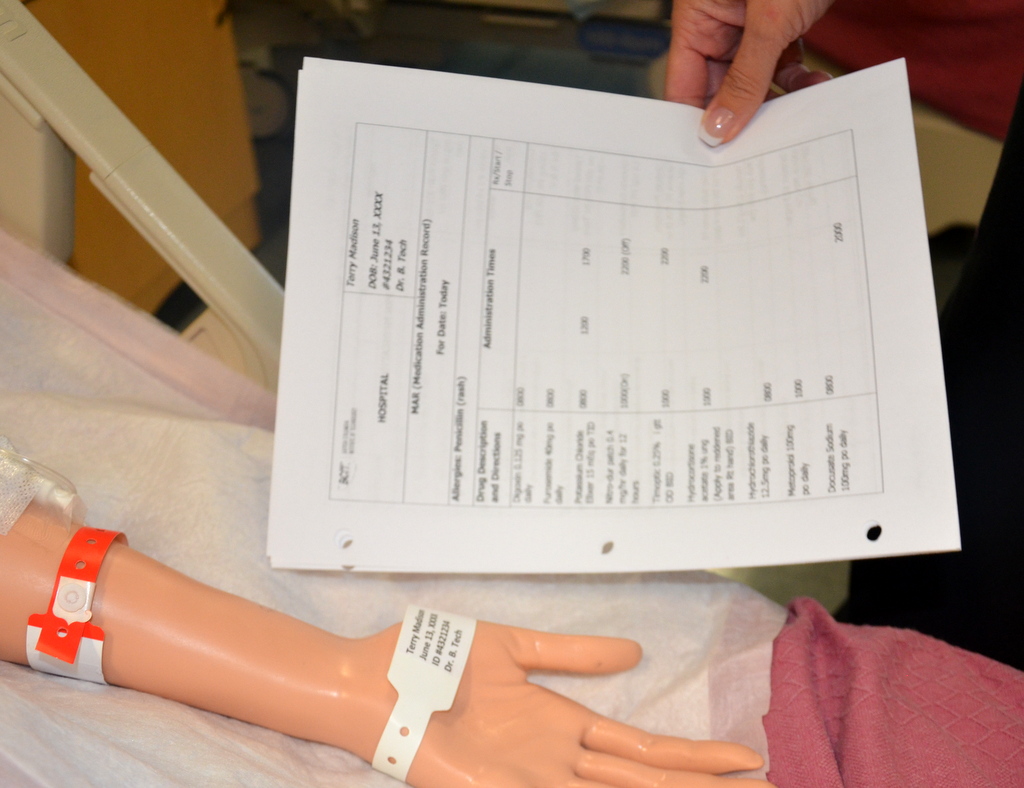
When performing these three checks, the nurse should ensure this is the right medication, right patient, right dosage, right route, and right time. See Figure 15.9[23] for an image of the nurse performing patient identification prior to administering the medication. The sixth right, correct documentation, should be done immediately after the medication is administered to the patient to avoid an error from another nurse inadvertently administering the dose a second time. These six rights completed three times have greatly reduced medication errors.
As discussed earlier, other rights to consider during this process are as follows:
- Is the patient receiving this medication for the right reason?
- Have the right assessments been performed prior to giving the medication?
- Has the patient also received the right education regarding the medications?
- Is the patient exhibiting the right response to the medication?
- Is the patient refusing to take the medication? Patients have the right to refuse medication. The patient’s refusal and any education or explanation provided related to the attempt to administer the medication should be documented by the nurse and the prescribing provider should be notified.
![]()
- Listen to the patient if they verbalize any concerns about medications. Explore their concerns, verify the order, and/or discuss their concerns with the prescribing provider before administering the medication to avoid a potential medication error.
- If a pill falls on the floor, it is contaminated and should not be administered. Dispose the medication according to agency policy.
- Be aware of absorption considerations of the medications you are administering. For example, certain medications such as levothyroxine should be administered on an empty stomach because food and other medications will affect its absorption.
- Nurses are often the first to notice when a patient has difficulty swallowing. If you notice a patient coughs immediately after swallowing water or has a “gurgling” sound to their voice, do not administer any medications, food, or fluid until you have reported your concerns to the heath care provider. A swallow evaluation may be needed and the route of medication may need to be changed from oral to another route to avoid aspiration.
- If your patient has a nothing by mouth (NPO) order, verify if this includes all medications. This information may be included on the MAR or the orders, and if not, verify this information with the provider. Some medications, such as diabetes medication, may be given with a sip of water in some situations where the patient has NPO status.
- If the route of administration is not accurately listed on the MAR, contact the prescribing provider before administering the medication. For example, a patient may have a PEG tube but the medication is erroneously listed as “PO” on the order.
For more information regarding classes of medications, administration considerations, and adverse effects to monitor, visit Open RN Nursing Pharmacology.
For information about specific medications, visit DailyMed, a current, evidence-based medication reference.
Special Considerations for Administering Controlled Substances
Controlled substances, also called Scheduled Medications, are kept in a locked system and accounted for using a checks and balance system. Removal of a controlled substance from a medication dispensing system must be verified and documented by a second nurse witness. Removal of a controlled substance from a medication cart needs to be documented on an additional controlled substance record with the patient’s name, the actual amount of substance given, the time it was given, associated pre-assessment data, and the name of the nurse administering the controlled substance.
Controlled substances stored in locked areas of medication carts must also be counted at every shift change by two nurses and then compared to the controlled substance administration record. If the count does not match the documentation record, the discrepancy must be reported immediately according to agency policy.
Additionally, if a partial dose of a controlled substance is administered, the remainder of the substance must be discarded in front of another nurse witness to document the event. This process is called “wasting.” Follow agency policy regarding wasting of controlled substances.
These additional safety measures help to prevent drug diversion, the use of a prescription medication for other than its intended purpose.
Oral Medication Administration
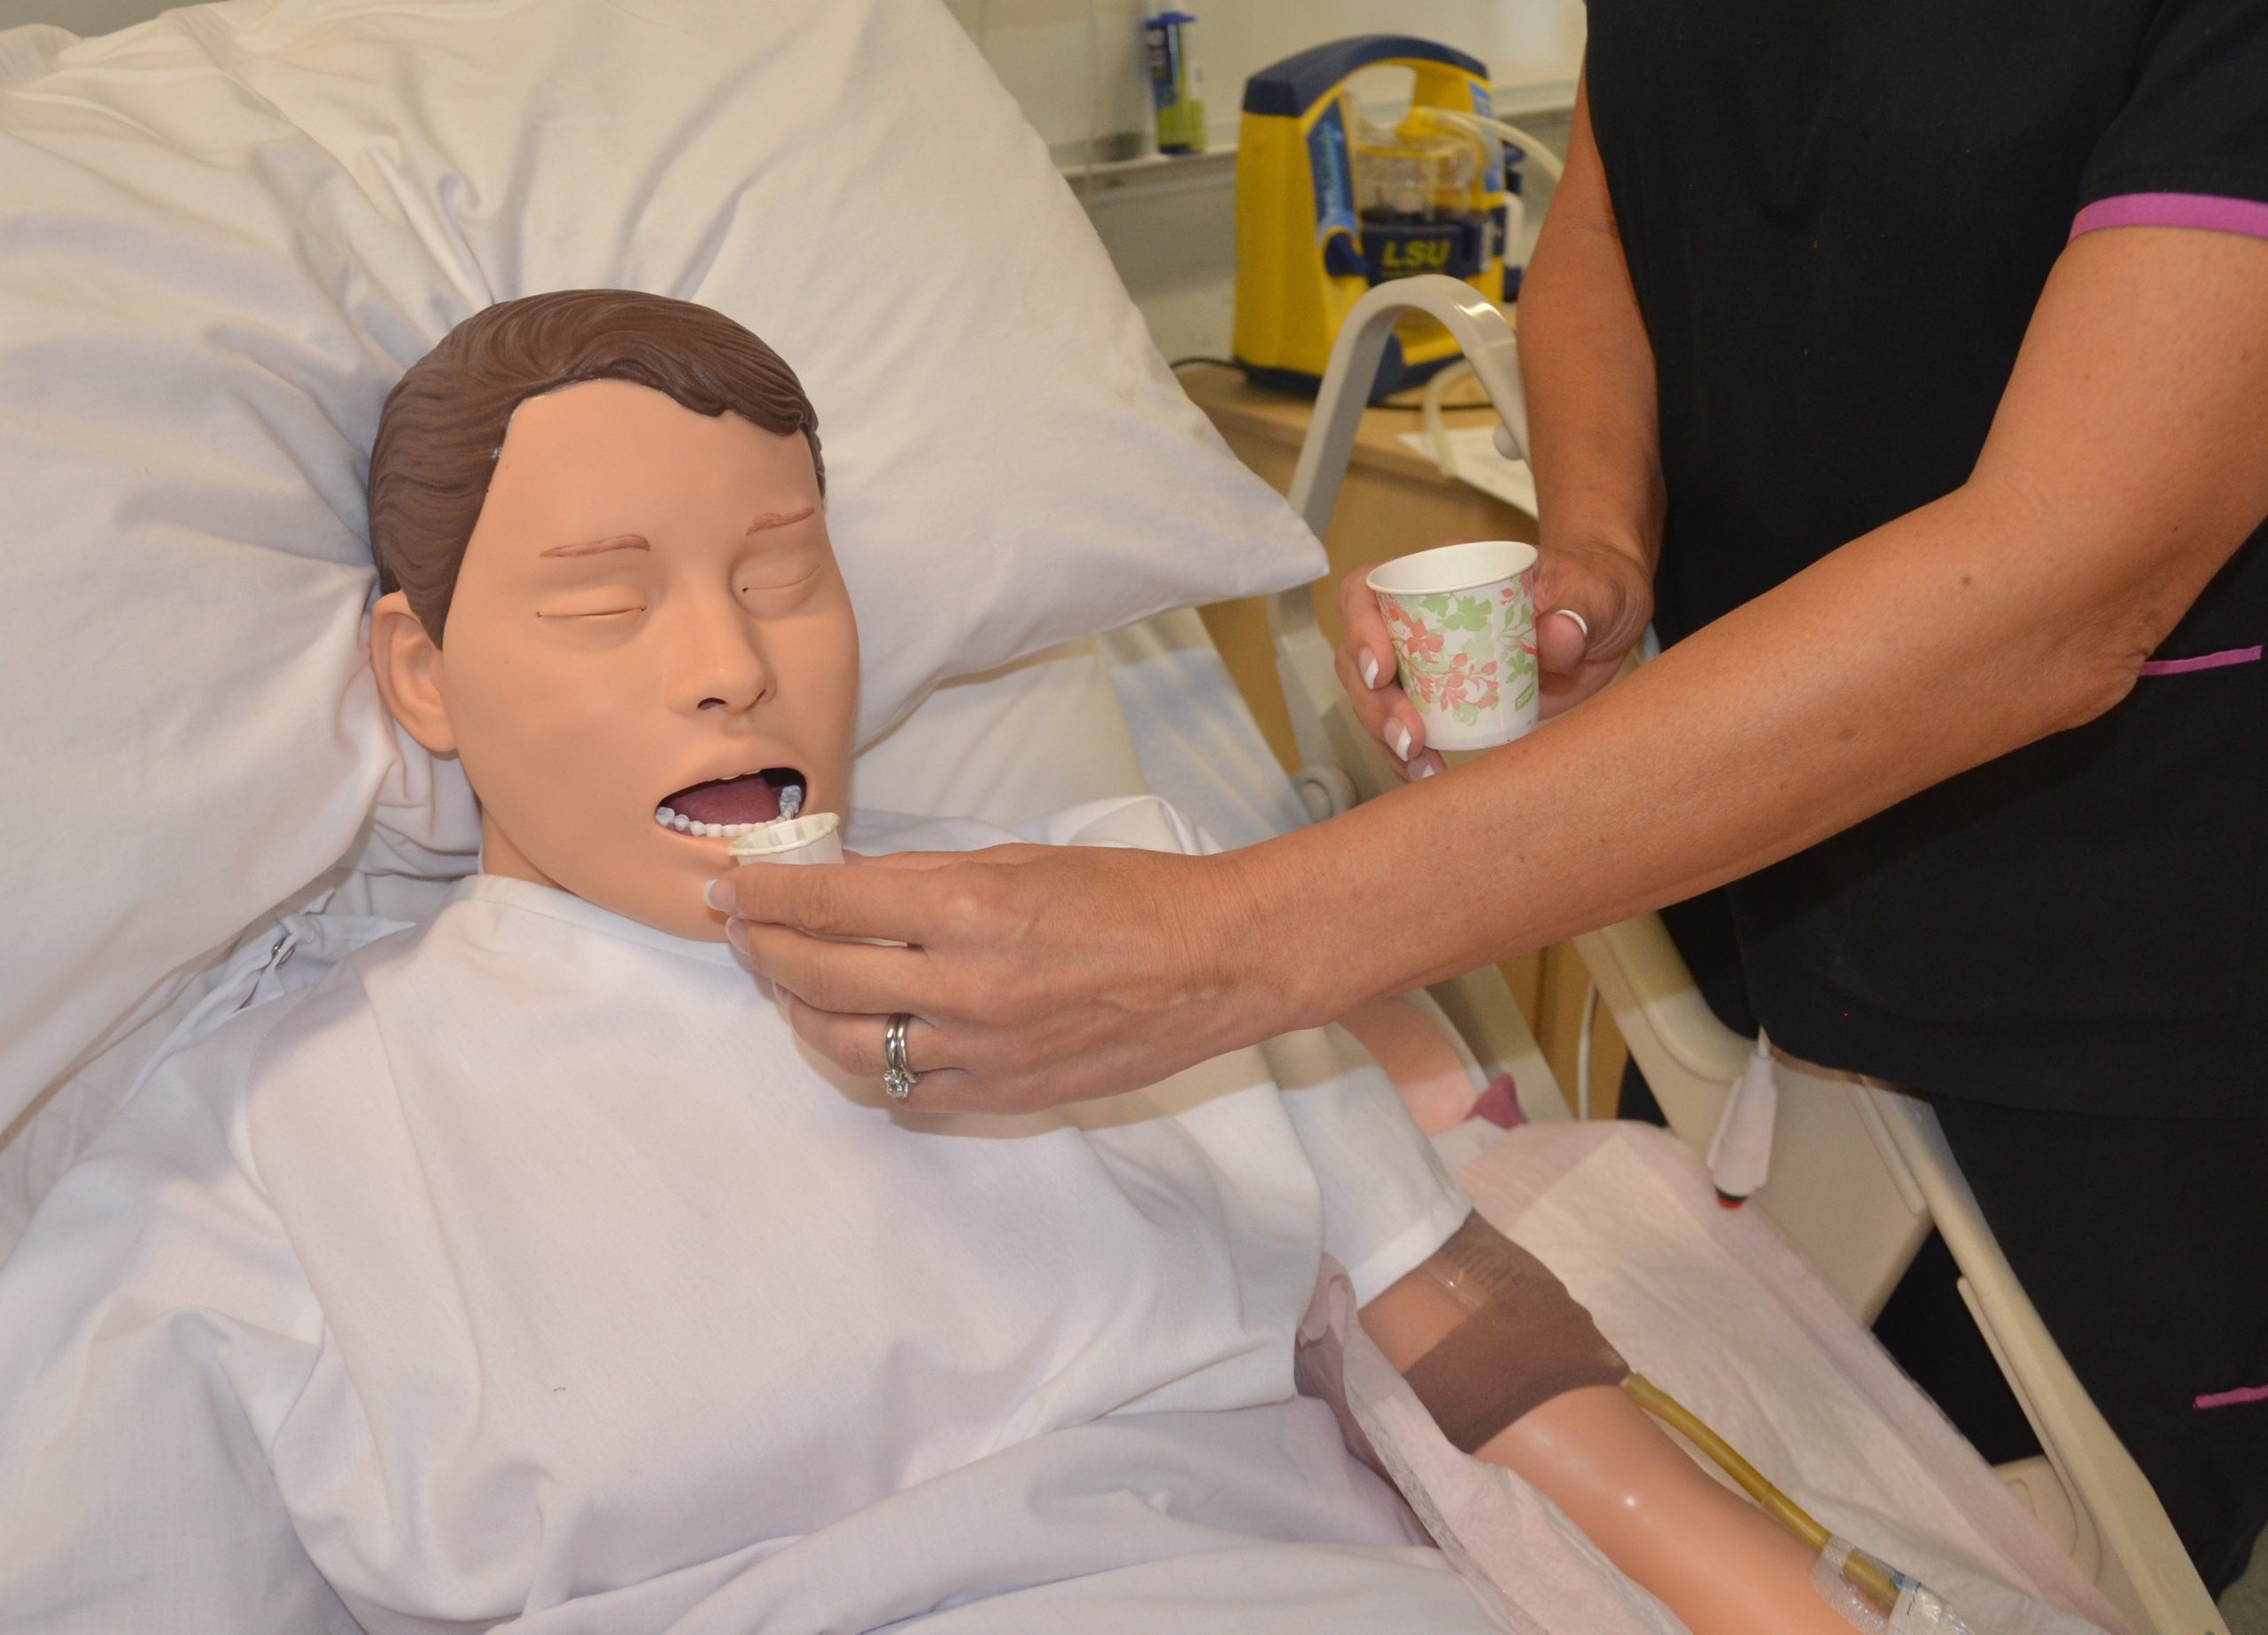
Most medications are administered orally because it is the most convenient and least invasive route for the patient. Medication given orally has a slower onset, typically about 30-60 minutes. Prior to oral administration of medications, ensure the patient has no contraindications to receiving oral medication, is able to swallow, and is not on gastric suction. If the patient has difficulty swallowing (dysphagia), tablets are typically crushed and placed in a substance like applesauce or pudding for easier swallowing (based on the patient’s prescribed diet). However, it is important to verify that a tablet may be crushed by consulting a drug reference or a pharmacist. For example, medications such as enteric-coated tablets, capsules, and sustained-release or long-acting drugs should never be crushed because doing so will affect the intended action of the medication. In this event, the provider must be contacted for a change in route. [24]
Position the patient receiving oral medication in an upright position to decrease the risk of aspiration. Patients should remain in this position for 30 minutes after medication administration, if possible. If a patient is unable to sit, assist them into a side-lying position. See Figure 15.10[25] for an image of a nurse positioning the patient in an upright position prior to medication administration. Offer a glass of water or other oral fluid (that is not contraindicated with the medication) to ease swallowing and improve absorption and dissolution of the medication, taking any fluid restrictions into account.[26]
Remain with the patient until all medication has been swallowed before documenting to verify the medication has been administered.[27]
If any post-assessments are required, follow up in the appropriate time frame. For example, when administering oral pain medication, follow up approximately 30 minutes to an hour after medication is given to ensure effective pain relief.
If medication is given sublingual (under the tongue) or buccal (between the cheek and gum) the mouth should be moist. Offering the patient a drink of water prior to giving the medication can help with absorption. Instruct the patient to allow the medication to completely dissolve, and reinforce the importance of not swallowing or chewing the medication.
Liquid medications are available in multidose vials or single-dose containers. It may be necessary to shake liquid medications if they are suspensions prior to pouring. Make sure the label is clearly written and easy to read. When pouring a liquid medication, it is ideal to place the label in the palm of your hand so if any liquid medication runs down the outside of the bottle it does not blur the writing and make the label unidentifiable. When pouring liquid medication, read the dose at eye level measuring at the meniscus of the poured fluid. Always follow specific agency policy and procedure when administering oral medications.
Rectal Medication Administration
Drugs administered rectally have a faster action than the oral route and a higher bioavailability, meaning a higher amount of effective drug in the bloodstream because it has not been influenced by upper gastrointestinal tract digestive processes. Rectal administration also reduces side effects of some drugs, such as gastric irritation, nausea, and vomiting. Rectal medications may also be prescribed for their local effects in the gastrointestinal system (e.g., laxatives) or their systemic effects (e.g., analgesics when oral route is contraindicated). Rectal medications are contraindicated after rectal or bowel surgery, with rectal bleeding or prolapse, and with low platelet counts.[28]
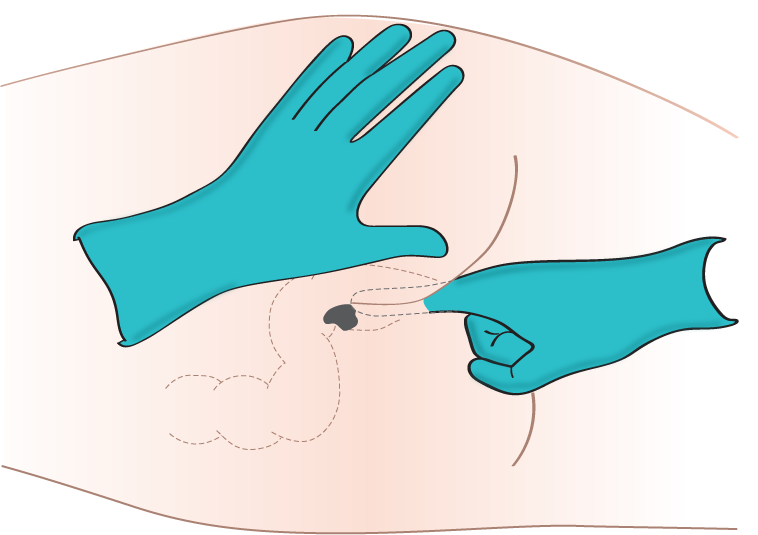
Rectal medications are often formulated as suppositories. Suppositories are small, cone-shaped objects that melt inside the body and release medication. When administering rectal suppositories, the patient should be placed on their left side in the Sims position. See Figure 15.11[29] for an image of patient positioning during rectal medication administration. The suppository and gloved index finger placing the suppository should be lubricated for ease of placement. Suppositories are conical and should be placed into the rectum rounded side first. The suppository should be inserted past the sphincter along the wall of the rectum. After placement, the patient should remain on their side while the medication takes effect. This time period is specific to each medication, but typically is at least 5 minutes. Make sure to avoid placing the suppository into stool. It is also important to monitor for a vasovagal response when placing medications rectally. A vasovagal response can occur when the vagus nerve is stimulated, causing the patient’s blood pressure and heart rate to drop, and creating symptoms of dizziness and perspiration. Sometimes the patient can faint or even have a seizure. Patients with a history of cardiac arrhythmias should not be administered rectal suppositories due to the potential for a vasovagal response. Always follow agency policy and procedure when administering rectal medications.[30],[31]
Another type of rectal medication is an enema. An enema is the administration of a substance in liquid form into the rectum. Many enemas are formulated in disposable plastic containers. Warming the solution to body temperature prior to administration may be beneficial because cold solution can cause cramping. It is also helpful to encourage the patient to empty their bladder prior to administration to reduce feelings of discomfort. Place an incontinence pad under the patient and position them on their left side in the Sims position. Lubricate the nozzle of the container and expel air. Insert the lubricated nozzle into the rectum slowly and gently expel the contents into the rectum. Ask the patient to retain the enema based on manufacturer’s recommendations.
Enteral Tube Medication Administration
Medication is administered via an enteral tube when the patient is unable to orally swallow medication. Medications given through an enteral feeding tube (nasogastric, nasointestinal, percutaneous endoscopic gastrostomy {PEG}, or jejunostomy {J} tube) should be in liquid form whenever possible to avoid clogging the tube. If a liquid form is not available, medications that are safe to crush should be crushed finely and dissolved in water to keep the tube from becoming clogged. If a medication is not safe to crush, the prescribing provider should be notified and a prescription for alternative medication obtained. Capsules should be opened and emptied into liquid as indicated prior to administration, and liquids should be administered at room temperature. Keep in mind that some capsules are time-released and should not be opened. In this case, contact the provider for a change in order.[32],[33]
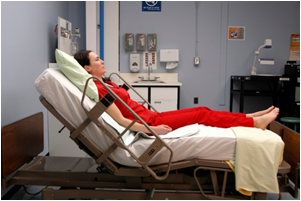
As always, follow agency policy for this medication administration procedure. Position the patient to at least 30 degrees and in high Fowler’s position when feasible. If gastric suctioning is in place, turn off the suctioning. See Figure 15.12[34] for an image of a nurse positioning the patient prior to administration of medications via a PEG tube. Follow the tube to the point of entry into the patient to ensure you are accessing the correct tube.[35],[36]
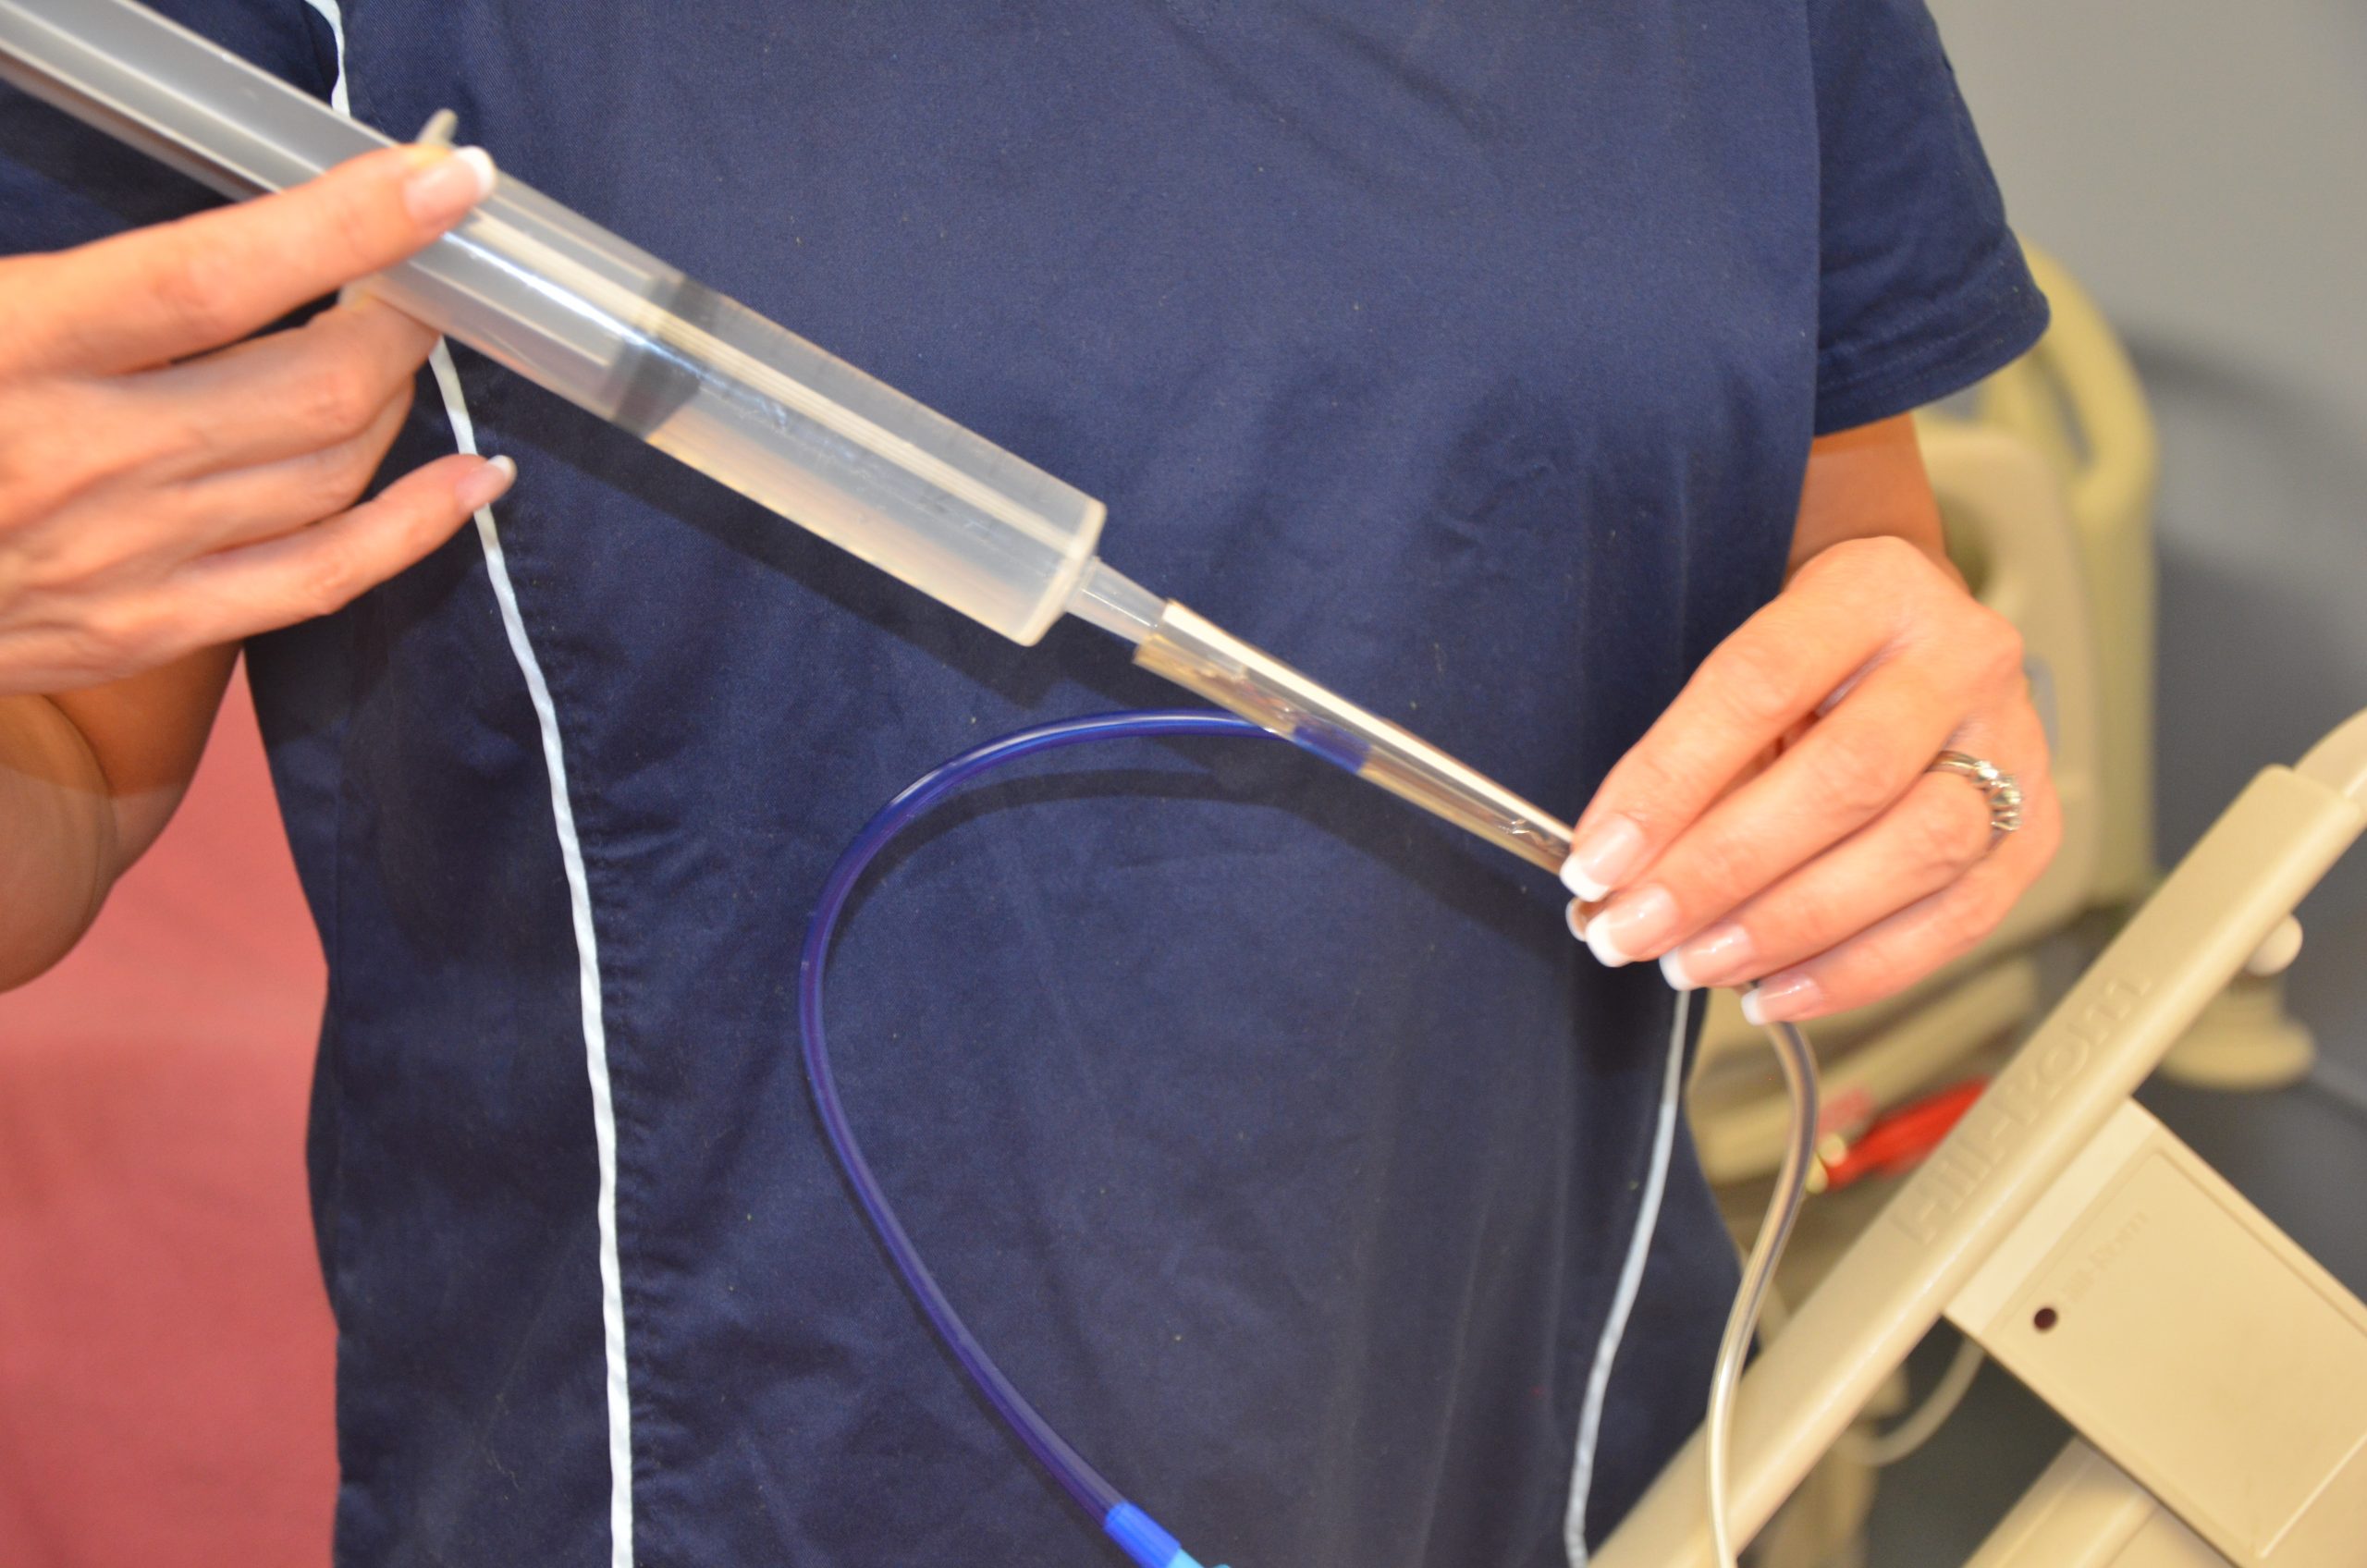
Prior to medication administration, verify tube placement. Placement is initially verified immediately after the tube is placed with an X-ray, and the nurse should verify these results. Additionally, bedside placement is verified by the nurse before every medication pass. There are multiple evidence-based methods used to check placement. One method includes aspirating tube contents with a 60-mL syringe and observing the fluid. Fasting gastric secretions appear grassy-green, brown, or clear and colorless, whereas secretions from a tube that has perforated the pleural space typically have a pale yellow serous appearance. A second method used to verify placement is to measure the pH of aspirate from the tube. Fasting gastric pH is usually 5 or less, even in patients receiving gastric acid inhibitors. Fluid aspirated from a tube in the pleural space typically has a pH of 7 or higher.[37],[38] Note that installation of air into the tube while listening over the stomach with a stethoscope is no longer considered a safe method to check tube placement according to evidence-based practices.[39]
After tube placement is checked, a clean 60-mL syringe is used to flush the tube with a minimum of 15 mL of water (5-10 mL for children) before administering the medication. Follow agency policy regarding flushing amount. Liquid medication, or appropriately crushed medication dissolved in water, is administered one medication at a time. Medication should not be mixed because of the risks of physical and chemical incompatibilities, tube obstruction, and altered therapeutic drug responses. Between each medication, the tube is flushed with 15 mL of water, keeping in mind the patient’s fluid volume status. After the final medication is administered, the tube is flushed with 15 mL of water. The tube is then clamped, or if the patient is receiving tube feeding, it can be restarted. If the patient is receiving gastric suctioning, it can be restarted 30 minutes after medication administration.[40],[41],[42] See Figure 15.13[43] for an image of a nurse administering medication via an enteral tube.
Special considerations during this procedure include the following:
- If the patient has fluid restrictions, the amount of fluid used to flush the tube between each medication may need to be modified to avoid excess fluid intake.
- If the tube is attached to suctioning, the suctioning should be left off for 20 to 30 minutes after the medication is given to promote absorption of the medication.
- If the patient is receiving tube feedings, review information about the drugs that are being administered. If they cannot be taken with food or need to be taken on an empty stomach, the tube feeding running time will need to be adjusted.
- Be sure to document the amount of water used to flush the tube during the medication pass on the fluid intake record.
- If the patient has a chronic illness or is immunosuppressed, sterile water is suggested for use of mixing and flushing instead of tap water.
- Enteric-coated medications and other medications on the “Do Not Crush List” should not be crushed for this procedure. Instead, the prescribing provider must be notified and an order for a different form of the medication must be obtained.
- If the tube becomes clogged, attempt to flush it with water. If unsuccessful, notify the provider and a pancreatic enzyme solution or kit may be ordered before a new tube is placed.[44]
Video Review for Crushing Medications[45]
Preventing Medication Errors
Medication errors can occur at various stages of the medication administration process, beginning with the prescribing provider, to the pharmacist preparing the medication, to the pharmacy technician stocking the medication, to the nurse administering the medication. Medication errors are most common at the ordering or prescribing stage. Typical errors include the prescribing provider writing the wrong medication, wrong route or dose, or the wrong frequency. These ordering errors account for almost 50% of medication errors. Data shows that nurses and pharmacists identify anywhere from 30% to 70% of medication-ordering errors.[46]
One of the major causes for medication errors is a distraction. Nearly 75% of medication errors have been attributed to this cause.[47] To minimize distractions, hospitals have introduced measures to reduce medication errors. For example, some hospitals set a “no-interruption zone policy” during medication dispensing and preparation and ask health care team members to only disrupt the medication administration process for emergencies. To reduce medication errors, agencies are also adopting many initiatives developed by the World Health Organization (WHO),[48] the Institute for Safe Medication Practices (ISMP), the Institute of Medicine (IOM),[49] and several other organizations. Initiatives include measures such as avoiding error-prone abbreviations, being aware of commonly confused medication names, and instituting additional safeguards for high-alert medications. Student nurses must also be aware of conditions that may contribute to making a medication error during their clinical courses. Read more about initiatives to prevent medication errors in the hyperlinks and videos provided below.
For more information about preventing medication errors as a student nurse, visit IMSP’s Error-Prone Conditions that Lead to Student Nurse-Related Errors. When you prepare to administer medications to your patients during clinical, your instructor will ask you questions to ensure safe medication administration.
Watch a video of an instructor asking a student typical medication questions.
Video Review of Administering Medications Without Harm[50]
Reporting Medication Errors
Despite multiple initiatives that have been instituted to prevent medication errors, including properly checking the rights of medication administration, medication errors happen. Examples of common errors include administering the wrong dose or an unsafe dose, giving medication to the wrong patient, administering medication by the wrong route or at the incorrect rate, and giving a drug that is expired. If a medication error occurs, the nurse must follow specific steps of reporting according to agency policy. In the past when medication errors occurred, the individual who caused it was usually blamed for the mishap and disciplinary action resulted. However, this culture of blame has shifted, and many medication errors by well-trained and careful nurses and other health care professions are viewed as potential symptoms of a system-wide problem. This philosophy is referred to as an institution’s safety culture. Thus, rather than focusing on disciplinary action, agencies are now trying to understand how the system failed causing the error to occur. This approach is designed to introduce safeguards at every level so that a mistake can be caught before the drug is given to the patient, which is often referred to as a “near miss.” For an agency to effectively institute a safety culture, all medication errors and near misses must be reported.
When a medication error occurs, the nurse’s first response should be to immediately monitor the patient’s condition and watch for any side effects from the medication. Secondly, the nurse must notify the nurse manager and prescribing provider of the error. The provider may provide additional orders to counteract the medication’s effects or to monitor for potential adverse reactions. In some situations, family members of the patient who are legal guardians or powers of attorney should also be notified. Lastly, a written report should be submitted documenting the incident, often referred to as an incident report. Incident reports are intended to identify if patterns of errors are occurring due to system-wide processes that can be modified to prevent future errors.
Life Span Considerations
Children
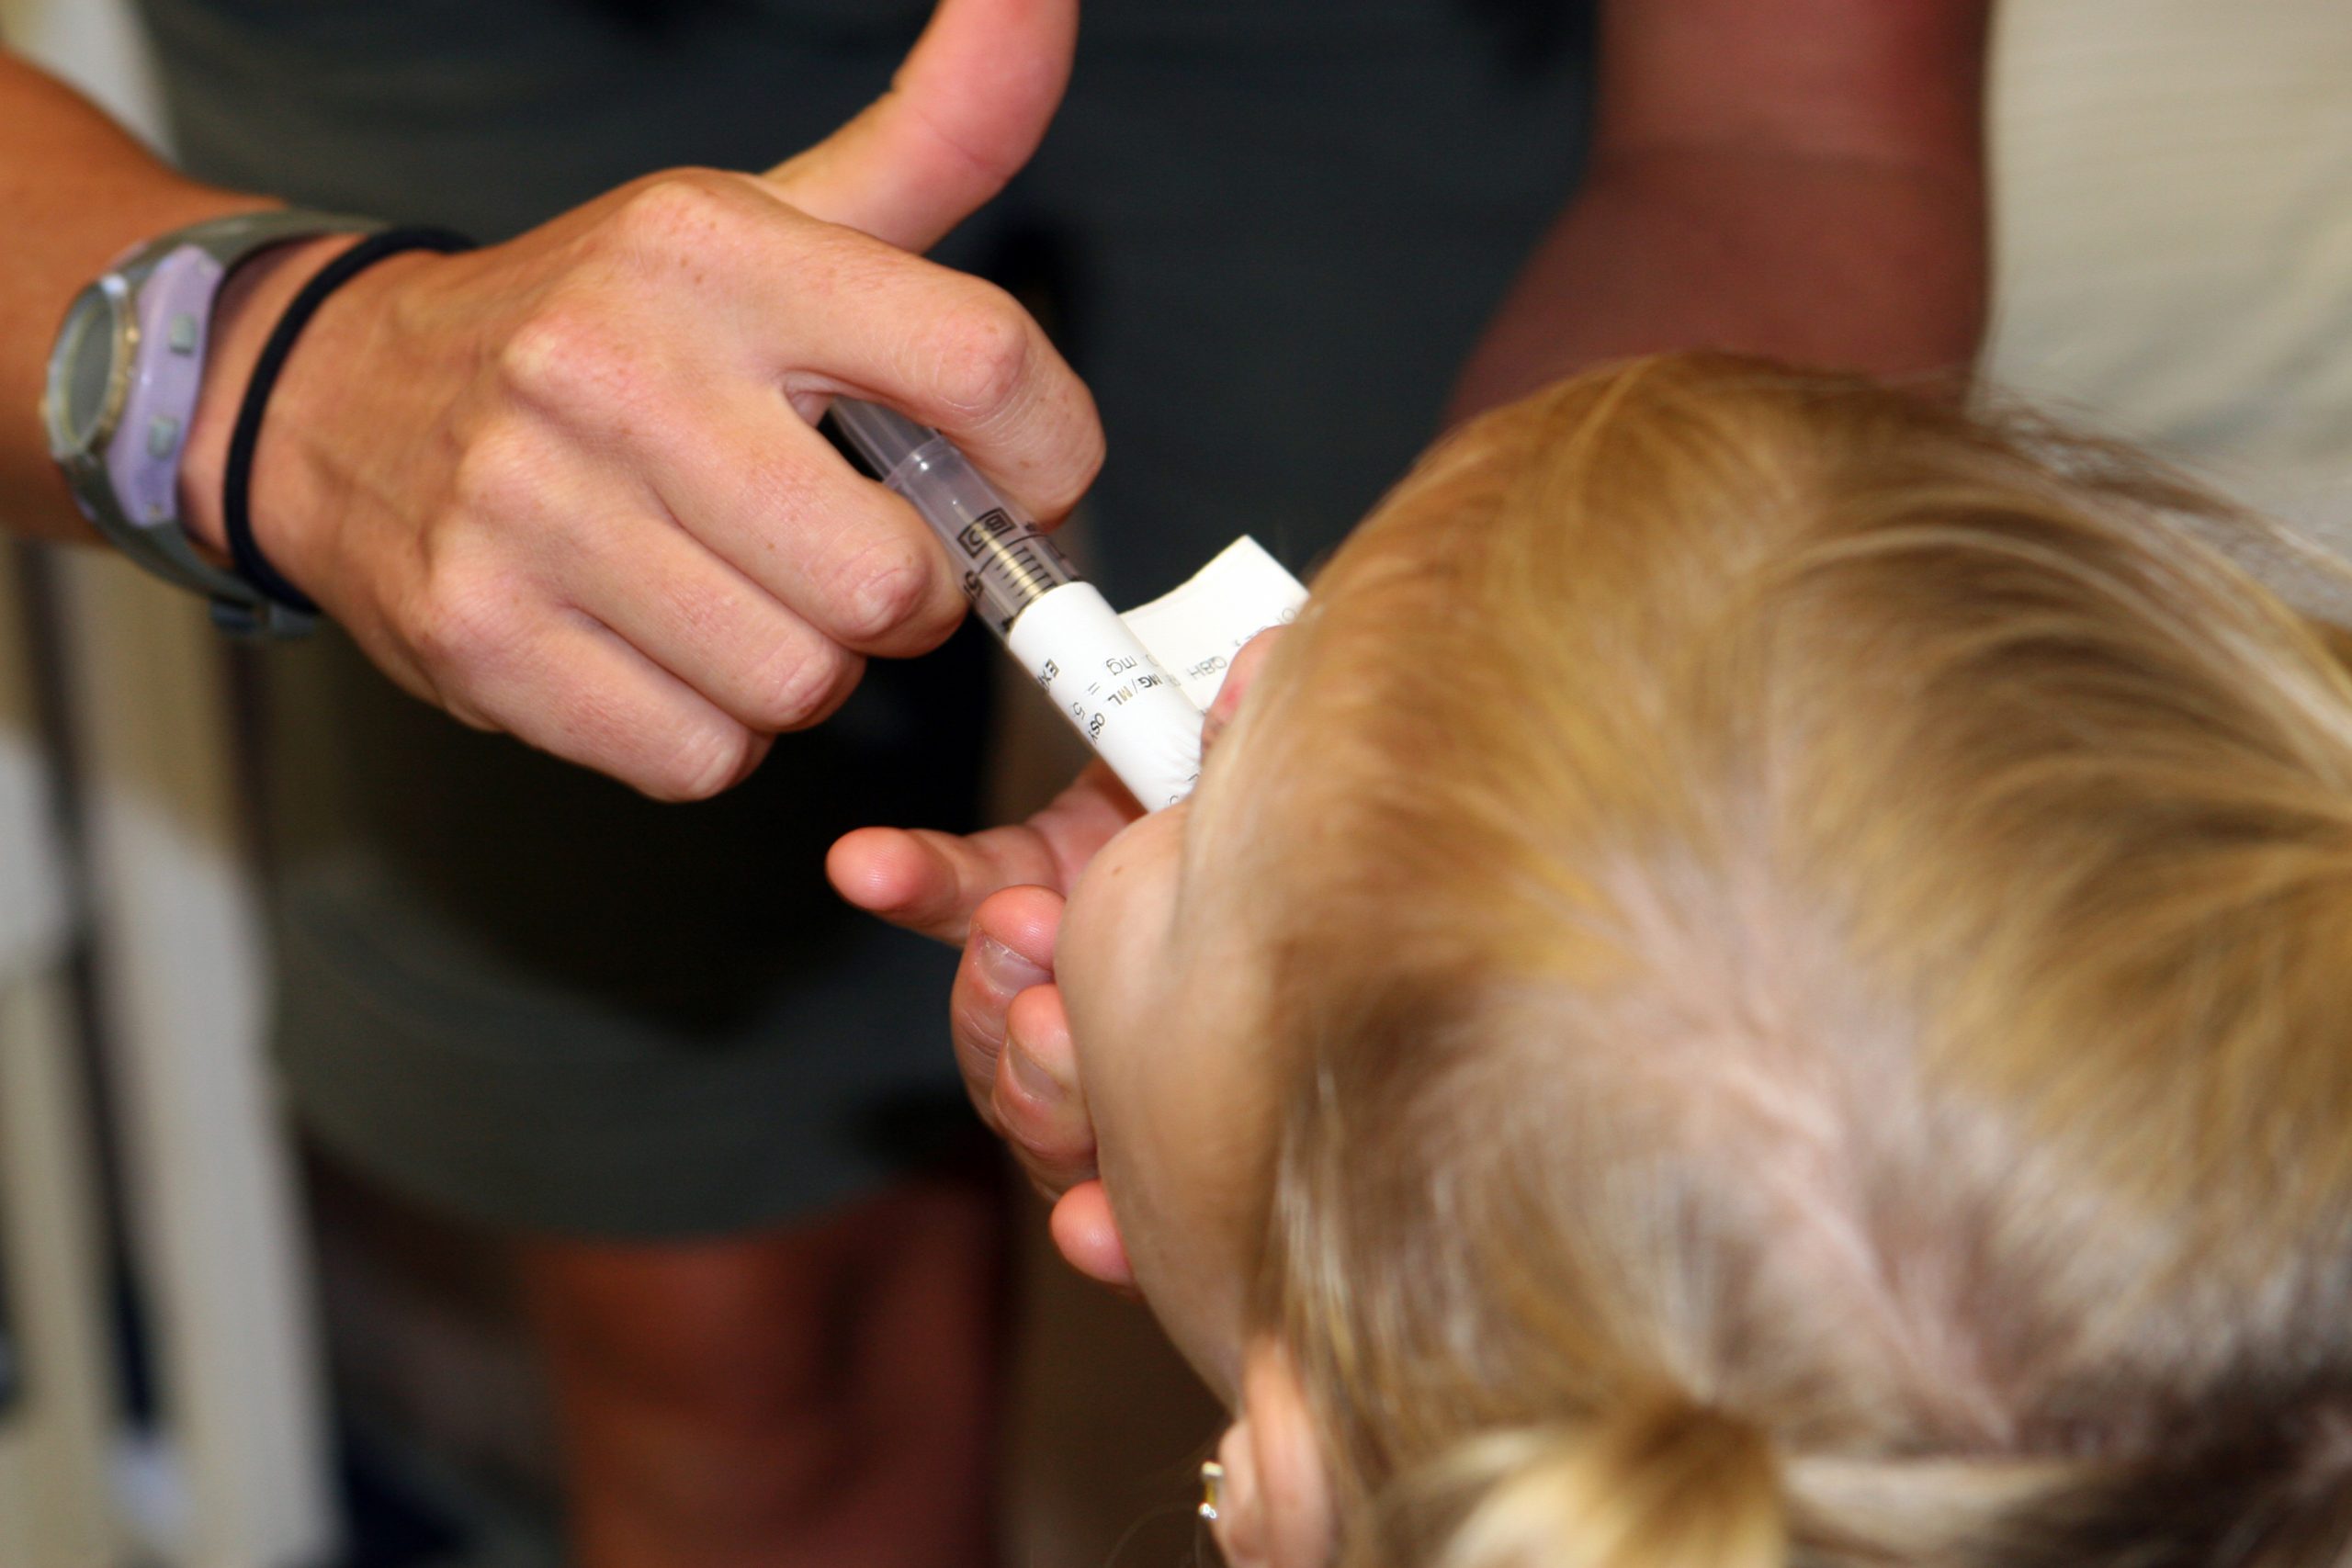
It can be difficult to persuade children to take medications. It is often helpful for medications to be prescribed in liquid or chewable form. For example, droppers are used for infants or very young children; the medication should be placed between the gum and cheek to prevent aspiration. Mixing medication with soft foods can also be helpful to encourage the child to swallow medications, but it is best to avoid mixing the medication with a staple food in the child’s diet because of potential later refusal of the food associated with medication administration. It can be helpful to offer the child a cool item, such as a popsicle or frozen fruit bar, prior to medication administration to numb the child’s tongue and decrease the taste of the medication. Other clinical tips for medication administration include asking the caregiver how the child takes medications at home and mimicking this method or asking the caregiver to administer the medication if the child trusts them more than the nurse. Oral syringes (without needles attached) may be used to administer precise dosages of medication to children. See Figure 15.14[51] of a nurse administering oral medication to a child with an oral syringe. When administering medication with an oral syringe, remember to remove the cap prior to administration because this could be a choking hazard. It is also important to educate the caregiver of the child how to properly administer the medication at the correct dosage at home.
Older Adults
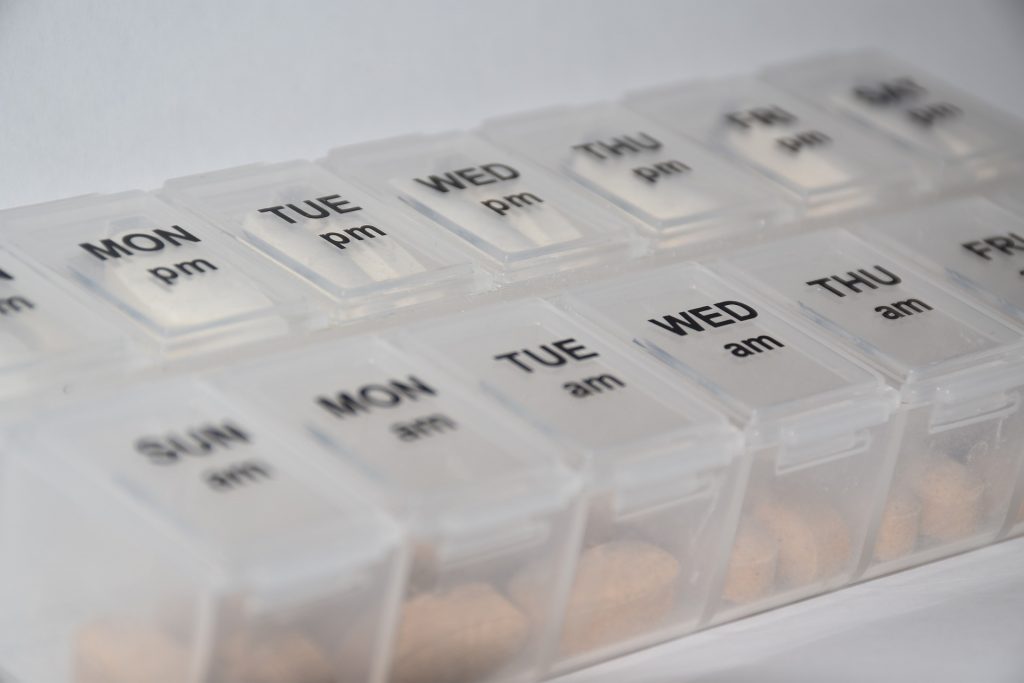
Many older adults have a “polypharmacy,” meaning many medications to keep track of and multiple times these medications need to be taken per day. Nurses should help patients set up a schedule to remember when to take the medications. Organizing medications in medication boxes by day and time is a very helpful strategy. See Figure 15.15[52] of a medication box. Nurses can suggest to patients to have all medications filled at the same pharmacy to avoid drug-drug interactions that can occur when multiple providers are prescribing medications.
Older adults often have difficulty swallowing, so obtaining a prescription for liquid medication or crushing the medication when applicable and placing it in applesauce or pudding is helpful. Allow extra time when administering medication to an older adult to give them time to ask questions and to swallow multiple pills. Monitor for adverse effects and drug interactions in older adults, who are often taking multiple medications and may have preexisting kidney or liver dysfunction.
Be sure to address the economic needs of an older adult as it relates to their medications. Medications can be expensive and many older adults live on a strict budget. Nurses often advocate for less expensive alternatives for patients, such as using a generic brand instead of a name brand or a less expensive class of medication. Be aware that an older adult with financial concerns may try to save money by not taking medications as frequently as prescribed. Also, the older adult may “feel good” on their medications and think they don’t need to monitor or take medications because they are “cured.” Reinforce that “feeling good” usually means the medication is working as prescribed and should continue to be taken. Finally, empower patients to take control of managing their health by providing education and ongoing support.
- NCSBN.(2018). 2019 NCLEX-RN test plan. https://www.ncsbn.org/2019_RN_TestPlan-English.pdf ↵
- Centers for Medicare & Medicaid Services. (2014, March 14). Memo: Requirements for hospital medication administration, particularly intravenous (IV) medications and post-operative care of patients receiving IV opioids. https://www.cms.gov/Medicare/Provider-Enrollment-and-Certification/SurveyCertificationGenInfo/Downloads/Survey-and-Cert-Letter-14-15.pdf ↵
- This work is a derivative of StatPearls by Tariq, Vashisht, Sinha, and Scherbak and is licensed under CC BY 4.0 ↵
- Centers for Medicare & Medicaid Services. (2014, March 14). Memo: Requirements for hospital medication administration, particularly intravenous (IV) medications and post-operative care of patients receiving IV opioids. https://www.cms.gov/Medicare/Provider-Enrollment-and-Certification/SurveyCertificationGenInfo/Downloads/Survey-and-Cert-Letter-14-15.pdf ↵
- Centers for Medicare & Medicaid Services. (2014, March 14). Memo: Requirements for hospital medication administration, particularly intravenous (IV) medications and post-operative care of patients receiving IV opioids. https://www.cms.gov/Medicare/Provider-Enrollment-and-Certification/SurveyCertificationGenInfo/Downloads/Survey-and-Cert-Letter-14-15.pdf ↵
- Vera, M. (2020, June 30). The 10 rights of drug administration. Nurselabs. https://nurseslabs.com/10-rs-rights-of-drug-administration/ ↵
- Butcher, H., Bulechek, G., Dochterman, J., & Wagner, C. (2018). Nursing interventions classification (NIC). Elsevier, pp.250-251,257-258. ↵
- Centers for Medicare & Medicaid Services. (2014, March 14). Memo: Requirements for hospital medication administration, particularly intravenous (IV) medications and post-operative care of patients receiving IV opioids. https://www.cms.gov/Medicare/Provider-Enrollment-and-Certification/SurveyCertificationGenInfo/Downloads/Survey-and-Cert-Letter-14-15.pdf ↵
- “Patient Identification.png” by BruceBlaus is licensed under CC BY-SA 4.0 ↵
- “Wrist Identification Band.jpg” by Whoisjohngalt is licensed under CC BY-SA 4.0 ↵
- The Joint Commission. (n.d.). National patient safety goals. https://www.jointcommission.org/standards/national-patient-safety-goals/ ↵
- Centers for Medicare & Medicaid Services. (2014, March 14). Memo: Requirements for hospital medication administration, particularly intravenous (IV) medications and post-operative care of patients receiving IV opioids. https://www.cms.gov/Medicare/Provider-Enrollment-and-Certification/SurveyCertificationGenInfo/Downloads/Survey-and-Cert-Letter-14-15.pdf ↵
- "MAR.png" by Meredith Pomietlo for Chippewa Valley Technical College is licensed under CC BY 4.0 ↵
- Centers for Medicare & Medicaid Services. (2014, March 14). Memo: Requirements for hospital medication administration, particularly intravenous (IV) medications and post-operative care of patients receiving IV opioids. https://www.cms.gov/Medicare/Provider-Enrollment-and-Certification/SurveyCertificationGenInfo/Downloads/Survey-and-Cert-Letter-14-15.pdf ↵
- Centers for Medicare & Medicaid Services. (2014, March 14). Memo: Requirements for hospital medication administration, particularly intravenous (IV) medications and post-operative care of patients receiving IV opioids. https://www.cms.gov/Medicare/Provider-Enrollment-and-Certification/SurveyCertificationGenInfo/Downloads/Survey-and-Cert-Letter-14-15.pdf ↵
- Centers for Medicare & Medicaid Services. (2014, March 14). Memo: Requirements for hospital medication administration, particularly intravenous (IV) medications and post-operative care of patients receiving IV opioids. https://www.cms.gov/Medicare/Provider-Enrollment-and-Certification/SurveyCertificationGenInfo/Downloads/Survey-and-Cert-Letter-14-15.pdf ↵
- NCSBN. (2018). 2019 NCLEX-RN test plan. https://www.ncsbn.org/2019_RN_TestPlan-English.pdf ↵
- "Unit Dose Packaging.jpg" and "Unit Dose Label.jpg" by Deanna Hoyord, Chippewa Valley Technical College are licensed under CC BY 4.0 ↵
- "Med Cart 1_313A0209.jpg" and "Med Cart Drawer._313A0224.jpg" by Deanna Hoyord, Chippewa Valley Technical College are licensed under CC BY 4.0 ↵
- “Medication_blister_pack_2.jpg” by Sprinno is licensed under CC BY-SA 3.0 ↵
- “MMI medication cart.JPG” by BrokenSphere is licensed under CC BY-SA 3.0 ↵
- “DSC_17601-150x150.jpg” by British Columbia Institute of Technology is licensed under CC BY 4.0. Access for free at https://opentextbc.ca/clinicalskills/chapter/6-1-safe-medication-adminstration/. ↵
- “Book-pictures-2015-430-150x150.jpg” by British Columbia Institute of Technology is licensed under CC BY 4.0.. Access for free at https://opentextbc.ca/clinicalskills/chapter/6-1-safe-medication-adminstration/. ↵
- This work is a derivative of Clinical Procedures for Safer Patient Care by British Columbia Institute of Technology and is licensed under CC BY 4.0 ↵
- “DSC_17631-150x150.jpg” by British Columbia Institute of Technology is licensed under CC BY 4.0. Access for free at https://opentextbc.ca/clinicalskills/chapter/6-1-safe-medication-adminstration/. ↵
- This work is a derivative of Clinical Procedures for Safer Patient Care by British Columbia Institute of Technology and is licensed under CC BY 4.0 ↵
- This work is a derivative of Clinical Procedures for Safer Patient Care by British Columbia Institute of Technology and is licensed under CC BY 4.0 ↵
- This work is a derivative of Clinical Procedures for Safer Patient Care by British Columbia Institute of Technology and is licensed under CC BY 4.0 ↵
- "Administering-med-rectally-2.png" by British Columbia Institute of Technology is licensed under CC BY 4.0 ↵
- This work is a derivative of Clinical Procedures for Safer Patient Care by British Columbia Institute of Technology and is licensed under CC BY 4.0 ↵
- Butcher, H., Bulechek, G., Dochterman, J., & Wagner, C. (2018). Nursing interventions classification (NIC). Elsevier, pp.250-251,257-258. ↵
- This work is a derivative of Clinical Procedures for Safer Patient Care by British Columbia Institute of Technology and is licensed under CC BY 4.0 ↵
- Boullata, J.I., Carrera, A.L., Harvey, L., Escuro, A.A., Hudson, L., Mays, A., McGinnis, C., Wessel, J.J., Bajpai, S., Beebe, M.L., Kinn, T.J., Klang, M.G., Lord, L., Martin, K., Pompeii‐Wolfe, C., Sullivan, J., Wood, A., Malone, A., & Guenter, P. (2017). ASPEN safe practices for enteral nutrition therapy. Journal of Parenteral and Enteral Nutrition, 41(1), 15-103. https://doi.org/10.1177/0148607116673053 ↵
- “degreeLow.jpg” by British Columbia Institute of Technology is licensed under CC BY 4.0. Access for free at https://opentextbc.ca/clinicalskills/chapter/3-4-positioning-a-patient-in-bed/ ↵
- This work is a derivative of Clinical Procedures for Safer Patient Care by British Columbia Institute of Technology and is licensed under CC BY 4.0 ↵
- Boullata, J.I., Carrera, A.L., Harvey, L., Escuro, A.A., Hudson, L., Mays, A., McGinnis, C., Wessel, J.J., Bajpai, S., Beebe, M.L., Kinn, T.J., Klang, M.G., Lord, L., Martin, K., Pompeii‐Wolfe, C., Sullivan, J., Wood, A., Malone, A., & Guenter, P. (2017). ASPEN safe practices for enteral nutrition therapy. Journal of Parenteral and Enteral Nutrition, 41(1), 15-103. https://doi.org/10.1177/0148607116673053 ↵
- ABoullata, J.I., Carrera, A.L., Harvey, L., Escuro, A.A., Hudson, L., Mays, A., McGinnis, C., Wessel, J.J., Bajpai, S., Beebe, M.L., Kinn, T.J., Klang, M.G., Lord, L., Martin, K., Pompeii‐Wolfe, C., Sullivan, J., Wood, A., Malone, A., & Guenter, P. (2017). ASPEN safe practices for enteral nutrition therapy. Journal of Parenteral and Enteral Nutrition, 41(1), 15-103. https://doi.org/10.1177/0148607116673053 ↵
- This work is a derivative of Clinical Procedures for Safer Patient Care by British Columbia Institute of Technology and is licensed under CC BY 4.0 ↵
- Boullata, J.I., Carrera, A.L., Harvey, L., Escuro, A.A., Hudson, L., Mays, A., McGinnis, C., Wessel, J.J., Bajpai, S., Beebe, M.L., Kinn, T.J., Klang, M.G., Lord, L., Martin, K., Pompeii‐Wolfe, C., Sullivan, J., Wood, A., Malone, A., & Guenter, P. (2017). ASPEN safe practices for enteral nutrition therapy. Journal of Parenteral and Enteral Nutrition, 41(1), 15-103. https://doi.org/10.1177/0148607116673053 ↵
- Butcher, H., Bulechek, G., Dochterman, J., & Wagner, C. (2018). Nursing interventions classification (NIC). Elsevier, pp. 250-251,257-258. ↵
- “Administering medication into a gastric tube.jpg” by British Columbia Institute of Technology is licensed under CC BY 4.0 ↵
- Boullata, J.I., Carrera, A.L., Harvey, L., Escuro, A.A., Hudson, L., Mays, A., McGinnis, C., Wessel, J.J., Bajpai, S., Beebe, M.L., Kinn, T.J., Klang, M.G., Lord, L., Martin, K., Pompeii‐Wolfe, C., Sullivan, J., Wood, A., Malone, A., & Guenter, P. (2017). ASPEN safe practices for enteral nutrition therapy. Journal of Parenteral and Enteral Nutrition, 41(1), 15-103. https://doi.org/10.1177/0148607116673053 ↵
- RegisteredNurseRN. (2017, March 22). Crushing medications for tube feeding and oral administration. [Video]. YouTube. All rights reserved. Video used with permission. https://youtu.be/86RzAgHu75U ↵
- This work is a derivative of StatPearls by Tariq, Vashisht, Sinha, and Scherbak and is licensed under CC BY 4.0 ↵
- This work is a derivative of StatPearls by Tariq, Vashisht, Sinha, and Scherbak and is licensed under CC BY 4.0 ↵
- World Health Organization (n.d.). Patient safety. https://www.who.int/patientsafety/medication-safety/technical-reports/en/ ↵
- IOM. Institute of Medicine. (2007). Preventing medication errors. The National Academies Press. https://doi.org/10.17226/11623 ↵
- World Health Organization (WHO). (2017, October 6). WHO: Medication without harm. [Video]. YouTube. All rights reserved. https://youtu.be/MWUM7LIXDeA ↵
- "USMC-080623-M-9467O-024.jpg" by Lance Cpl. Regina A. Ochoa for the United States Marine Corps is in the Public Domain ↵
- “pills-4005382_960_720.jpg” by Nemo73 is licensed under CC0. ↵
When assessing a patient’s oxygenation status, it is important for the nurse to have an understanding of the underlying structures of the respiratory system to best understand their assessment findings. Visit the “Respiratory Assessment" chapter for more information about the structures of the respiratory system.
Video Review for Oxygenation Basics
View the TED-Ed Oxygen's Journey video on YouTube[1]
Breathing Mechanics[2]
Gas Exchange[3]
Carbon Dioxide Transport[4]
Assessing Oxygenation Status
A patient’s oxygenation status is routinely assessed using pulse oximetry, referred to as SpO2. SpO2 is an estimated oxygenation level based on the saturation of hemoglobin measured by a pulse oximeter. Because the majority of oxygen carried in the blood is attached to hemoglobin within the red blood cell, SpO2 estimates how much hemoglobin is “saturated” with oxygen. The target range of SpO2 for an adult is 94-98%.[5] For patients with chronic respiratory conditions, such as COPD, the target range for SpO2 is often lower at 88% to 92%. Although SpO2 is an efficient, noninvasive method to assess a patient’s oxygenation status, it is an estimate and not always accurate. For example, if a patient is severely anemic and has a decreased level of hemoglobin in the blood, the SpO2 reading is affected. Decreased peripheral circulation can also cause a misleading low SpO2 level.
A more specific measurement of oxygen and carbon dioxide in the blood is obtained through an arterial blood gas (ABG). ABG results are often obtained for patients who have deteriorating or unstable respiratory status requiring urgent and emergency treatment. An ABG is a blood sample that is typically drawn from the radial artery by a respiratory therapist, emergency or critical care nurse, or health care provider. ABG results evaluate oxygen, carbon dioxide, pH, and bicarbonate levels. The partial pressure of oxygen in the blood is referred to as PaO2. The normal PaO2 level of a healthy adult is 80 to 100 mmHg. The PaO2 reading is more accurate than a SpO2 reading because it is not affected by hemoglobin levels. The PaCO2 level is the partial pressure of carbon dioxide in the blood. The normal PaCO2 level of a healthy adult is 35-45 mmHg. The normal range of pH level for arterial blood is 7.35-7.45, and the normal range for the bicarbonate (HCO3) level is 22-26. The SaO2 level is also obtained, which is the calculated arterial oxygen saturation level. See Table 11.2a for a summary of normal ranges of ABG values.[6]
Table 11.2a Normal Ranges of ABG Values
| Value | Description | Normal Range |
|---|---|---|
| pH | Acid-base balance of blood | 7.35-7.45 |
| PaO2 | Partial pressure of oxygen | 80-100 mmHg |
| PaCO2 | Partial pressure of carbon dioxide | 35-45 mmHg |
| HCO3 | Bicarbonate level | 22-26 mEq/L |
| SaO2 | Calculated oxygen saturation | 95-100% |
Hypoxia and Hypercapnia
Hypoxia is defined as a reduced level of tissue oxygenation. Hypoxia has many causes, ranging from respiratory and cardiac conditions to anemia. Hypoxemia is a specific type of hypoxia that is defined as decreased partial pressure of oxygen in the blood (PaO2), measured by an arterial blood gas (ABG).
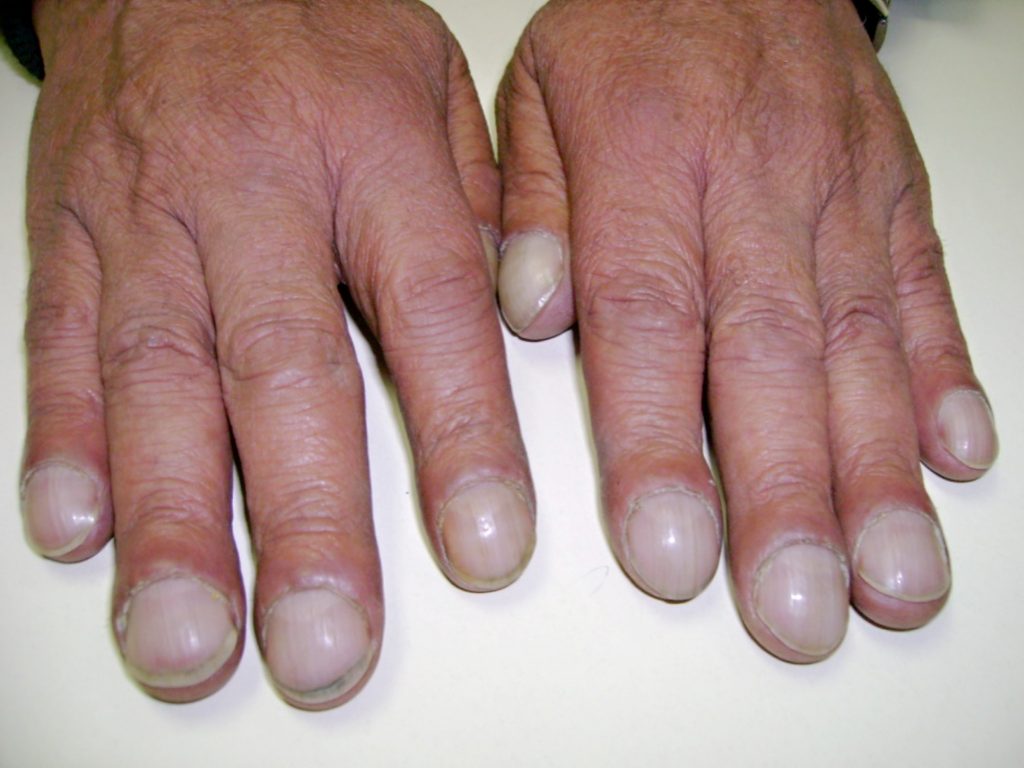
Early signs of hypoxia are anxiety, confusion, and restlessness. As hypoxia worsens, the patient’s level of consciousness and vital signs will worsen, with increased respiratory rate and heart rate and decreased pulse oximetry readings. Late signs of hypoxia include bluish discoloration of the skin and mucous membranes called cyanosis. Cyanosis is most easily seen around the lips and in the oral mucosa. A sign of chronic hypoxia is clubbing, a gradual enlargement of the fingertips (see Figure 11.1[7]). See Table 11.2b for symptoms and signs of hypoxia.[8]
Hypercapnia is an elevated level of carbon dioxide in the blood. This level is measured by the PaCO2 level in an ABG test and is indicated when the PaCO2 level is higher than 45. Hypercapnia is typically caused by hypoventilation or areas of the alveoli that are ventilated but not perfused. In a state of hypercapnia or hypoventilation, there is an accumulation of carbon dioxide in the blood. The increased carbon dioxide causes the pH of the blood to drop, leading to a state of respiratory acidosis. You can read more about respiratory acidosis in the “Fluids and Electrolytes” chapter of the Open RN Nursing Fundamentals book. Patients with hypercapnia can present with tachycardia, dyspnea, flushed skin, confusion, headaches, and dizziness. If the hypercapnia develops gradually over time, such as in a patient with chronic obstructive pulmonary disease (COPD), symptoms may be mild or may not be present at all. Hypercapnia is managed by addressing its underlying cause. A noninvasive positive pressure device such as a BiPAP may provide support to patients who are having trouble breathing normally, but if this is not sufficient, intubation may be required.[9]
Table 11.2b Symptoms and Signs of Hypoxia
| Signs & Symptoms | Description |
|---|---|
| Restlessness | Patient may become increasingly fidgety, move about the bed, demonstrate signs of anxiety and agitation. Restlessness is an early sign of hypoxia. |
| Tachycardia | An elevated heart rate (above 100 beats per minute in adults) can be an early sign of hypoxia. |
| Tachypnea | An increased respiration rate (above 20 breaths per minute in adults) is an indication of respiratory distress. |
| Shortness of breath (Dyspnea) | Shortness of breath is a subjective symptom of not getting enough air. Depending on severity, dyspnea causes increased levels of anxiety. |
| Oxygen saturation level (SpO2) | Oxygen saturation levels should be above 94% for an adult without an underlying respiratory condition. |
| Use of accessory muscles | Use of neck or intercostal muscles when breathing is an indication of respiratory distress. |
| Noisy breathing | Audible noises with breathing are an indication of respiratory conditions. Assess lung sounds with a stethoscope for adventitious sounds such as wheezing, rales, or crackles. Secretions can plug the airway, thereby decreasing the amount of oxygen available for gas exchange in the lungs. |
| Flaring of nostrils or pursed lip breathing | Flaring is a sign of hypoxia, especially in infants. Pursed-lip breathing is a technique often used in patients with COPD. This breathing technique increases the amount of carbon dioxide exhaled so that more oxygen can be inhaled. |
| Position of patient | Patients in respiratory distress may sit up or lean over by resting arms on their legs to enhance lung expansion. Patients who are hypoxic may not be able to lie flat in bed. |
| Ability of patient to speak in full sentences | Patients in respiratory distress may be unable to speak in full sentences or may need to catch their breath between sentences. |
| Skin color (Cyanosis) | Changes in skin color to bluish or gray are a late sign of hypoxia. |
| Confusion or loss of consciousness (LOC) | This is a worsening sign of hypoxia. |
| Clubbing | Clubbing, a gradual enlargement of the fingertips, is a sign of chronic hypoxia. |
Treating Hypoxia
Acute hypoxia is a medical emergency and should be treated promptly with oxygen therapy. Failure to initiate oxygen therapy when needed can result in serious harm or death of the patient. Although oxygen is considered a medication that requires a prescription, oxygen therapy may be initiated without a physician’s order in emergency situations as part of the nurse’s response to the “ABCs,” a common abbreviation for airway, breathing, and circulation. Most agencies have a protocol in place that allows nurses to apply oxygen in emergency situations. After applying oxygen as needed, the nurse then contacts the provider, respiratory therapist, or rapid response team, depending on the severity of hypoxia. Devices such high flow oxymasks, CPAP, BiPAP, or mechanical ventilation may be initiated by the respiratory therapist or provider to deliver higher amounts of inspired oxygen. Various types of oxygenation devices are further explained in the “Oxygenation Equipment” section.
Prescription orders for oxygen therapy will include two measurements of oxygen to be delivered - the oxygen flow rate and the fraction of inspired oxygen (FiO2). The oxygen flow rate is the number dialed up on the oxygen flow meter between 1 L/minute and 15 L/minute. Fio2 is the concentration of oxygen the patient inhales. Room air contains 21% oxygen concentration, so the FiO2 for supplementary oxygen therapy will range from 21% to 100% concentration.
In addition to administering oxygen therapy, there are several other interventions the nurse should consider implementing to a hypoxic patient. Additional interventions used to treat hypoxia in conjunction with oxygen therapy are outlined in Table 11.2c.[10]
Table 11.2c Interventions to Manage Hypoxia
| Interventions | Additional Information |
|---|---|
| Raise the Head of the Bed | Raising the head of the bed to high Fowler’s position promotes effective chest expansion and diaphragmatic descent, maximizes inhalation, and decreases the work of breathing. Patients with COPD who are short of breath may gain relief by sitting upright or leaning over a bedside table while in bed. |
| Encourage Enhanced Breathing and Coughing Techniques | Enhanced breathing and coughing techniques such as using pursed-lip breathing, coughing and deep breathing, huffing technique, incentive spirometry, and flutter valves may assist patients to clear their airway while maintaining their oxygen levels. See the following “Enhanced Breathing and Coughing Techniques” section for additional information regarding these techniques. |
| Manage Oxygen Therapy and Equipment | If the patient is already on supplemental oxygen, ensure the equipment is turned on, set at the required flow rate, correctly positioned on the patient, and properly connected to an oxygen supply source. If a portable tank is being used, check the oxygen level in the tank. Ensure the connecting oxygen tubing is not kinked, which could obstruct the flow of oxygen. Feel for the flow of oxygen from the exit ports on the oxygen equipment. In hospitals where medical air and oxygen are used, ensure the patient is connected to the oxygen flow port. Hospitals in America follow the national standard that oxygen flow ports are green and air outlets are yellow. |
| Assess the Need for Respiratory Medications | Pharmacological management is essential for patients with respiratory disease such as asthma, COPD, or severe allergic response. Bronchodilators effectively relax smooth muscles and open airways. Glucocorticoids relieve inflammation and also assist in opening air passages. Mucolytics decrease the thickness of pulmonary secretions so that they can be expectorated more easily. |
| Provide Oral Suctioning if Needed | Some patients may have a weakened cough that inhibits their ability to clear secretions from the mouth and throat. Patients with muscle disorders or those who have experienced a cerebral vascular accident (CVA) are at risk for aspiration pneumonia, which is caused by the accidental inhalation of material from the mouth or stomach. Provide oral suction if the patient is unable to clear secretions from the mouth and pharynx. See the chapter on “Tracheostomy Care and Suctioning” for additional details on suctioning. |
| Provide Pain Relief If Needed | Provide adequate pain relief if the patient is reporting pain. Pain increases anxiety and may inhibit the patient’s ability to take in full breaths. |
| Consider the Side Effects of Pain Medications | A common side effect of pain medication is sedation and respiratory depression. For more information about interventions to manage respiratory depression, see the “Oxygenation” chapter in the Open RN Nursing Fundamentals textbook. |
| Consider Other Devices to Enhance Clearance of Secretions | Chest physiotherapy and specialized devices assist with secretion clearance, such as handheld flutter valves or vests that inflate and vibrate the chest wall. Consider requesting a consultation with a respiratory therapist based on the patient’s situation. |
| Plan Frequent Rest Periods Between Activities | Patients experiencing hypoxia often feel short of breath and fatigue easily. Allow the patient to rest frequently, and space out interventions to decrease oxygen demand in patients whose reserves are likely limited. |
| Consider Other Potential Causes of Dyspnea | If a patient’s level of dyspnea is worsening, assess for other underlying causes in addition to the primary diagnosis. Are there other respiratory, cardiovascular, or hematological conditions such as anemia occurring? Start by reviewing the patient’s most recent hemoglobin and hematocrit lab results. Completing a thorough assessment may reveal abnormalities in these systems to report to the health care provider. |
| Consider Obstructive Sleep Apnea | Patients with obstructive sleep apnea (OSA) are often not previously diagnosed prior to hospitalization. The nurse may notice the patient snores, has pauses in breathing while snoring, or awakens not feeling rested. These signs may indicate the patient is unable to maintain an open airway while sleeping, resulting in periods of apnea and hypoxia. If these apneic periods are noticed but have not been previously documented, the nurse should report these findings to the health care provider for further testing and follow-up. Testing consists of using continuous pulse oximetry while the patient is sleeping to determine if the patient is hypoxic during these episodes and if a CPAP device should be prescribed. See the box below for additional information regarding OSA. |
| Anxiety | Anxiety often accompanies the feeling of dyspnea and can worsen it. Anxiety in patients with COPD is chronically undertreated. It is important for the nurse to address the feelings of anxiety and dyspnea. Anxiety can be relieved by teaching enhanced breathing and coughing techniques, encouraging relaxation techniques, or administering antianxiety medications. |
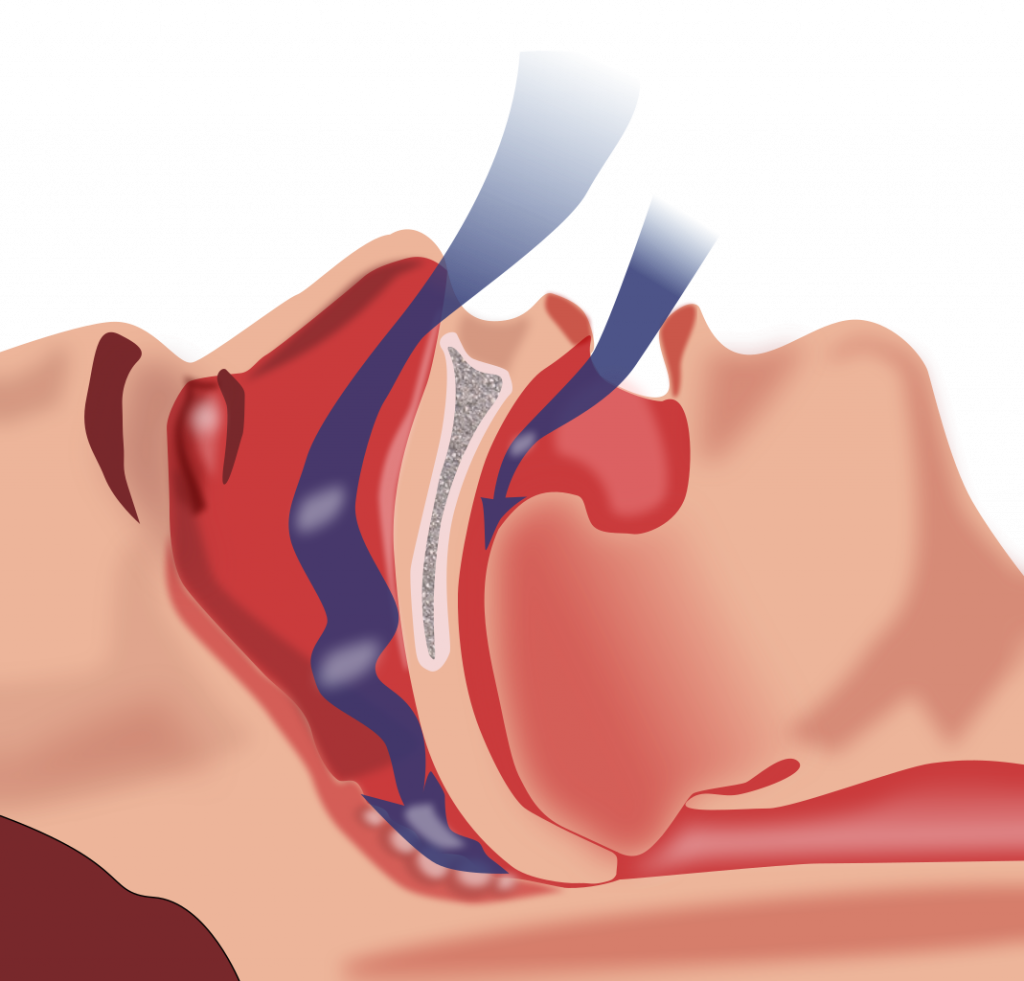
Obstructive Sleep Apnea (OSA) is the most common type of sleep apnea. See Figure 11.2[11] for an illustration of OSA. As soft tissue falls to the back of the throat, it impedes the passage of air (blue arrows) through the trachea and is characterized by repeated episodes of complete or partial obstructions of the upper airway during sleep. The episodes of breathing cessations are called “apneas,” meaning “without breath.” Despite the effort to breathe, apneas are associated with a reduction in blood oxygen saturation due to the obstruction of the airway. Treatment for OSA often includes the use of a CPAP device.
Enhanced Breathing and Coughing Techniques
In addition to oxygen therapy and the interventions listed in Table 11.2c to implement for a patient experiencing dyspnea and hypoxia, there are several techniques a nurse can teach a patient to use to enhance their breathing and coughing. These techniques include pursed-lip breathing, incentive spirometry, coughing and deep breathing, and the huffing technique.
Pursed-Lip Breathing
Pursed-lip breathing is a technique that allows people to control their oxygenation and ventilation. The technique requires a person to inspire through the nose and exhale through the mouth at a slow controlled flow. See Figure 11.3[12] for an illustration of pursed-lip breathing. This type of exhalation gives the person a puckered or pursed appearance. By prolonging the expiratory phase of respiration, a small amount of positive end-expiratory pressure (PEEP) is created in the airways that helps to keep them open so that more air can be exhaled, thus reducing air trapping that occurs in some conditions such as COPD. Pursed-lip breathing often relieves the feeling of shortness of breath, decreases the work of breathing, and improves gas exchange. People also regain a sense of control over their breathing while simultaneously increasing their relaxation.[13]

View the COPD Foundation's YouTube video to learn more about pursed-lip breathing:
Breathing Techniques[14]
Incentive Spirometry
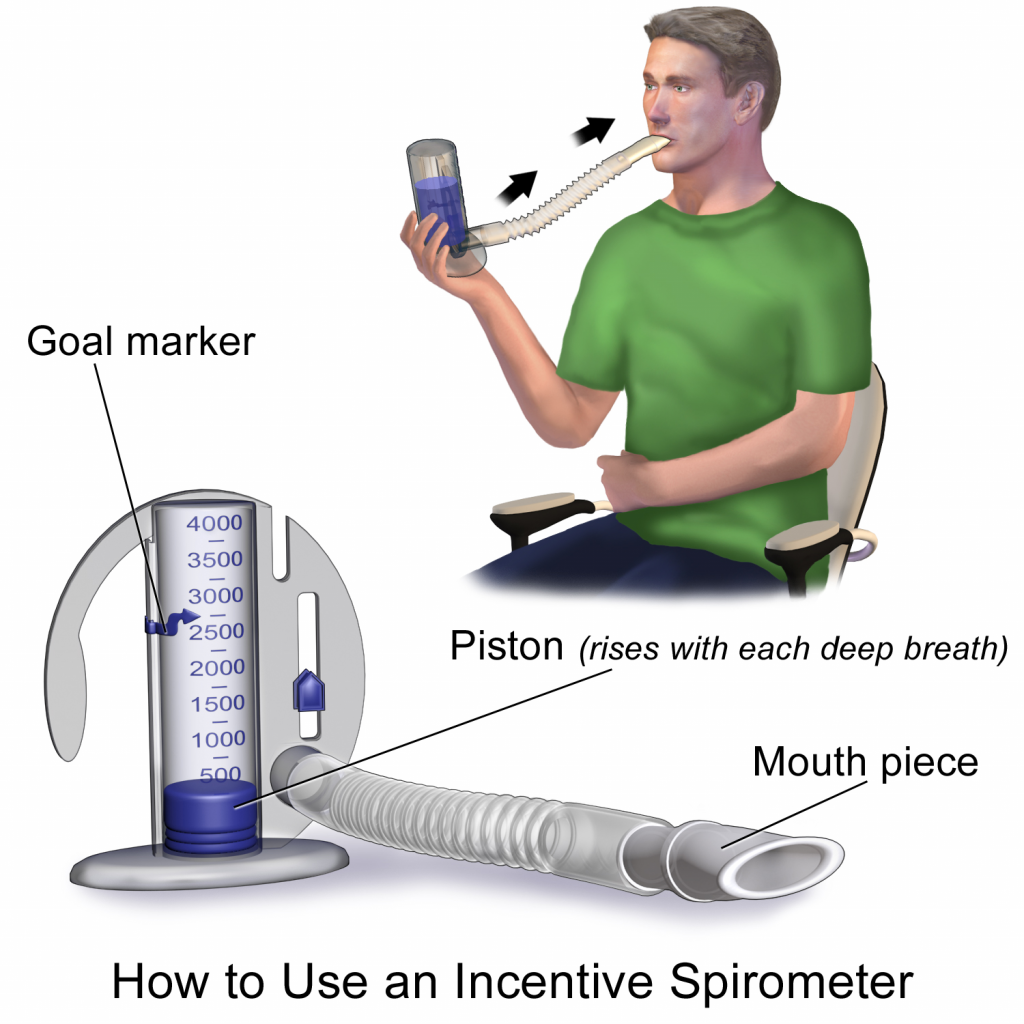
An incentive spirometer is a medical device often prescribed after surgery to prevent and treat atelectasis. Atelectasis occurs when alveoli become deflated or filled with fluid and can lead to pneumonia. See Figure 11.4[15] for an image of a patient using an incentive spirometer. While sitting upright, the patient should breathe in slowly and deeply through the tubing with the goal of raising the piston to a specified level. The patient should attempt to hold their breath for 5 seconds, or as long as tolerated, and then rest for a few seconds. This technique should be repeated by the patient 10 times every hour while awake.[16] The nurse may delegate this intervention to unlicensed assistive personnel, but the frequency in which it is completed and the volume achieved should be documented and monitored by the nurse.
Coughing and Deep Breathing
Teaching the coughing and deep breathing technique is similar to incentive spirometry but no device is required. The patient is encouraged to take deep, slow breaths and then exhale slowly. After each set of breaths, the patient should cough. This technique is repeated 3 to 5 times every hour.
Huffing Technique
The huffing technique is helpful for patients who have difficulty coughing. Teach the patient to inhale with a medium-sized breath and then make a sound like “Ha” to push the air out quickly with the mouth slightly open.
Vibratory PEP Therapy
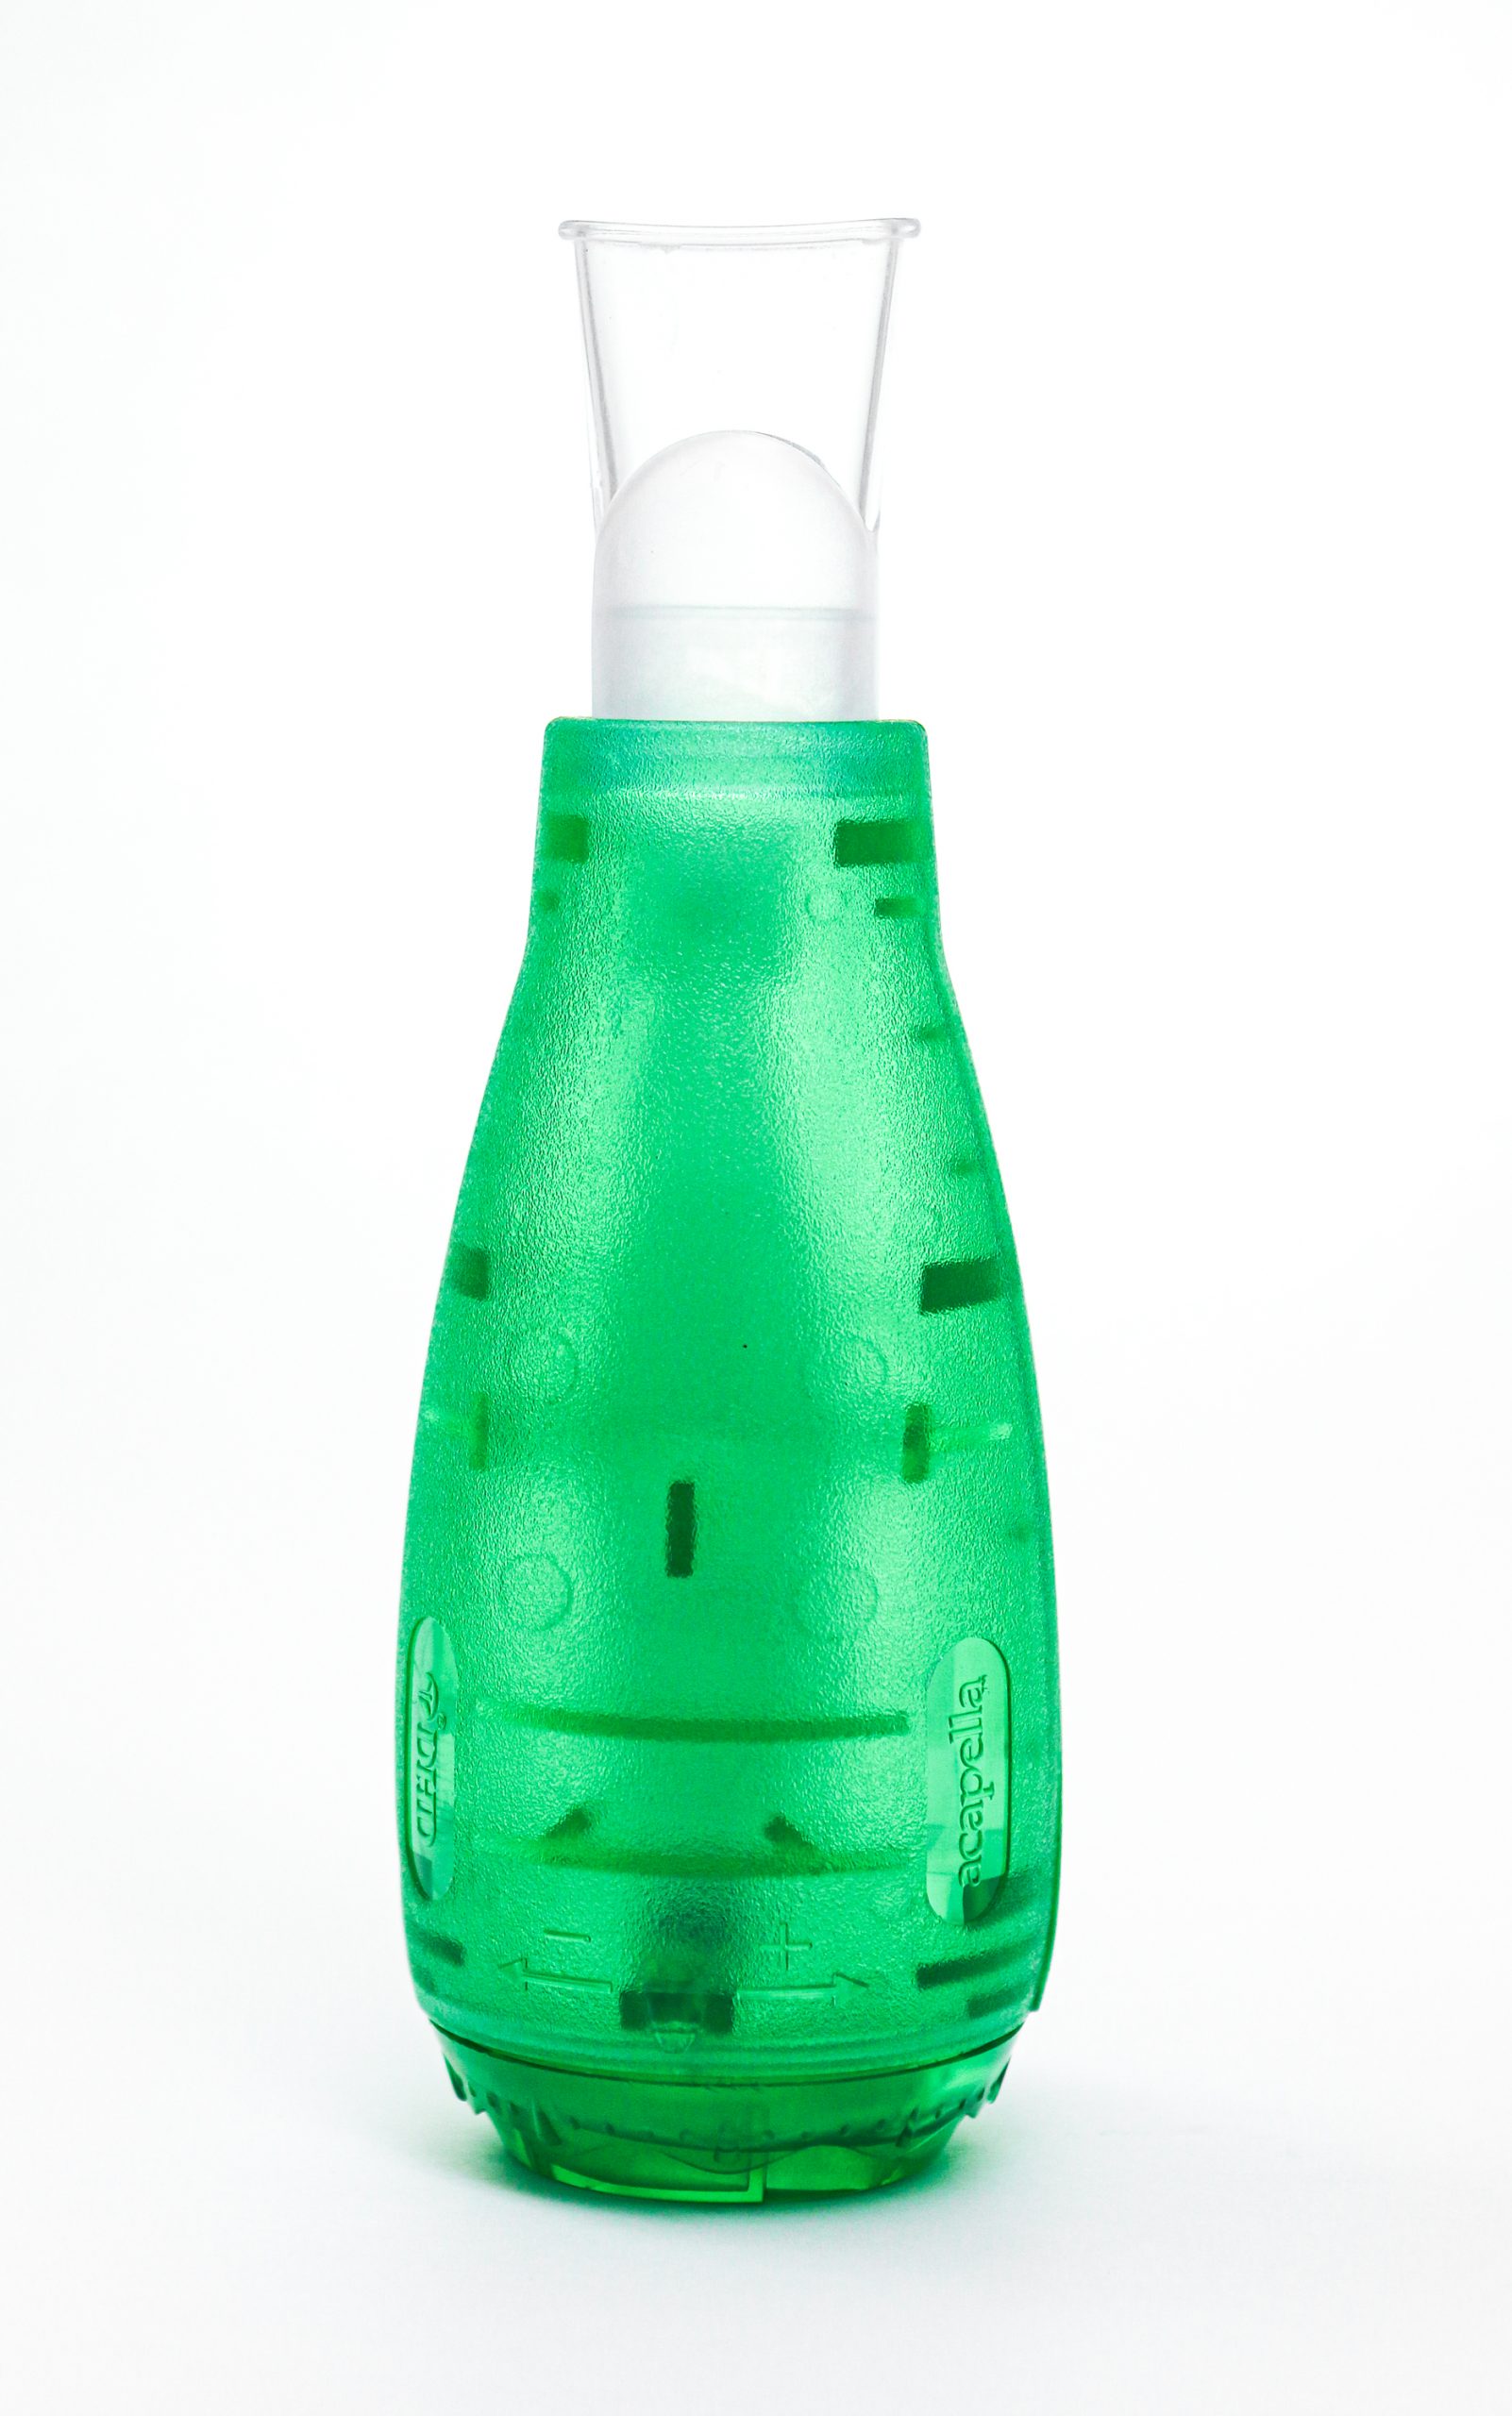
Vibratory Positive Expiratory Pressure (PEP) therapy uses handheld devices such as “flutter valves” or “Acapella” devices for patients who need assistance in clearing mucus from their airways. These devices (see Figure 11.5[17]) require a prescription and are used in collaboration with a respiratory therapist or advanced health care provider. To use Vibratory PEP therapy, the patient should sit up, take a deep breath, and blow into the device. A flutter valve within the device creates vibrations that help break up the mucus so the patient can cough it up and spit it out. Additionally, a small amount of positive end-expiratory pressure (PEEP) is created in the airways that helps to keep them open so that more air can be exhaled.
Visit NHS University Hospitals Plymouth Physiotherapy's "Acapella" video on YouTube to review using a flutter valve device[18]

