20.11 Checklist for Drain Management
Open Resources for Nursing (Open RN)
Drain management systems are commonly used during post-operative surgical management to remove drainage, prevent infection, and enhance wound healing. A drain may be superficial in the skin or deep in an organ, duct, or cavity, such as a hematoma. A patient may have several drains depending on the extent and type of surgery. A closed system uses a vacuum system to withdraw fluids and collect them in a reservoir. Closed systems must be emptied and drainage measured routinely according to agency policy.
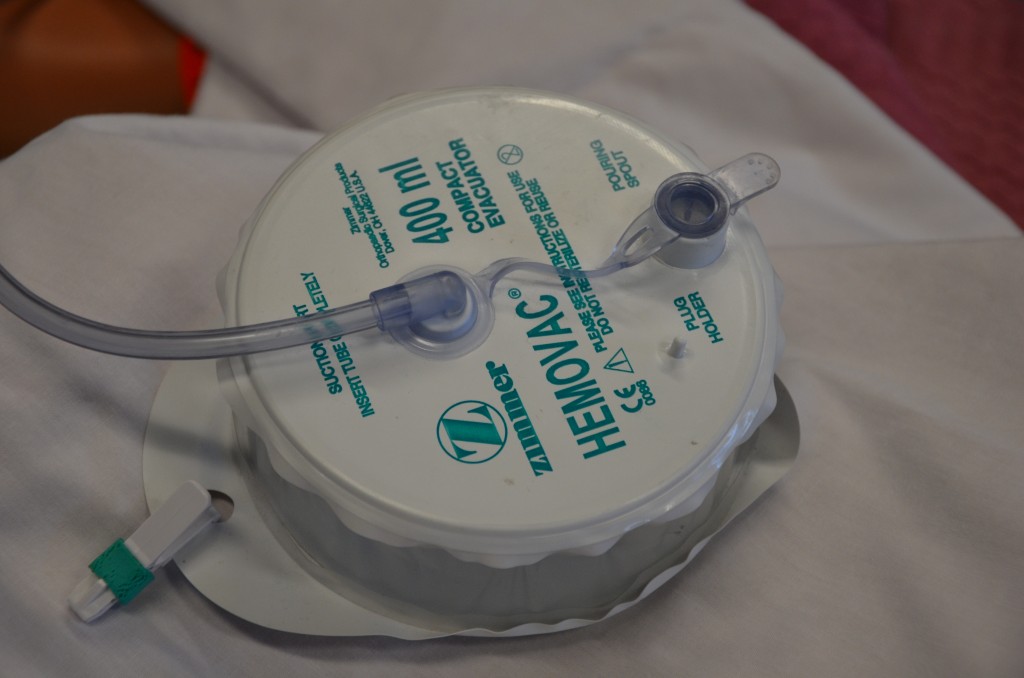
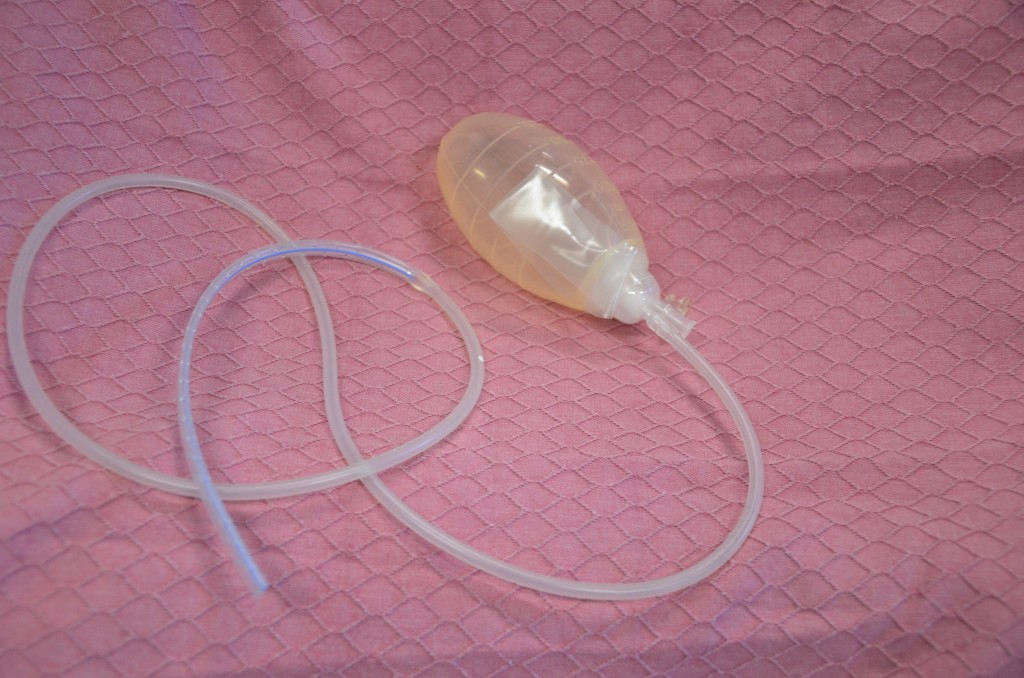
Drainage tubes contain perforations to allow fluid to drain from the surgical wound site. The drainage is collected in a closed sterile collection system/reservoir, such as a Hemovac or Jackson-Pratt. The amount of drainage varies depending on location and type of surgery. A Hemovac drain (see Figure 20.38[1]) can hold up to 500 mL of drainage. A Jackson-Pratt (JP) drain (see Figure 20.39[2]) is used for smaller amounts of drainage, usually ranging from 25 to 50 mL. Drains are usually sutured to the skin to prevent accidental removal, and the drainage site is covered with a sterile dressing. The site and drain should be checked periodically throughout the shift to ensure the drain is functioning effectively and that no leaking is occurring.


Checklist for Drain Management
Use the checklist below to review the steps for completion of “Drain Management.”
Steps
Disclaimer: Always review and follow agency policy regarding this specific skill.
- Gather supplies: drainage measurement container, nonsterile gloves, waterproof pad, and alcohol swab.
- Perform safety steps:
- Perform hand hygiene.
- Check the room for transmission-based precautions.
- Introduce yourself, your role, the purpose of your visit, and an estimate of the time it will take.
- Confirm patient ID using two patient identifiers (e.g., name and date of birth).
- Explain the process to the patient and ask if they have any questions.
- Be organized and systematic.
- Use appropriate listening and questioning skills.
- Listen and attend to patient cues.
- Ensure the patient’s privacy and dignity.
- Assess ABCs.
- Apply nonsterile gloves and goggles or face shield according to agency policy to reduce the transmission of microorganisms and protect against an accidental body fluid exposure.
- Maintaining a sterile technique, remove the plug from the pouring spout as indicated on the drain:
- Open the plug pointing away from your face to avoid an accidental splash of contaminated fluid.
- Maintain the plug’s sterility.
- Notice that the vacuum will be broken and the reservoir (drainage collection system) will expand.
- Gently tilt the opening of the reservoir toward the measuring container and pour out the drainage away from you to prevent exposure to body fluids. Do not touch the measuring container with the reservoir opening.
- Place the drainage container on the bed or hard surface, tilt it away from your face, and compress the drain to flatten it with one hand to remove all the air before closing the spout to establish the vacuum system.
- Cleanse the plug with the alcohol swab per agency policy. Maintaining sterility, place the plug back into the pour spout of the drainage system to establish the vacuum system of the drainage system.
- Secure the device onto the patient’s gown using a safety pin; check patency and placement of tube. Ensure that enough slack is present in tubing and that the reservoir hangs lower than the wound. Proper placement of the reservoir allows gravity to facilitate wound drainage. Providing enough slack to accommodate patient movement prevents tension of the drainage system and pulling on the tubing and insertion site.
- Note the characteristics of the drainage: color, consistency, odor, and amount. Drainage counts as patient fluid output and must be documented on the patient chart per agency policy.
- Monitor and empty drains frequently in the post-operative period to reduce the weight of the reservoir and to assess drainage.
- Remove gloves and perform hand hygiene.
- Assist the patient to a comfortable position, ask if they have any questions, and thank them for their time.
- Ensure safety measures when leaving the room:
- CALL LIGHT: Within reach
- BED: Low and locked (in lowest position and brakes on)
- SIDE RAILS: Secured
- TABLE: Within reach
- ROOM: Risk-free for falls (scan room and clear any obstacles)
- Document the procedure and assessment findings according to agency policy. Report any unusual findings or concerns to the health care provider. If the amount of drainage increases or changes, notify the appropriate health care provider according to agency policy.
- If the amount of drainage significantly decreases, the drain may be ready to be assessed and removed.
- Notify required health care provider if the wound appears infected.
- Record the number of drains if there is more than one, and record each one separately.
- “DSC_0272-1024x678.jpg” by British Columbia Institute of Technology is licensed under CC BY 4.0. Access for free at https://opentextbc.ca/clinicalskills/chapter/4-8-drain-management-and-removal/ ↵
- ”DSC_0285-1024x678.jpg” by British Columbia Institute of Technology is licensed under CC BY 4.0. Access for free at https://opentextbc.ca/clinicalskills/chapter/4-8-drain-management-and-removal/ ↵

