4 Managing Long Documents in Microsoft Word
Learning Objectives
By the end of this section, you will be able to:
- Use the tools in Pages command group
- Utilize Format Painter to apply formatting in a long document
- Use some of the tools on the References tab
- Create bookmarks for document navigation
Long documents underscore the importance of good navigation tools. Imagine working through a 200-page report, only to have to scroll endlessly through chapter headings to find what you are looking for. This is why tools like cross-references, bookmarks, tables of contents, and tables of figures are so important. They allow you to quickly access different parts of your document, as does the document outline, available in the Navigation pane.
In a business setting, these navigation tools are especially important. Think about your market trends report for WorldCorp. The high-level executives reading your report will need to be able to quickly glance at the table of contents and read a few pages of the report, without having to scroll or flip through many pages of text. In fact, they likely don’t need to read the whole report; they will read the executive summary and skip around the report to graphs that interest them. (The executive summary is a short overview at the beginning of the report that highlights the main points of a long report.)
This section discusses the different command groups and tools that make long documents more user-friendly.
The Pages Command Group
The Pages command group is on the Insert tab, and it contains three commands. The most used one is Page Break; this command allows the user to finish writing on the current page and start writing on a new page. (You can also access many of these same tools on the Layout tab in the Page Setup command group.) Adding a page break can be particularly useful at the end of a chapter or section. To insert a page break, place the cursor where the break will be (the start of the new page), and select the Page Break option. You may also just use the keyboard shortcut Ctrl+Enter to place a page break. If you turn on the ability to view hidden characters, you can see exactly where the page break is on your page (see Figure 4.48). You can also view it easily in the Print layout option on the View tab. Here, we can add a page beak at the end of each major section of the market trends report.
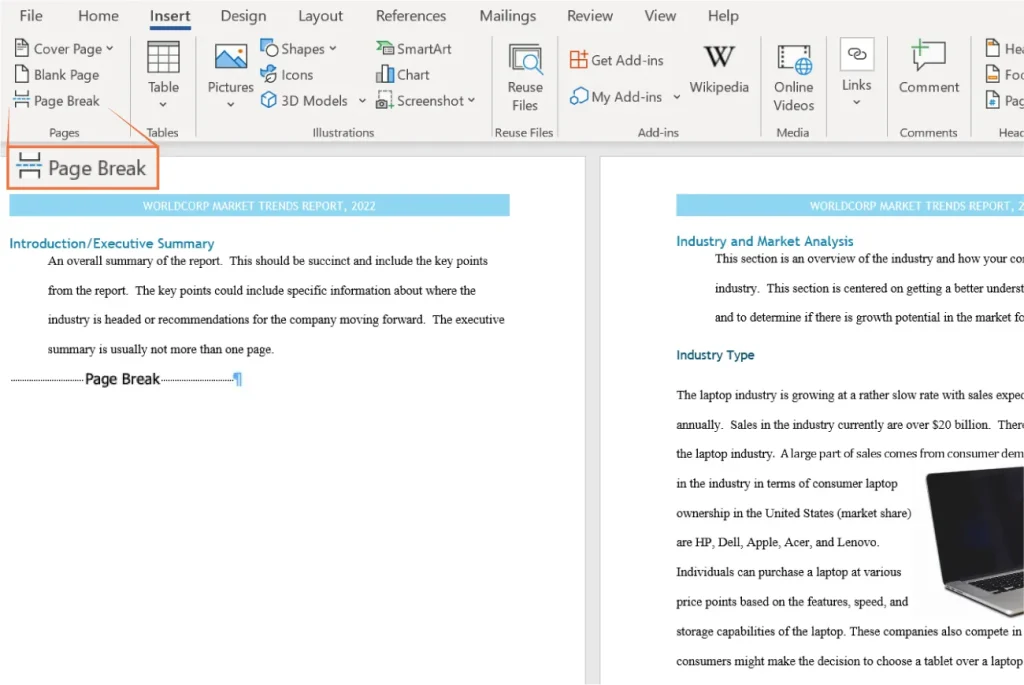
Figure 4.48 Page breaks make the subsequent text start on the next page. Here, it was placed at the end of the Introduction/Executive Summary, so that the Industry and Market Analysis section started on a new page. (Used with permission from Microsoft)
There is another command, Blank Page, which is not as commonly used as Page Break, but can be impactful in long documents such as reports and textbooks. These intentionally blank pages are added to provide a sense of closure or finality before a new chapter or section begins; they make a bigger impact than just a page break because they leave a full page empty. This convention is more often used in the publishing world when needing to, say, start a new chapter on a right-hand page.
To insert a blank page, go through the same steps as inserting a page break: Put the cursor where you want the blank page to be, and select the Blank Page icon.
The last command to discuss in the Pages group is Cover Page. Adding a cover page, or title page, is a common practice for long documents. It is an informative page that contains basic information about the report, such as the title, authors, publishing date, and the department or/and division. Some companies or organizations follow specific guidelines about title pages; formally written reports that follow the Chicago Manual of Style, for instance, do not include any graphics, and the components must follow a set alignment and format. Yet many business reports do not strictly follow any set manual of style, or may simply follow their company’s brand guidelines. It is appropriate in many business settings to use graphics, such as a logo or photograph, on a title page, as in Figure 4.49.
Insert a title page to your market trends report. To insert a title page, select the drop-down menu of the Cover Page command, and choose a design. Word offers many different options for layouts, fonts, colors, and styles. Just update the text and add an image, if applicable.
![A screenshot of a Microsoft Word document with the 'Insert' tab selected. The 'Cover Page' dropdown menu is open, displaying various built-in cover page templates including Austin, Banded, Facet, Filigree, Grid, and Integral. The right side of the image shows part of a document with a blue header and the placeholder text '[DOCUMENT TITLE]'.](https://nicoletcollege.pressbooks.pub/app/uploads/sites/101/2025/07/4.49-1024x667.jpeg)
Figure 4.49 Word comes with some built-in styles and layouts for cover pages, some of which include spaces for graphics. (Used with permission from Microsoft)
Format Painter
Another tool in Word that helps manage long documents is the Format Painter. Format Painter is a command on the Home tab. It is used to copy formatting from another document or section of the same document. This can be useful when you have formatting in one section of the document that you want to copy over to another section, saving you the time and effort of having to format the new document or section again manually.
To use the Format Painter, select the area of the document from which you want to copy the formatting, then choose the Format Painter command. If you single-click the Format Painter, it will only allow it to be used once. To use it multiple times, double-click the Format Painter. It can then be used until you click the Format Painter icon again or press the Esc key. The mouse pointer will change to a little brush, then with the brush, you select all the areas you want to apply the formatting to. Word will automatically mirror and apply the new formatting. If the document has a lot of chapters, if the document outline is multilevel, or if there is a lot of different elements in the previous document, then the Format Painter will not work perfectly. You might need to fix some pages or areas of the newer document. For example, when you have bullets, the Format Painter will not copy over the bullets, but instead will only copy the formatting of the text.
Format Painter is a useful tool for when you want a whole document to have the same formatting, particularly if that document contains copied and pasted text from multiple sources or collaborators. In Figure 4.50, we selected a phrase from the first paragraph, then chose Format Painter and used the brush to select the entire target paragraph. As you can see, the selected text now has matching formatting to the header.
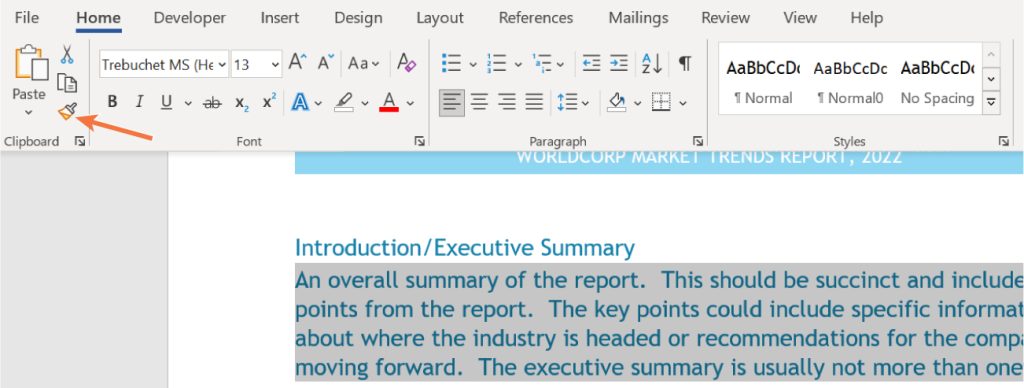
Figure 4.50 The Format Painter is useful for applying multiple types of formatting to a single chunk of text. (Used with permission from Microsoft)
References Tab
The References tab is for working with citations and the front/back matter of books. This is an important tab for anyone who is creating a document with many sources, such as a journal article or economic report. It is also helpful when dealing with long documents that include many sections such as the market trends report. Managing a table of contents, a citation list, or a bibliography manually can be unwieldy, and, fortunately, Word provides lots of tools to help users keep these organized and looking professional.
Let’s review the different command groups on this tab. The first command group is the Table of Contents group. This contains tools for helping the user insert or modify a table of contents. The Footnotes command group is for managing and inserting footnotes and endnotes. The Research command group has two useful tools. The Search tool can be used to find information, definitions, and images online. The Researcher tool allows you to search for sources for information contained in the document. You can then insert the citation or link to the source using the tool. You simply click on the Research tool and type the search term or phrase into the navigation window. The Citations & Bibliography command group is for inserting, formatting, and managing your references. The Captions command group is for when you are working with figures and tables and want to add captions to later create a summary of the figures in your document. The Index command group is for building an index, like what you would find at the end of a textbook. The Table of Authorities is a command group that lawyers use when they need to cite cases and statutes. This next section walks through some of the commands you might find most helpful in this tab.
Table of Contents
If your document is formatted properly, Word will automatically generate a table of contents for you. You can select from a few different styles, which is useful for ensuring that your table of contents matches the look and feel of the rest of your document. Let’s examine the requirements for a table of contents and what you need to have in your document to create a good one.
Headings for Tables of Contents
In the Creating and Working in Documents chapter, we discussed how to insert headings and why these are important for navigating long documents. We also mentioned how to access your document outline in the Navigation Pane. Recall that as you insert different levels of headings (H1, H2, H3, etc.), the Navigation Pane will read the document automatically and display them for you in the form of a document outline. This is particularly useful for long documents, as you can see the outline of the entire document without having to scroll all the way through hundreds of pages of text.
The reason these headings are relevant to generating a table of contents is that the table of contents uses the headings in the same way as the document outline. When you set up your H1s, H2s, and H3s, Word will automatically use those to generate a multilevel table of contents.
Section Breaks for Tables of Contents
In the chapter on Creating and Working in Documents, we also briefly reviewed how to insert section breaks and why they are important. Recall that there are two types of section breaks: continuous section breaks and page breaks. Continuous section breaks are used when you want a new section but want to remain on the same page. They can also be used if you want to have different margins on two different areas of the same page, or to add columns for one section of the text. Page breaks, however, begin a new section on the next page. These do everything the continuous section break does, but simply adds a new page. These are useful for when you want to start a new chapter, for example.
Both types of section breaks are important for generating your table of contents. When you create a table of contents in Word, the program automatically generates page numbers based on the page numbers in your sections. You may have continuous page numbering throughout your document, and so in this case, the table of contents will not be concerned with your sections. However, if there is different page numbering in different sections, the table of contents will reflect this.
Inserting a Table of Contents
You need to have added your headings and sections for the table of contents to work. In the market trends report, we formatted the headings for each major section and the subsections in those sections. Recall the headings were formatted using the Style command group on the Home tab. To insert a table of contents using the headings we have defined, go to the first page of the first section. For the report, we want to include the table of contents after the cover page. So we will go to the Introduction/Executive Summary heading. Leave a blank line before the section heading by pressing Enter to move the first section downward as least one line, as shown in Figure 4.51. This will determine the placement of the table of contents. It should appear before the actual report starts, so before the first section of the document. Now, go to the References tab, choose the drop-down menu called Table of Contents, and choose any of the preset formats. Choose Automatic Table 2 for the market trends report; it will look like Figure 4.52. Conveniently, the table of contents has clickable hyperlinks by default, meaning that you can press Ctrl on the keyboard while clicking the mouse on any part of the table of contents and it will take you to that part of the document.
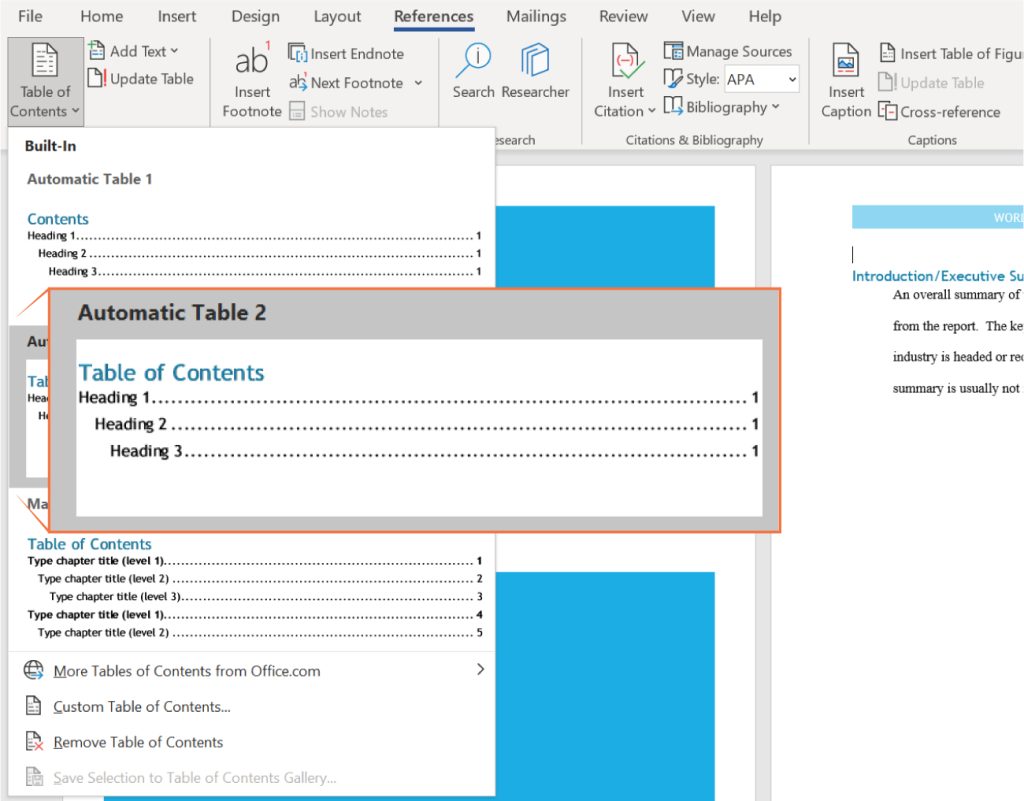
Figure 4.51 Creating a hyperlinked table of contents in Word allows the reader to click right to each section, directly from the table of contents. (Used with permission from Microsoft)
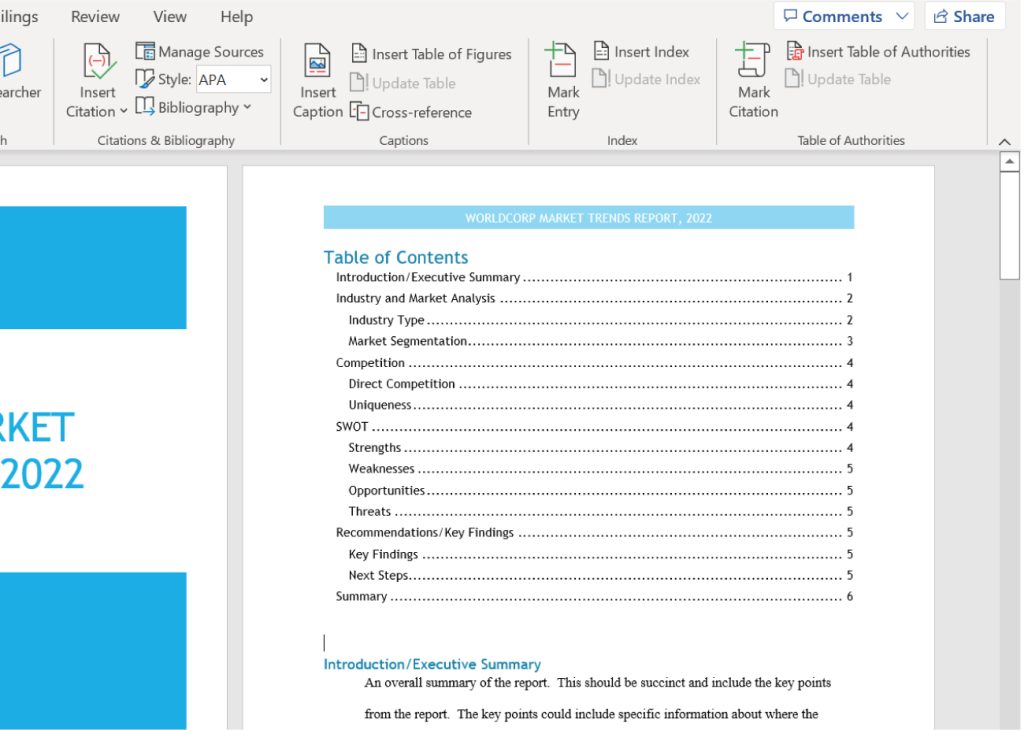
Figure 4.52 The table of contents is arranged using the headings we defined when composing the document. (Used with permission from Microsoft)
Note that any time you update your document, and add or delete any headings, you will also need to update your table of contents. You can do this simply by putting your cursor anywhere on the table of contents and selecting the Update Table button. This will automatically update your headings and page numbers.
Footnotes and Endnotes
A footnote is a way to add notes to a document, and/or a way to cite a reference. A footnote appears at the bottom of the page where the reference occurs. When you add a footnote, a small superscript number or symbol will appear above your text, and then the footnote will automatically be added to the bottom of the page. This is an easy way to add a reference to a source or other general notes. For example, the author may want to add a related thought or comment about the text and have it appear at the bottom of the page in the form of a footnote, so that the reader can quickly and easily read it.
An endnote is similar to a footnote, except that the note appears on a page at the end of the document. Endnotes are typically part of the back matter. They are useful for when you want to have all of your references and comments in one place. However, having them at the end of the document makes it harder for the reader to read them in the moment.
To insert a footnote or endnote, place your cursor at the end of a sentence, and choose the Insert Footnote or Insert Endnote command on the References tab. Word will automatically take you to the bottom of the page (for a footnote) or the end of the document (for an endnote) and add a short line to indicate where the footnote/endnote space will be.
For the market trends report, we need to add a footnote to provide the reference for the information about laptop sales in the industry. We will place the cursor at the end of the sentence (at the end of the word “billion”) as the place where the footnote notation will be inserted (Figure 4.53). The actual footnote will be inserted at the bottom of the page as a blank footnote. You can then insert the appropriate citation for the footnote. In this case, the website for the reference was copied and pasted into the footnote (Figure 4.54). To format the text in the footnote, click on it twice, and the whole line will be selected, then right-click on it and select Style. You can change the font type if you click on Modify. You can further change the footnote type, as there are many standard layouts of how to present a footnote, as Figure 4.55 shows. Enter the citation/text for the footnote.
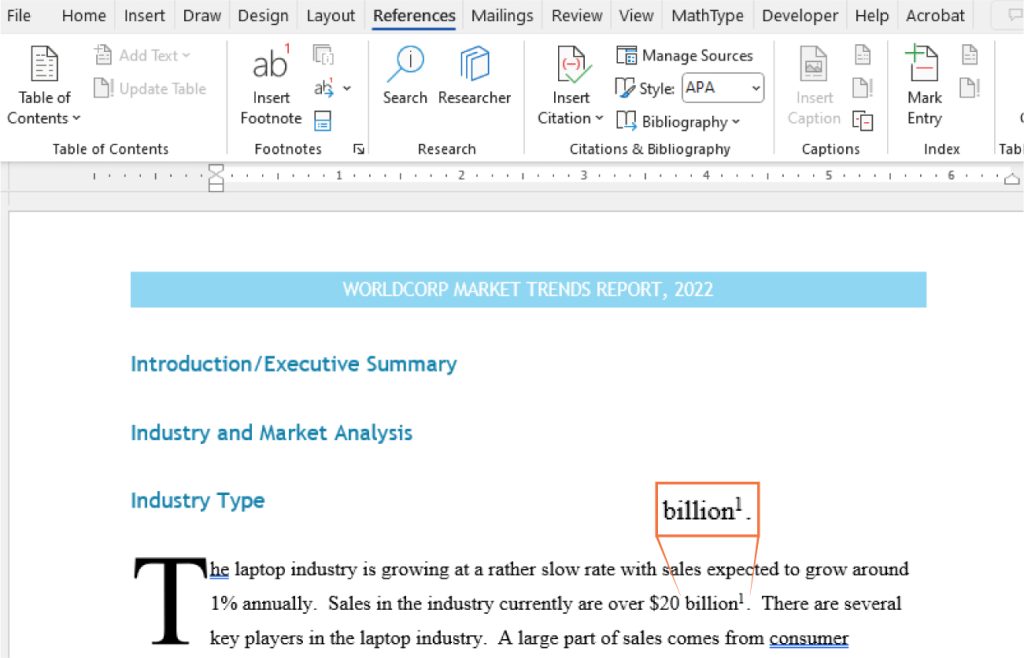
Figure 4.53 The superscript “1” indicates that there is a footnote at the bottom of the page. (Used with permission from Microsoft)
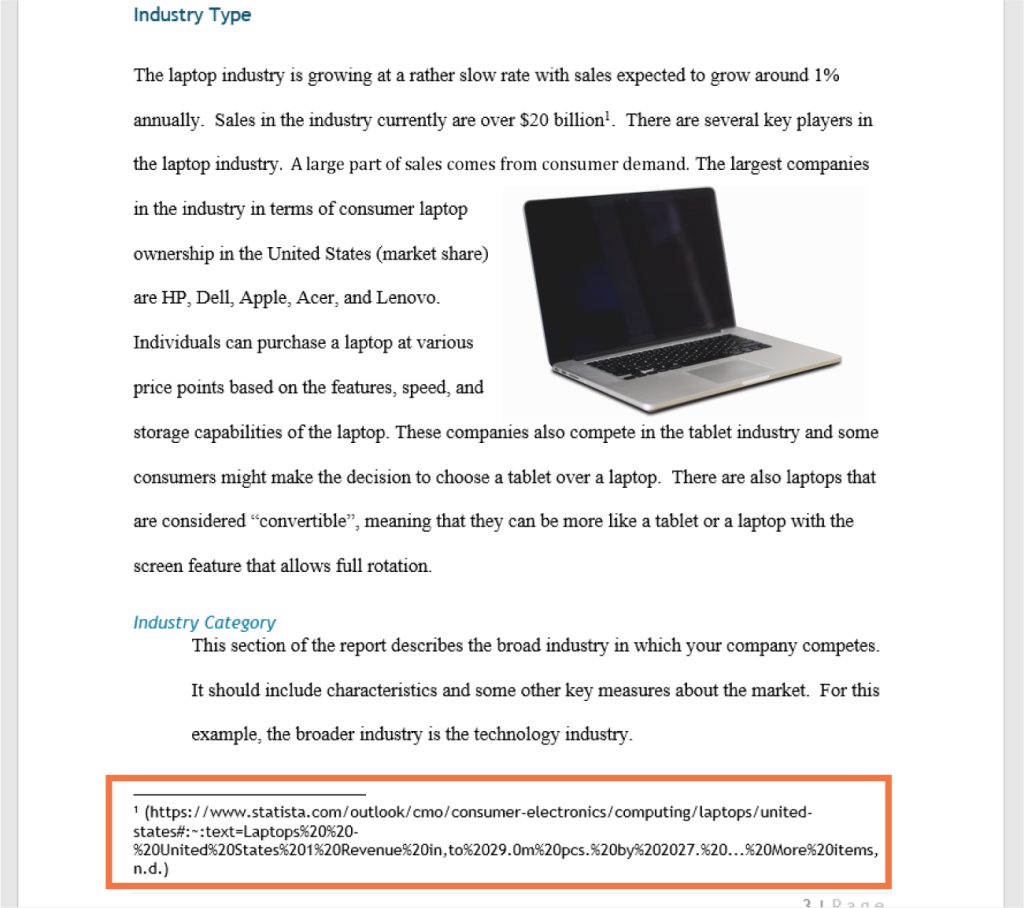
Figure 4.54 Footnotes will be numbered in the body of the document and numbered at the bottom of the page where the footnote is inserted. Include the citation for the reference in the footnote. (Used with permission from Microsoft)
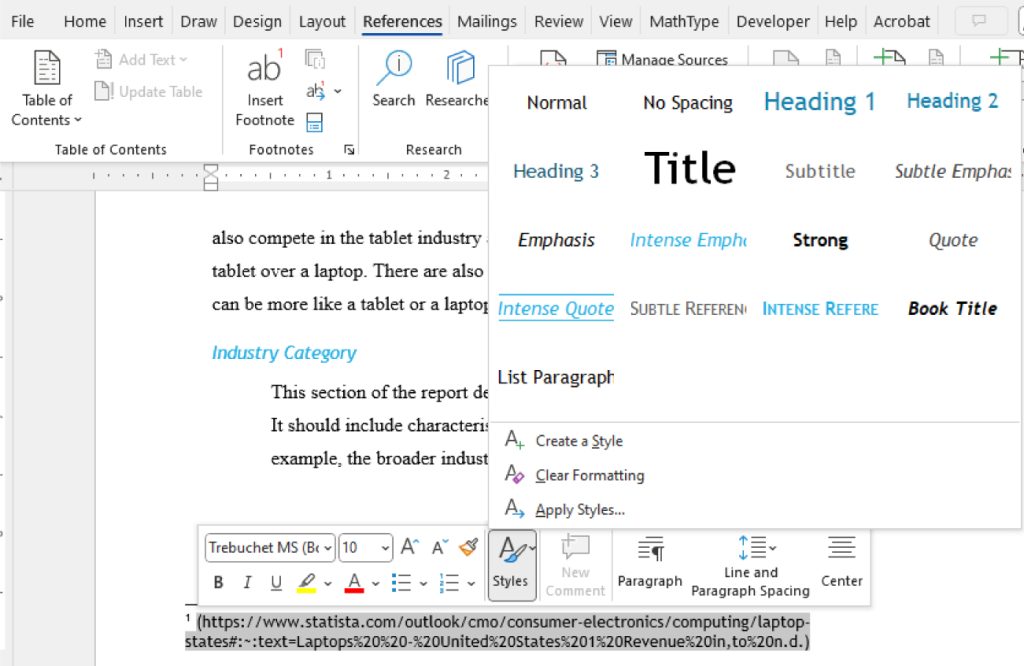
Figure 4.55 The style of the footnote font can be formatted using a wide variety of built-in styles. (Used with permission from Microsoft)
An endnote will look exactly the same as a footnote. The only difference is that it is at the end of the document instead of at the bottom of the page. For the market trends report, we could use endnotes to identify the departments that contributed the specific information in the sections or to add additional context to a statement in the report.
For both footnotes and endnotes, you have the option of changing the numbering system. Word will automatically use numbers (for footnotes) or Roman numerals (for endnotes), but you can change this. Double-click to select the endnote or footnote, then right-click it to activate the context menu, and select Note Options where you can change the numbering format. If you want to change the font or layout, select Style from the context menu.
Table of Figures
A table of figures is similar to a table of contents, except that instead of listing your document’s headings and section breaks, it lists the captioned figures, such as tables and images. This is useful in documents with a lot of statistical analyses, for instance, in which readers will need to easily and quickly find specific graphs or charts. It can also be useful in documents like business reports, where you might want to have a list of the different data tables. Like a table of contents, there are a few requirements that must be met before the table of figures can be generated.
Captions
For Word to automatically generate your table of figures, you need to insert captions for each of them. Let’s first insert a summary chart of data using the skills learned earlier in the chapter into the market trends report. To “caption” a figure, select the entire figure, then choose Insert Caption (see Figure 4.56). In the dialog box that appears (see Figure 4.57), the caption is automatically generated to be “Figure 1,” but you can rename it to whatever you like. There are also options where you can choose the placement of the caption. Do the same for all the figures in your document. Once all your figures are captioned, then you can insert your table of figures.
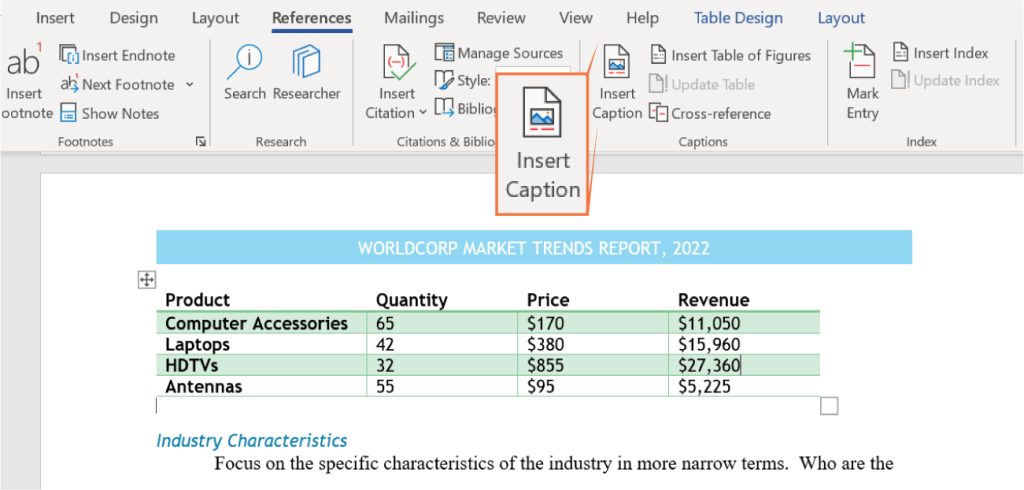
Figure 4.56 You must use the Insert Caption tool to make sure all of your captions will appear in the table of figures. (Used with permission from Microsoft)

Figure 4.57 (a) You can use the default text for captions or type in your own information. (b) The caption is placed below the table in this example, and is formatted according to the Style formatting used for the rest of the document. (Used with permission from Microsoft)
Inserting a Table of Figures
As with inserting a table of contents, first go to the top of your document where you will want your table of figures to appear. Typically, a table of figures is placed right below the table of contents. Now that we have labeled our table with a caption, we can create a table of figures to see how it works. As seen in Figure 4.58, insert a page break, and choose the Insert a Table of Figures command from the References tab. Word will automatically “read” the existing captions, and a table of figures will be generated.
To make your document neat and organized, add the title Table of Figures on top, and insert another page break to separate the Table of Figures page from the beginning of the document.
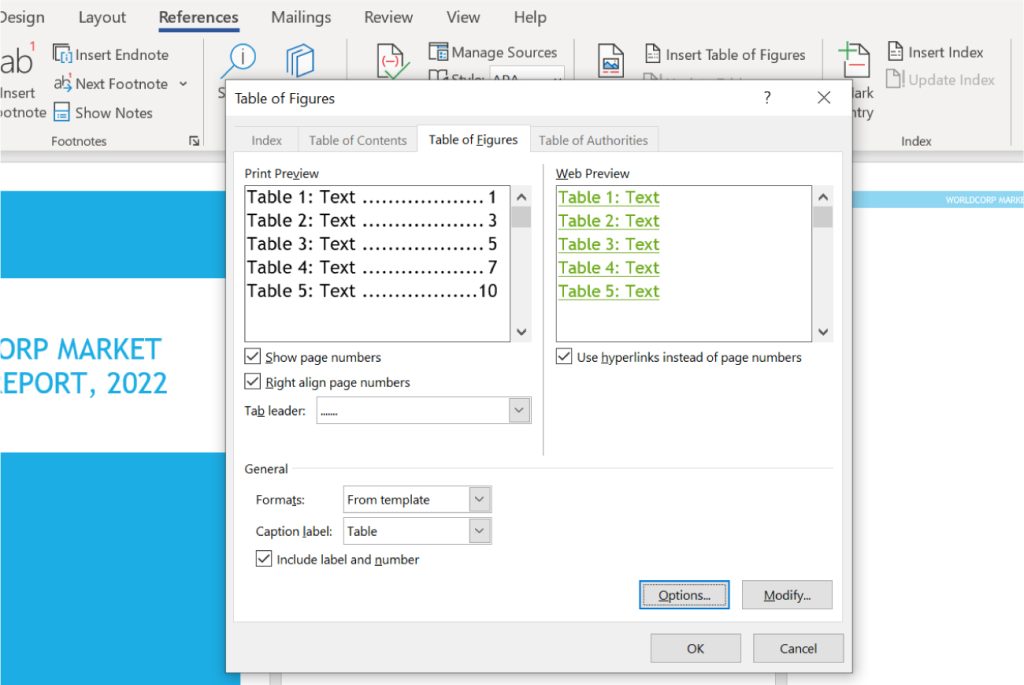
Figure 4.58 You can change some formatting options when you choose Insert Table of Figures. (Used with permission from Microsoft)
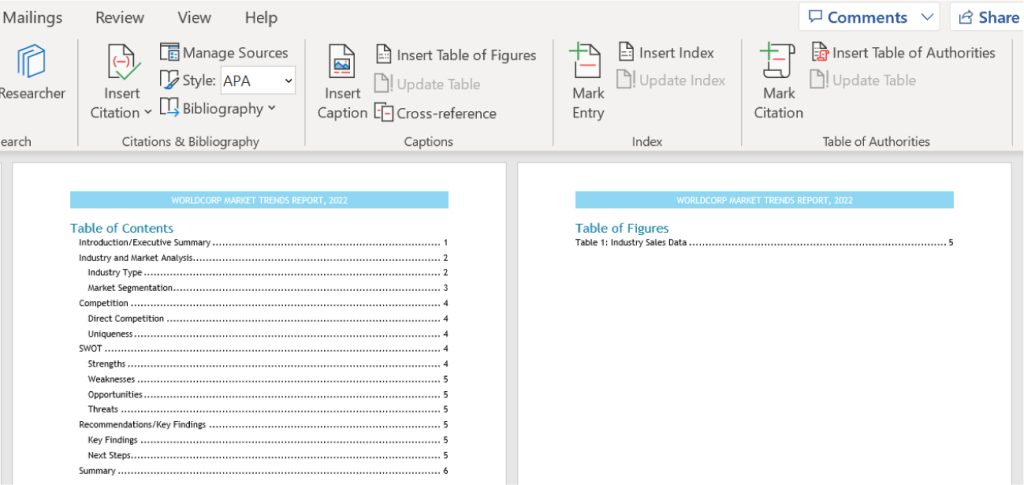
Figure 4.59 The table of figures should look similar to a table of contents, but without the multilevel tiers. (Used with permission from Microsoft)
Linked Bookmarks
Another helpful tool for navigating long documents is the bookmark. You can add bookmark links throughout your document for better navigation. Place the cursor where you want the bookmark to link up to—a section header, for example, or the beginning of an important paragraph—and go to the Insert tab and click Bookmark. In the dialog box, type a name for your bookmark Figure 4.60. In this case, we chose to bookmark the start of the body text. Now, select a word that will link up to the bookmark, right-click on it, and select Hyperlink from the context menu. The same hyperlink dialog box will appear, but this time select Place in This Document. Click on the bookmark you just made, and then click OK; the link will be set Figure 4.61. Conversely, if you want to remove a bookmark from Word, click the Bookmark command in the Insert menu, locate it, and then select Delete.
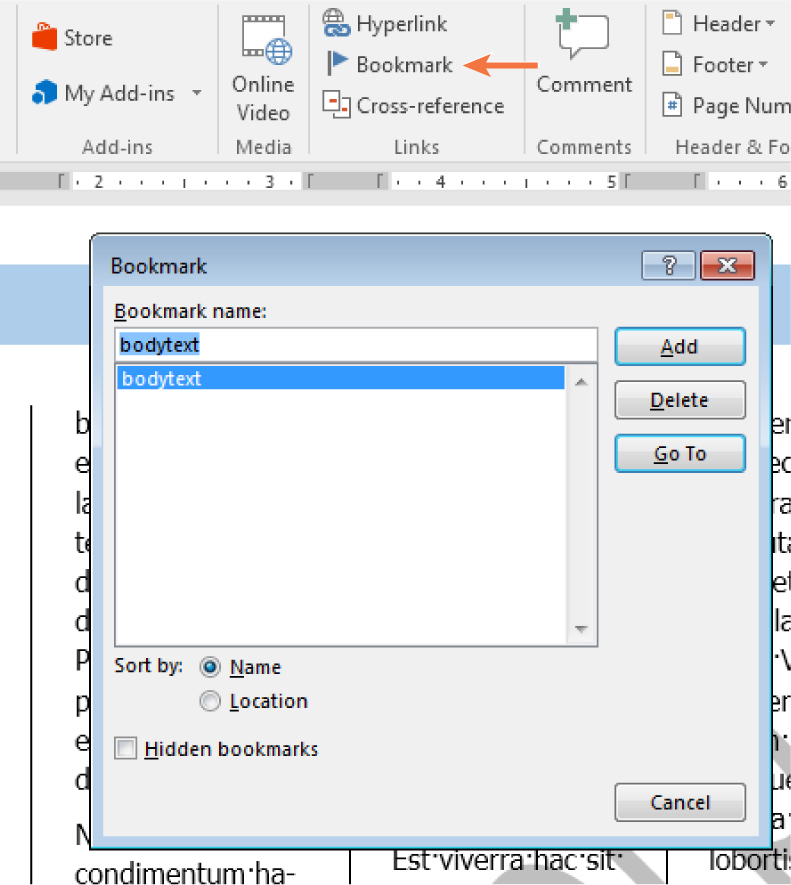
Figure 4.60 When creating Bookmarks, make sure to choose a descriptor word that has meaning to the content you are designating. (Used with permission from Microsoft)
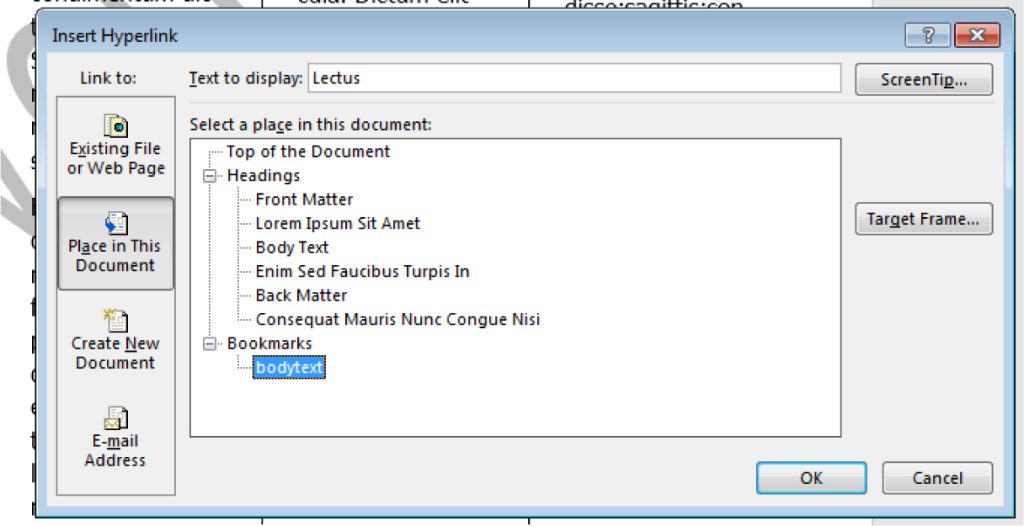
Figure 4.61 The bookmark is now set. Linking a section of text to a bookmark eases navigation through a long document. (Used with permission from Microsoft)
Another reason to use bookmarks is to help digital readers of your document navigate back to important sections of the document while they read. For example, you can add a link at the end of each chapter that says, “Go to Table of Contents.” To do this, first place a bookmark in front of the table of contents as Figure 4.62 shows. To locate the roster of bookmarks, click the Bookmark command on the Insert tab, and then click Go to. If you want to relocate the bookmark, place the cursor where you want the bookmark to be relocated to, then open the Bookmark dialog box, click the original bookmark’s name, and then click Add. This will update the new location.
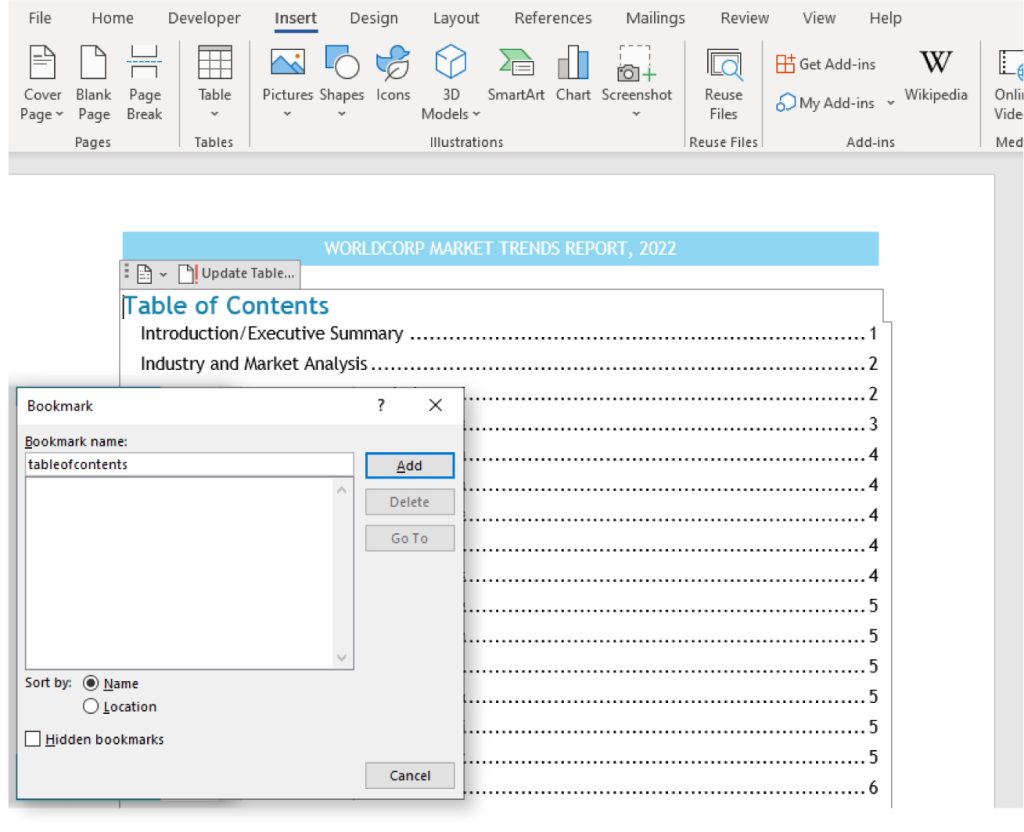
Figure 4.62 When you create the bookmark at the table of contents, you will be able to see it in your roster of bookmarks. (Used with permission from Microsoft)
Next, move to the area of the document where you want to link the table of contents. Go to the Insert tab and select Link. From the Insert Link window, choose the bookmark you just created. In the text box that appears, write the text you want readers to see (“Go to Table of Contents”), then choose Place in this Document as shown in Figure 4.63 and Figure 4.64. Choose the placement in the document and click OK.
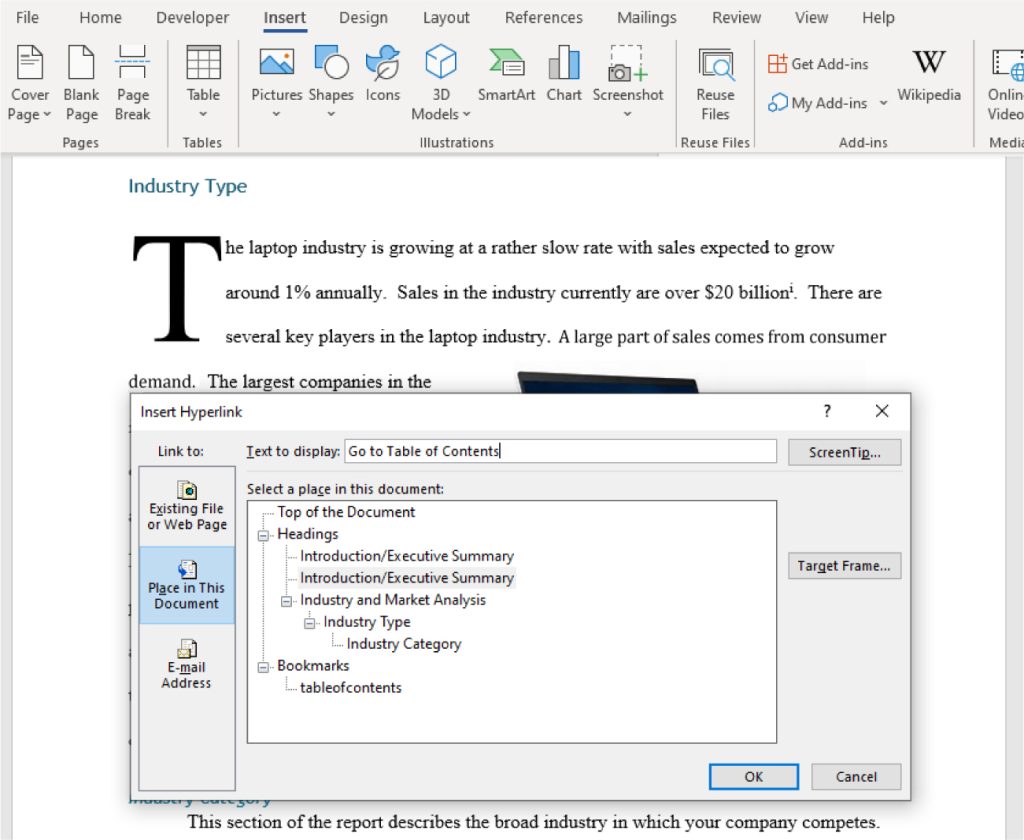
Figure 4.63 Remember to name your hyperlink something that will be helpful to the reader. (Used with permission from Microsoft)
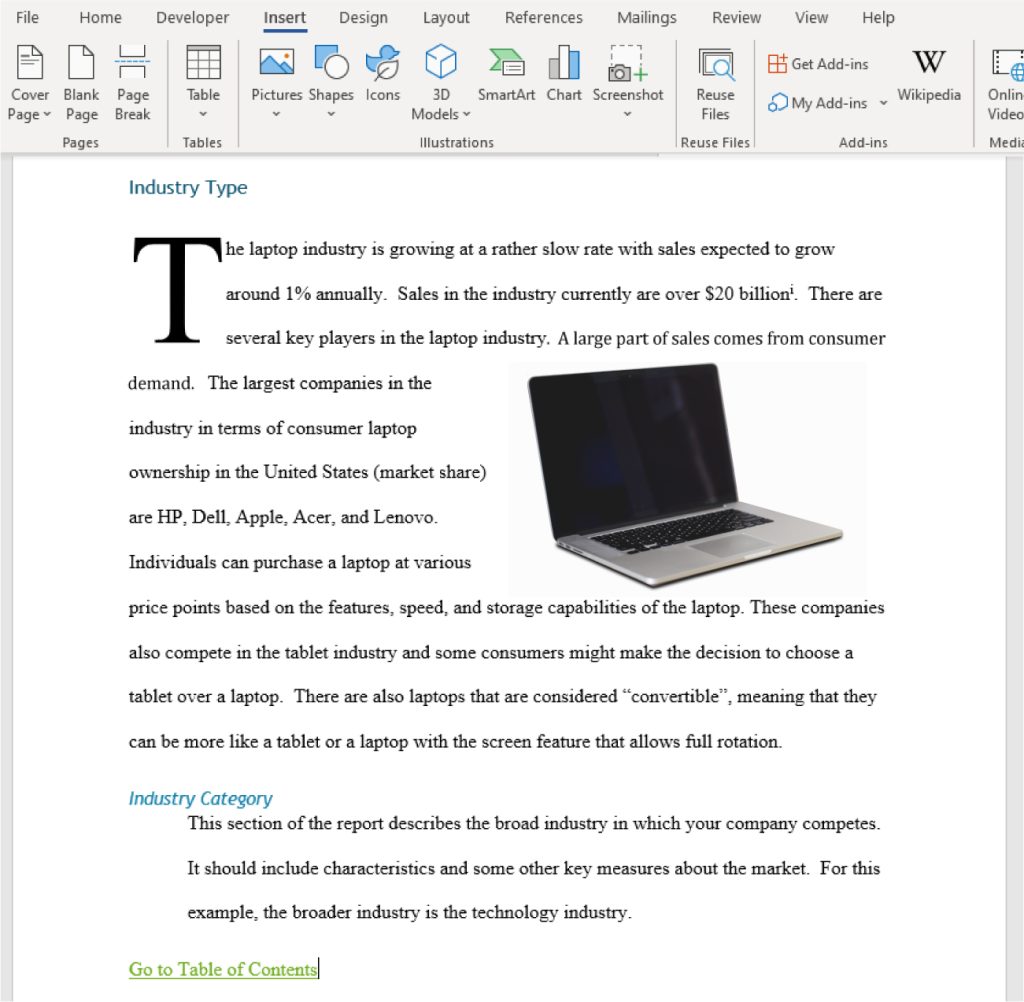
Figure 4.64 Readers can simply click on the inserted hyperlink to go straight to the table of contents. (Used with permission from Microsoft)
Spotlight on Ethics
Academic Integrity
When you are creating documents, especially long documents that might include research or data that has been created by others, it is essential that you give proper credit. You might have encountered citing sources when completing a research report for a class. We have an ethical obligation to cite sources to acknowledge the work of researchers and their findings from the studies. If proper citation is not given to material that is not your own, this is called plagiarism. Plagiarism is part of a broader category called “academic integrity.” Academic integrity goes beyond giving credit for work that is not your own, but it also covers issues such as cheating on a test or paying to have someone create a research report for you.
This is not to say that we cannot use information from others to support our thoughts or to help us develop a new understanding of the material. Instead, it means we have to acknowledge that the information came from another source and we are using their research in our work. From the researcher’s standpoint, a measure of the quality of the research is the number of times the work is cited by others. This is similar to a product online having a large number of five-star reviews. The more the research is cited by others, the higher the credibility of the information.
Media Attributions
- 4.48
- 4.49
- 4.50
- 4.51
- 4.52
- 4.53
- 4.54
- 4.55
- 4.56
- 4.57
- 4.58
- 4.59
- 4.60
- 4.61
- 4.62
- 4.63
- 4.64
